Ana içeriğe geç
Nintendo GameCube Front and Back Panel Replacement

Nintendo GameCube Front and Back Panel Replacement

dcarlin

dcarlin ve 24 diğer katkıda bulunanlar

En son May 23, 2024 tarihinde güncellendi

5 dakika
Kolay

Removing these panels allows further access to the GameCube's components.

Neye ihtiyacın var

iFixit bu bağlantılar üzerinden satın aldığınızda komisyon kazanır.
  1. Nintendo GameCube Front and Back Panel Replacement, Top Case: adım 1, 3 resimden 1. Nintendo GameCube Front and Back Panel Replacement, Top Case: adım 1, 3 resimden 2. Nintendo GameCube Front and Back Panel Replacement, Top Case: adım 1, 3 resimden 3.
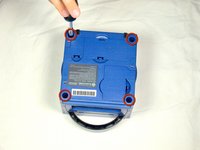
    • Turn over the Gamecube so that the bottom side is facing up.

    • Use the 4.5 mm Gamebit screwdriver to remove all four screws.

  2. Nintendo GameCube Front and Back Panel Replacement: adım 2, 3 resimden 1. Nintendo GameCube Front and Back Panel Replacement: adım 2, 3 resimden 2. Nintendo GameCube Front and Back Panel Replacement: adım 2, 3 resimden 3.
    • With the bottom side of the GameCube facing upward and the screws removed, carefully pull the outer shell of the unit away from the top half.

    • Move the GameCube so that the inside is facing upwards.

  3. Nintendo GameCube Front and Back Panel Replacement, Removing the back panel: adım 3, 1 resimden 1.
    • Gently press down on the clips located on either side of the back panel.

    • Carefully remove the back panel from the GameCube.

  4. Nintendo GameCube Front and Back Panel Replacement: adım 4, 1 resimden 1.
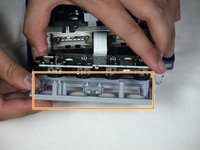
    • Unclip the controller ports at the front of the unit.

    • A ribbon cable (outlined in orange) is still attached to the unit. Do not disconnect this cable.

    • Controller ports are where the controllers plug into the game console, and are a half circular shape.

  5. Nintendo GameCube Front and Back Panel Replacement, Separate the casing: adım 5, 2 resimden 1. Nintendo GameCube Front and Back Panel Replacement, Separate the casing: adım 5, 2 resimden 2.
    • This step may not be necessary depending on your end goal

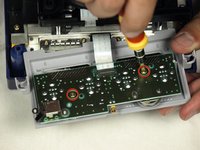
    • Use a Phillips #2 screwdriver to remove the two screws on the back of the control port.

    • Carefully separate the gray outer casing of the control port and the circuit board.

Sonuç

To reassemble your device, follow these instructions in reverse order.

6 farklı kişi bu kılavuzu tamamladı.

dcarlin

Üyelik tarihi: 11/05/09

366 İtibar

4 adet Kılavuz yazıldı

Ekip

Cal Poly, Team 6-2, Maness Fall 2009 Cal Poly, Team 6-2, Maness Fall 2009 üyesi

CPSU-MANESS-F09S6G2

4 Üyeler

45 adet Kılavuz yazıldı

0Kılavuz Yorumları

Yorum Ekle

İstatistikleri Görüntüle:

Son 24 Saat: 9

Son 7 gün: 40

Son 30 gün: 157

Her zaman: 16,143