Ana içeriğe geç

Nintendo Switch LCD and Digitizer Separation

Salt Önkoşul
Bu kılavuz yalnızca diğer kılavuzlar için bir ön koşul olarak kullanılmak üzere tasarlanmıştır. Tek başına eksiktir.

Neye ihtiyacın var

  1. Nintendo Switch LCD and Digitizer Separation, Screen: adım 1, 2 resimden 1. Nintendo Switch LCD and Digitizer Separation, Screen: adım 1, 2 resimden 2.
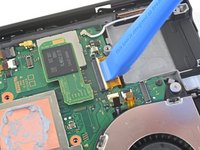
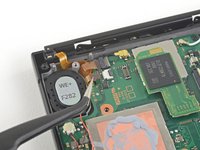
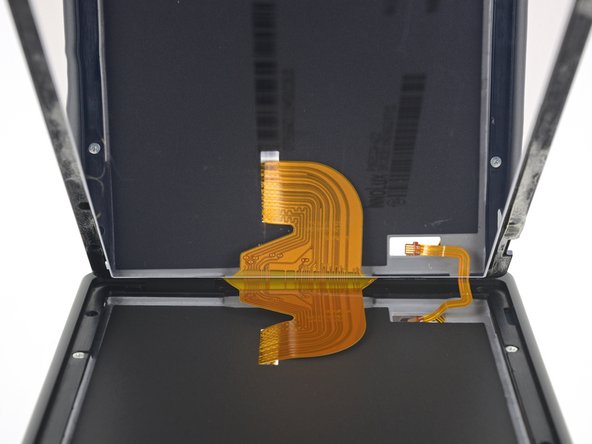
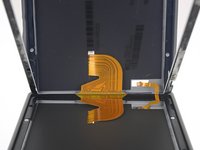
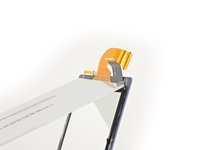
    • Use an opening tool, spudger, or your fingernail to flip up the small, hinged locking flap on the LCD ribbon cable ZIF connector.

  2. Nintendo Switch LCD and Digitizer Separation: adım 2, 2 resimden 1. Nintendo Switch LCD and Digitizer Separation: adım 2, 2 resimden 2.
    Bu adımda kullanılan alet:
    Tweezers
    $4.99
    • Use a pair of tweezers to pull the ribbon cable straight out of its connector on the motherboard.

  3. Nintendo Switch LCD and Digitizer Separation: adım 3, 2 resimden 1. Nintendo Switch LCD and Digitizer Separation: adım 3, 2 resimden 2.
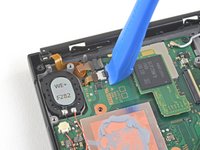
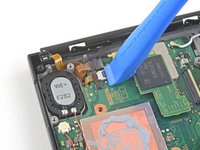
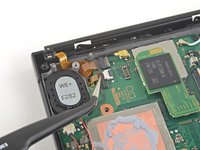
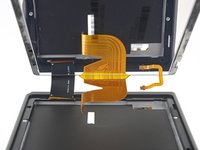
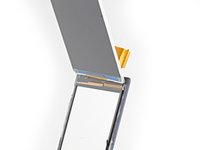
    • Use an opening tool, spudger, or your fingernail to flip up the small, hinged locking flap on the smaller LCD ribbon cable ZIF connector.

  4. Nintendo Switch LCD and Digitizer Separation: adım 4, 2 resimden 1. Nintendo Switch LCD and Digitizer Separation: adım 4, 2 resimden 2.
    • Use a pair of tweezers to pull the ribbon cable straight out of its connector on the motherboard.

  5. Nintendo Switch LCD and Digitizer Separation: adım 5, 1 resimden 1.
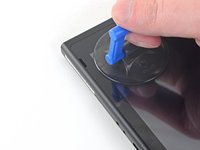
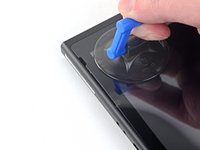
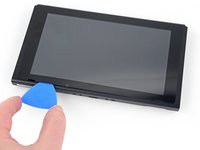
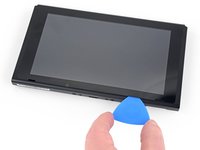
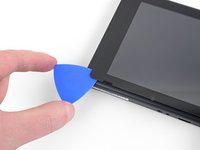
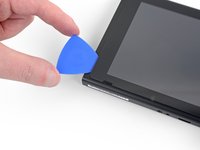
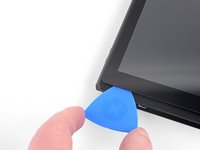
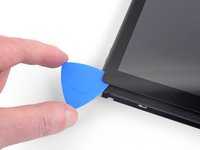
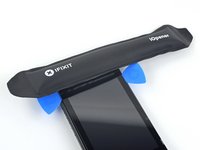
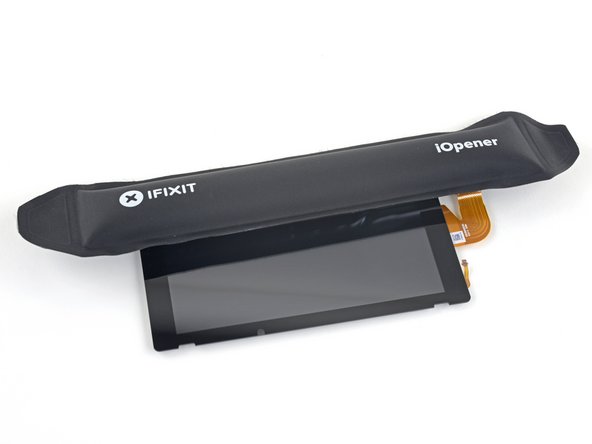
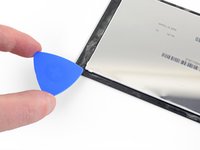
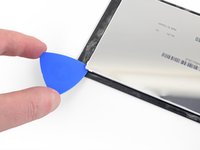
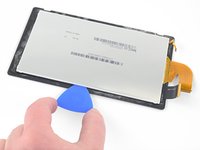
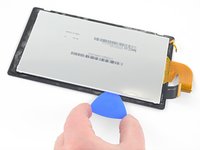
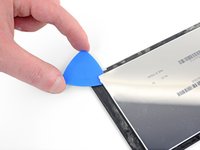
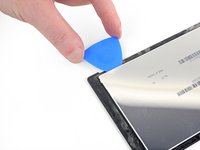
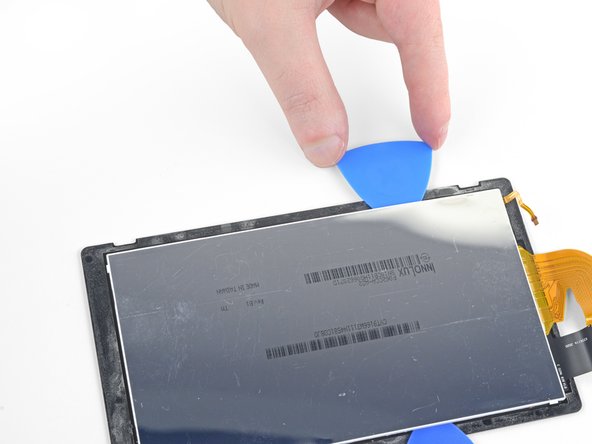
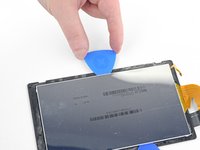
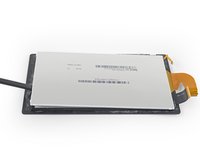
    • Heat an iOpener and apply it to the bottom edge of the screen for around two minutes to to help soften the adhesive.

    • A hair dryer, heat gun, or hot plate may also be used, but be careful not to overheat the device—the display and internal battery are both susceptible to heat damage.

  6. Nintendo Switch LCD and Digitizer Separation: adım 6, 3 resimden 1. Nintendo Switch LCD and Digitizer Separation: adım 6, 3 resimden 2. Nintendo Switch LCD and Digitizer Separation: adım 6, 3 resimden 3.
    • Apply a suction cup to the bottom-left corner of the screen.

    • Pull up on the suction up with strong, steady force to create a gap.

    • Depending on the age of your device, this may be difficult. If you have trouble, apply more heat and try again.

    • Insert the point of an opening pick into the gap, making sure to only insert the pick about 5 mm.

  7. Nintendo Switch LCD and Digitizer Separation: adım 7, 3 resimden 1. Nintendo Switch LCD and Digitizer Separation: adım 7, 3 resimden 2. Nintendo Switch LCD and Digitizer Separation: adım 7, 3 resimden 3.
    • Slide the opening pick along the bottom edge of the screen to slice the adhesive.

    • Leave the pick inserted to prevent the adhesive from re-adhering to the frame.

  8. Nintendo Switch LCD and Digitizer Separation: adım 8, 3 resimden 1. Nintendo Switch LCD and Digitizer Separation: adım 8, 3 resimden 2. Nintendo Switch LCD and Digitizer Separation: adım 8, 3 resimden 3.
    • Insert a second opening pick into the gap to the left of the first pick.

    • Slide the opening pick back towards the left side of the device.

    • Leave the opening pick inserted.

  9. Nintendo Switch LCD and Digitizer Separation: adım 9, 1 resimden 1.
    • Heat the left edge of the screen for around two minutes to help soften the adhesive.

  10. Nintendo Switch LCD and Digitizer Separation: adım 10, 3 resimden 1. Nintendo Switch LCD and Digitizer Separation: adım 10, 3 resimden 2. Nintendo Switch LCD and Digitizer Separation: adım 10, 3 resimden 3.
    • Continue sliding the opening pick around the bottom-left corner to slice the adhesive.

  11. Nintendo Switch LCD and Digitizer Separation: adım 11, 2 resimden 1. Nintendo Switch LCD and Digitizer Separation: adım 11, 2 resimden 2.
    • Continue sliding the opening pick along the left edge of the screen to slice to adhesive.

  12. Nintendo Switch LCD and Digitizer Separation: adım 12, 1 resimden 1.
    • Heat the top edge of the screen for around two minutes to help soften the adhesive.

  13. Nintendo Switch LCD and Digitizer Separation: adım 13, 3 resimden 1. Nintendo Switch LCD and Digitizer Separation: adım 13, 3 resimden 2. Nintendo Switch LCD and Digitizer Separation: adım 13, 3 resimden 3.
    • Continue sliding the opening pick around the top-left corner of the screen to slice the adhesive.

  14. Nintendo Switch LCD and Digitizer Separation: adım 14, 3 resimden 1. Nintendo Switch LCD and Digitizer Separation: adım 14, 3 resimden 2. Nintendo Switch LCD and Digitizer Separation: adım 14, 3 resimden 3.
    • Continue sliding the opening pick along the top edge of the screen to slice the adhesive.

  15. Nintendo Switch LCD and Digitizer Separation: adım 15, 3 resimden 1. Nintendo Switch LCD and Digitizer Separation: adım 15, 3 resimden 2. Nintendo Switch LCD and Digitizer Separation: adım 15, 3 resimden 3.
    • Heat the right edge of the screen for around two minutes to help soften the adhesive.

    • Place the flat end of a spudger into the gap along the left edge of the screen.

    • Carefully and slowly lift the left edge of the screen, opening it like a book.

  16. Nintendo Switch LCD and Digitizer Separation: adım 16, 3 resimden 1. Nintendo Switch LCD and Digitizer Separation: adım 16, 3 resimden 2. Nintendo Switch LCD and Digitizer Separation: adım 16, 3 resimden 3.
    • Lift the right edge of the screen straight off the device, threading the ribbon cables through the frame as you do so.

    • Take care not to snag any of the ribbon cables on the frame as you remove the screen.

    • You can reuse the screen adhesive if it is still sticky. Otherwise, replace the adhesive with double-sided tape such as Tesa tape.

  17. Nintendo Switch LCD and Digitizer Separation, Separate the LCD panel and digitizer: adım 17, 1 resimden 1.
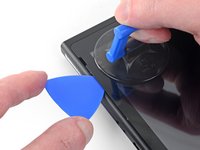
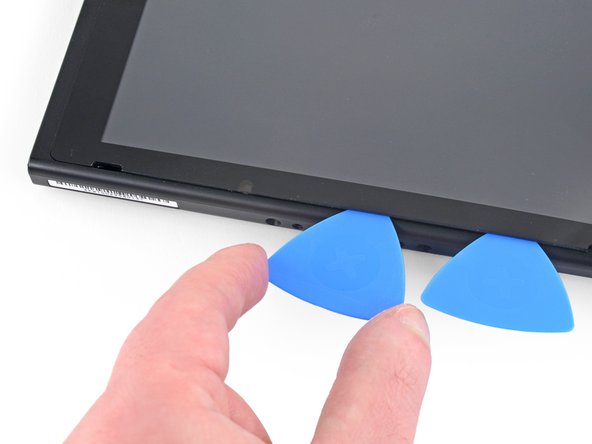
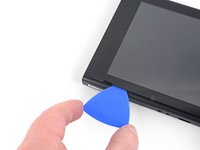
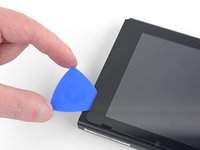
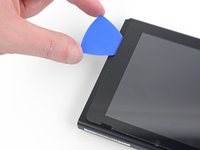
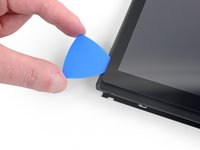
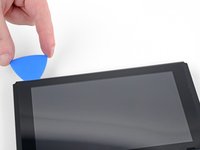
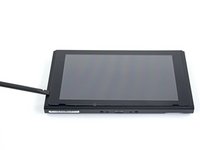
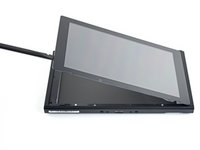
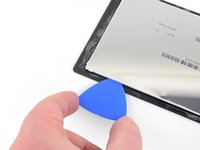
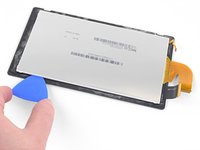
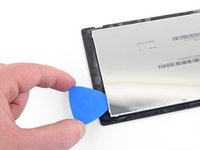
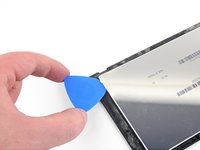
    • Heat the top edge of the screen assembly for around two minutes to help soften the adhesive holding the LCD panel to the digitizer.

  18. Nintendo Switch LCD and Digitizer Separation: adım 18, 3 resimden 1. Nintendo Switch LCD and Digitizer Separation: adım 18, 3 resimden 2. Nintendo Switch LCD and Digitizer Separation: adım 18, 3 resimden 3.
    • Turn the screen assembly over.

    • Insert an opening pick in between the LCD panel and the digitizer at the top-left corner.

    • It doesn't matter how deep you insert the opening pick, but about 5 mm is enough to slice through all the adhesive.

    • You can slightly bend the digitizer to create a wider gap, but take care not to bend it too far to cause damage to the digitizer if you're reusing it.

    • Slide the opening pick along the top edge of the screen assembly to slice the adhesive.

  19. Nintendo Switch LCD and Digitizer Separation: adım 19, 3 resimden 1. Nintendo Switch LCD and Digitizer Separation: adım 19, 3 resimden 2. Nintendo Switch LCD and Digitizer Separation: adım 19, 3 resimden 3.
    • Continue sliding the opening pick along the top edge of the screen to slice the adhesive.

  20. Nintendo Switch LCD and Digitizer Separation: adım 20, 1 resimden 1.
    • Heat the left edge of the screen assembly for around two minutes to help soften the adhesive.

  21. Nintendo Switch LCD and Digitizer Separation: adım 21, 2 resimden 1. Nintendo Switch LCD and Digitizer Separation: adım 21, 2 resimden 2.
    • Insert and slide the opening pick along the left edge of the screen assembly to slice the adhesive.

  22. Nintendo Switch LCD and Digitizer Separation: adım 22, 3 resimden 1. Nintendo Switch LCD and Digitizer Separation: adım 22, 3 resimden 2. Nintendo Switch LCD and Digitizer Separation: adım 22, 3 resimden 3.
    • Continue sliding the opening pick around the bottom-left corner of the screen assembly to slice the adhesive.

  23. Nintendo Switch LCD and Digitizer Separation: adım 23, 1 resimden 1.
    • Heat the bottom edge of the screen assembly for around two minutes to help soften the adhesive.

  24. Nintendo Switch LCD and Digitizer Separation: adım 24, 3 resimden 1. Nintendo Switch LCD and Digitizer Separation: adım 24, 3 resimden 2. Nintendo Switch LCD and Digitizer Separation: adım 24, 3 resimden 3.
    • Continue sliding the opening pick along the bottom edge to slice the adhesive.

  25. Nintendo Switch LCD and Digitizer Separation: adım 25, 1 resimden 1.
    • Heat the right edge of the screen assembly for around two minutes to help soften the adhesive.

  26. Nintendo Switch LCD and Digitizer Separation: adım 26, 2 resimden 1. Nintendo Switch LCD and Digitizer Separation: adım 26, 2 resimden 2.
    • Insert the flat end of a spudger in between the LCD panel and the digitizer along the left edge of the screen assembly.

    • Carefully and slowly lift up the left side of the LCD panel, opening it like a book.

  27. Nintendo Switch LCD and Digitizer Separation: adım 27, 3 resimden 1. Nintendo Switch LCD and Digitizer Separation: adım 27, 3 resimden 2. Nintendo Switch LCD and Digitizer Separation: adım 27, 3 resimden 3.
    • Continue lifting the LCD panel away from the digitizer to separate the two components.

    • The LCD ribbon cable is slightly adhered to the digitizer. If it doesn't remove easily, apply more heat to that area and try again.

Sonuç

To reassemble your device, follow these instructions in reverse order.

Craig Lloyd

Üyelik tarihi: 02/10/16

38.761 İtibar

82 adet Kılavuz yazıldı

0 Yorum

Yorum Ekle

İstatistikleri Görüntüle:

Son 24 Saat: 0

Son 7 gün: 3

Son 30 gün: 10

Her zaman: 55