Ana içeriğe geç

Nintendo Switch Motherboard Replacement

Arşivlenmiş Kılavuz
Bu kılavuz sadece arşivsel amaçlarla muhafaza edilmiştir. Onarımınızı gerçekleştirmek için kılavuzun güncel halini kullanın.

Neye ihtiyacın var

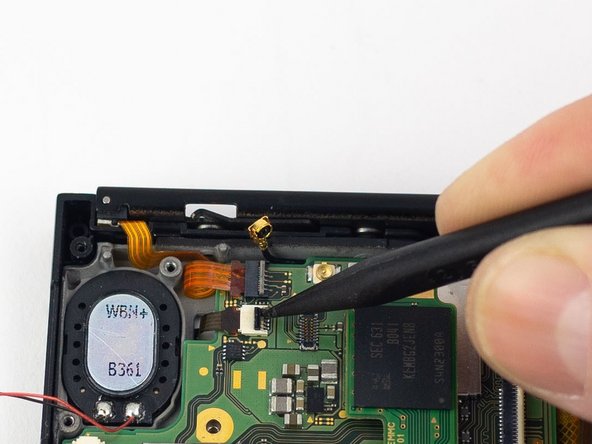
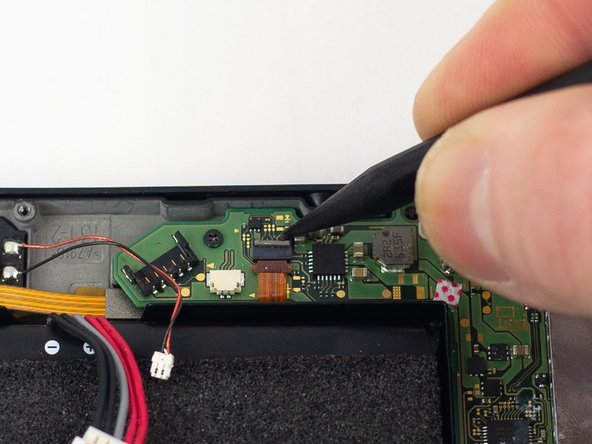
  1. Nintendo Switch Motherboard Replacement, Motherboard: adım 1, 2 resimden 1. Nintendo Switch Motherboard Replacement, Motherboard: adım 1, 2 resimden 2.
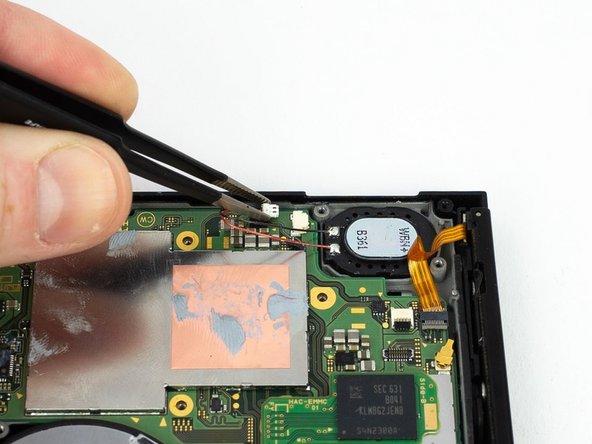
    • Disconnect the right loudspeaker from the motherboard.

  2. Nintendo Switch Motherboard Replacement: adım 2, 2 resimden 1. Nintendo Switch Motherboard Replacement: adım 2, 2 resimden 2.
    • Disconnect the left speaker from the motherboard.

  3. Nintendo Switch Motherboard Replacement: adım 3, 2 resimden 1. Nintendo Switch Motherboard Replacement: adım 3, 2 resimden 2.
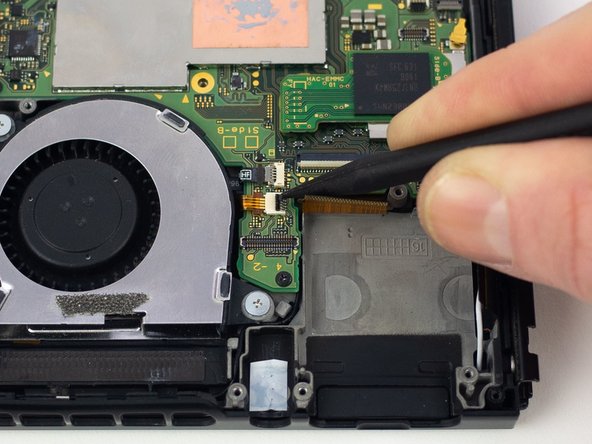
    • Use a spudger to flip up the small beige locking flap on the display ZIF connector.

  4. Nintendo Switch Motherboard Replacement: adım 4, 2 resimden 1. Nintendo Switch Motherboard Replacement: adım 4, 2 resimden 2.
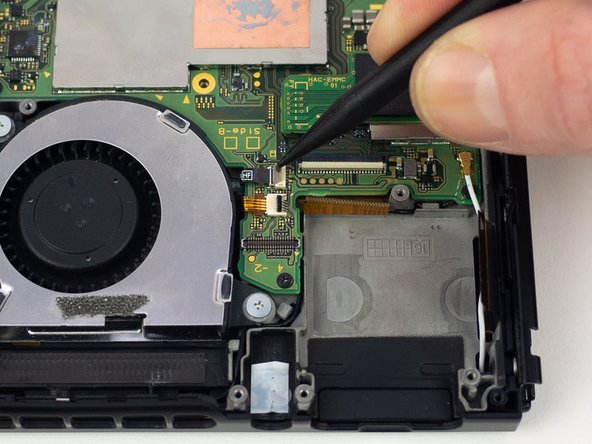
    • Use the pointed end of a spudger to slide the display ribbon cable out of the ZIF connector.

  5. Nintendo Switch Motherboard Replacement: adım 5, 2 resimden 1. Nintendo Switch Motherboard Replacement: adım 5, 2 resimden 2.
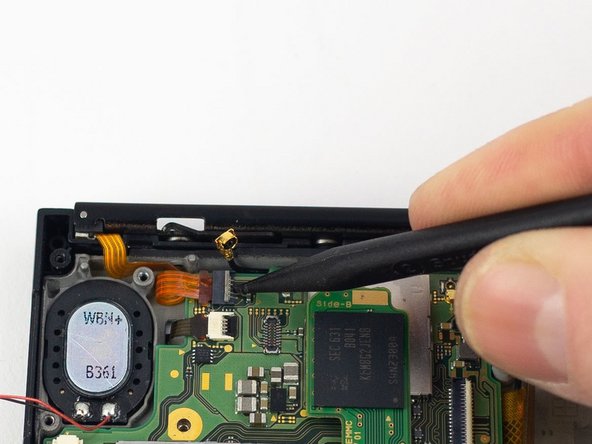
    • Use a spudger to flip up the small black locking flap on the power/volume button ZIF connector.

  6. Nintendo Switch Motherboard Replacement: adım 6, 2 resimden 1. Nintendo Switch Motherboard Replacement: adım 6, 2 resimden 2.
    • Use a spudger to flip up the small gray locking flap on the fan ZIF connector.

  7. Nintendo Switch Motherboard Replacement: adım 7, 2 resimden 1. Nintendo Switch Motherboard Replacement: adım 7, 2 resimden 2.
    • Use the flat end of a spudger to disconnect the white coaxial antenna cable from the motherboard.

  8. Nintendo Switch Motherboard Replacement: adım 8, 2 resimden 1. Nintendo Switch Motherboard Replacement: adım 8, 2 resimden 2.
    • Use the flat end of a spudger to disconnect the black coaxial antenna cable from the motherboard.

  9. Nintendo Switch Motherboard Replacement: adım 9, 2 resimden 1. Nintendo Switch Motherboard Replacement: adım 9, 2 resimden 2.
    • Use a spudger to flip up the small gray locking flap on the right Joy-Con rail ZIF connector.

  10. Nintendo Switch Motherboard Replacement: adım 10, 2 resimden 1. Nintendo Switch Motherboard Replacement: adım 10, 2 resimden 2.
    • Use a spudger to flip up the small black locking flap on the ZIF connector.

  11. Nintendo Switch Motherboard Replacement: adım 11, 2 resimden 1. Nintendo Switch Motherboard Replacement: adım 11, 2 resimden 2.
    • Use a spudger to flip up the small gray locking flap on the left Joy-Con rail ZIF connector.

  12. Nintendo Switch Motherboard Replacement: adım 12, 1 resimden 1.
    • Remove the four 2.50 mm JIS #000 screws from the motherboard.

    • Remove the two 3.14 mm JIS #000 screws from the USB-C port.

  13. Nintendo Switch Motherboard Replacement: adım 13, 1 resimden 1.
    • Gently lift and wiggle the motherboard to remove.

Sonuç

To reassemble your device, follow these instructions in reverse order.

Blake Klein

Üyelik tarihi: 01/29/17

72.246 İtibar

50 adet Kılavuz yazıldı

0 Yorum

Yorum Ekle

İstatistikleri Görüntüle:

Son 24 Saat: 0

Son 7 gün: 0

Son 30 gün: 1

Her zaman: 30