Ana içeriğe geç
Nintendo Switch Rear Panel Replacement

Nintendo Switch Rear Panel Replacement

Blake Klein

Blake Klein ve başka bir katkıda bulunan

En son April 15, 2021 tarihinde güncellendi

5 - 30 dakika
Kolay
Arşivlenmiş Kılavuz
Bu kılavuz sadece arşivsel amaçlarla muhafaza edilmiştir. Onarımınızı gerçekleştirmek için kılavuzun güncel halini kullanın.

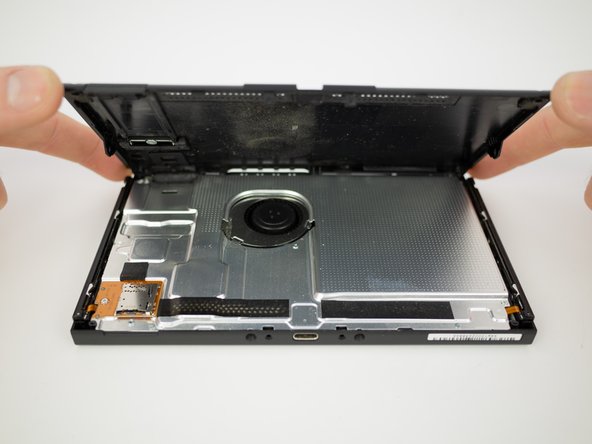
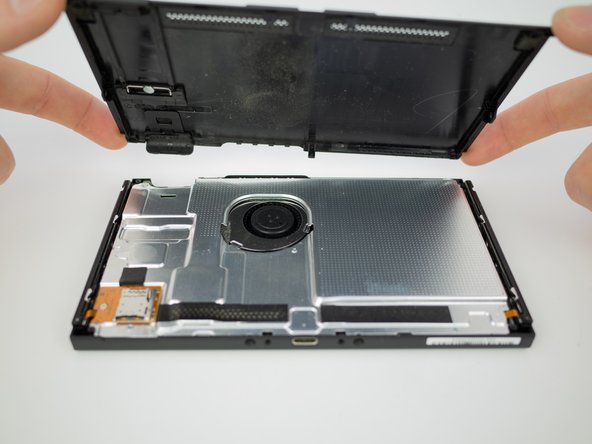
Follow this guide to remove the rear panel from a Nintendo Switch.

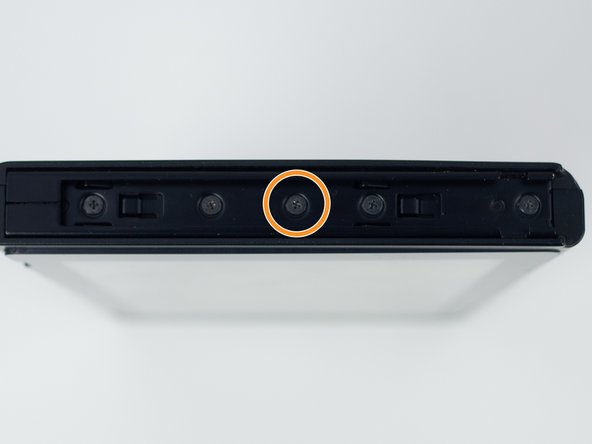
A single screw is hidden underneath the kickstand.

  1. Nintendo Switch Rear Panel Replacement, Rear Panel: adım 1, 1 resimden 1.
    • Remove the four 6.3 mm Tri-point Y00 screws from the rear panel.

  2. Nintendo Switch Rear Panel Replacement: adım 2, 1 resimden 1.
    • Remove the single 6.1 mm Phillips #000 screw from underneath the kickstand.

  3. Nintendo Switch Rear Panel Replacement: adım 3, 1 resimden 1.
    • Remove the two 2.7 mm Phillips #000 screws from the bottom of the device.

  4. Nintendo Switch Rear Panel Replacement: adım 4, 1 resimden 1.
    • Remove the single 2.7 mm Phillips #000 screw from the top of the device.

  5. Nintendo Switch Rear Panel Replacement: adım 5, 2 resimden 1. Nintendo Switch Rear Panel Replacement: adım 5, 2 resimden 2.
    • Remove the single 3.8 mm Phillips #000 screw from the right Joy-Con rail.

    • Remove the single 3.8 mm Phillips #000 screw from the left Joy-Con rail.

  6. Nintendo Switch Rear Panel Replacement: adım 6, 3 resimden 1. Nintendo Switch Rear Panel Replacement: adım 6, 3 resimden 2. Nintendo Switch Rear Panel Replacement: adım 6, 3 resimden 3.
    • Pull the rear panel up and off of the device.

Sonuç

To reassemble your device, follow these instructions in reverse order.

Blake Klein

Üyelik tarihi: 01/29/17

72.165 İtibar

50 adet Kılavuz yazıldı

0 Yorum

Yorum Ekle

İstatistikleri Görüntüle:

Son 24 Saat: 2

Son 7 gün: 2

Son 30 gün: 4

Her zaman: 64