Ana içeriğe geç
Onarım Topluluğuna Katılın - Hesap Oluşturun

Nintendo Wii Fan Replacement

Neye ihtiyacın var

    1. Nintendo Wii Fan Replacement, Faceplate: adım 1, 2 resimden 1. Nintendo Wii Fan Replacement, Faceplate: adım 1, 2 resimden 2.
      • Use a metal spudger to remove the white plastic screw covers stuck to the lower case near the front of the Wii.

      FixBot'a Sor

      Yorum Ekle

    2. Nintendo Wii Fan Replacement: adım 2, 1 resimden 1.
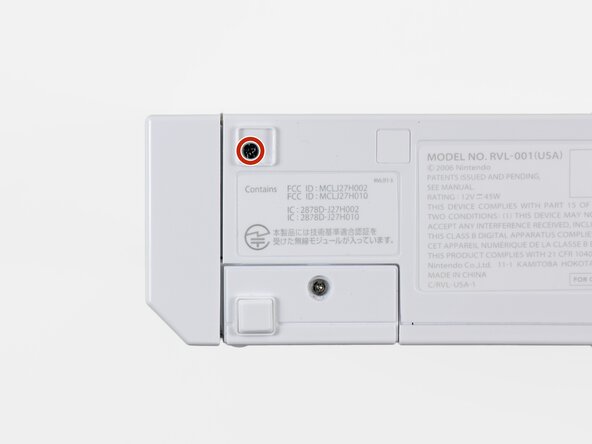
      • Remove the two 8.3 mm Tri-Point screws hidden under the covers you just removed.

      FixBot'a Sor

      Yorum Ekle

    3. Nintendo Wii Fan Replacement: adım 3, 1 resimden 1.
      • Remove the single 5.9 mm Phillips screw under the controller port door nearest the faceplate.

      FixBot'a Sor

      Yorum Ekle

    4. Nintendo Wii Fan Replacement: adım 4, 1 resimden 1.
      • Use a metal spudger to remove the rubber foot stuck to the side of the Wii near the DVD drive opening.

      FixBot'a Sor

      Yorum Ekle

    5. Nintendo Wii Fan Replacement: adım 5, 1 resimden 1.
      • Remove the single 5.9 mm Phillips screw hidden under the foot you just removed.

      FixBot'a Sor

      Yorum Ekle

    6. Nintendo Wii Fan Replacement: adım 6, 2 resimden 1. Nintendo Wii Fan Replacement: adım 6, 2 resimden 2.
      Bu adımda kullanılan alet:
      Tweezers
      $4.99
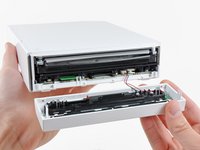
      • Carefully pull the faceplate away from the front of the Wii.

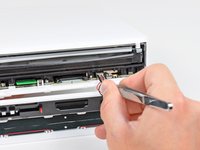
      • Use a pair of tweezers to disconnect the LED cable's plastic connector from the motherboard.

      • Remove the faceplate.

      FixBot'a Sor

      Yorum Ekle

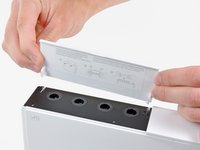
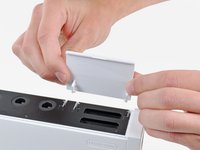
    1. Nintendo Wii Fan Replacement, Outer Case: adım 7, 3 resimden 1. Nintendo Wii Fan Replacement, Outer Case: adım 7, 3 resimden 2. Nintendo Wii Fan Replacement, Outer Case: adım 7, 3 resimden 3.
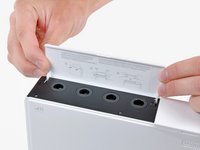
      • Open the controller port cover until it is perpendicular to the black controller port bezel.

      • Pull the controller port cover straight up to release it from the outer case.

      • Repeat this procedure for the memory card port cover.

      FixBot'a Sor

      Yorum Ekle

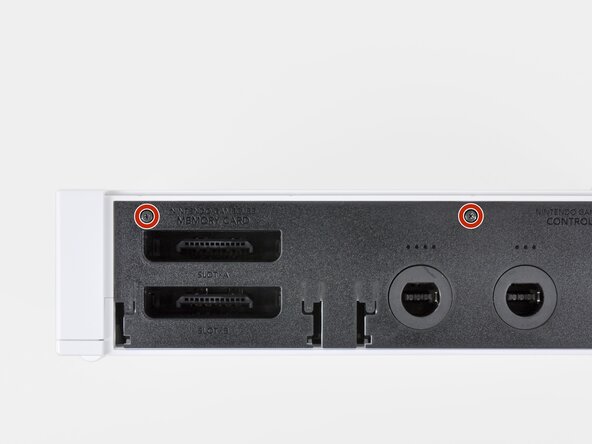
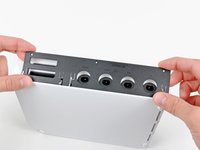
    2. Nintendo Wii Fan Replacement: adım 8, 2 resimden 1. Nintendo Wii Fan Replacement: adım 8, 2 resimden 2.
      • Remove the two remaining 4.1 mm Phillips screws along the top edge of the black plastic controller port bezel.

      • Lift the bezel from the long edge furthest away from the controller ports and remove it from the Wii.

      FixBot'a Sor

      Yorum Ekle

    3. Nintendo Wii Fan Replacement: adım 9, 1 resimden 1.
      • Remove the two 5 mm Phillips screws above the controller ports.

      FixBot'a Sor

      Yorum Ekle

    4. Nintendo Wii Fan Replacement: adım 10, 1 resimden 1.
      • Use a metal spudger to remove the three highlighted screw covers stuck to the side of the Wii.

      FixBot'a Sor

      Yorum Ekle

    5. Nintendo Wii Fan Replacement: adım 11, 1 resimden 1.
      • Remove the following screws:

      • Two 5 mm Phillips screws

      • One 8.2 mm Tri-Point screw

      FixBot'a Sor

      Yorum Ekle

    6. Nintendo Wii Fan Replacement: adım 12, 1 resimden 1.
      • Use a metal spudger to remove the two rubber feet stuck to the bottom face of the Wii near the rear ports.

      FixBot'a Sor

      Yorum Ekle

    7. Nintendo Wii Fan Replacement: adım 13, 1 resimden 1.
      Bu adımda kullanılan alet:
      iFixit Precision 4 mm Screwdriver Bit
      $2.99
      • Remove the two 8.2 mm Tri-Point screws hidden under the feet you just removed.

      • You may use a 4 mm hex nut driver to extend your bit into the recesses and reach the screws.

      FixBot'a Sor

      Yorum Ekle

    8. Nintendo Wii Fan Replacement: adım 14, 1 resimden 1.
      • Lift the outer case straight up off the body of the Wii.

      FixBot'a Sor

      Yorum Ekle

    1. Nintendo Wii Fan Replacement, Fan: adım 15, 1 resimden 1.
      Bu adımda kullanılan alet:
      Tweezers
      $4.99
      • Grab the fan connector with a pair of tweezers and lift it straight up and out of its socket on the motherboard.

      • Be sure your tweezers are clamped down on the fan connector, not the socket attached to the motherboard.

      FixBot'a Sor

      Yorum Ekle

    2. Nintendo Wii Fan Replacement: adım 16, 1 resimden 1.
      • Remove the two 10 mm Phillips screws securing the fan to the fan shroud.

      FixBot'a Sor

      Yorum Ekle

    3. Nintendo Wii Fan Replacement: adım 17, 1 resimden 1.
      • Remove the fan from the Wii.

      FixBot'a Sor

      Yorum Ekle

Sonuç

To reassemble your device, follow these instructions in reverse order.

İptal et: Bu kılavuzu tamamlamadım.

36 farklı kişi bu kılavuzu tamamladı.

10Kılavuz Yorumları

Awesome guide, just replaced faulty fan unit in my 9 year old wii. Should hopefully keep it going for another 9 years :)

Finlay Macrae - Yanıt Paylaş

Super easy and great instructions! I feel a little guilty that my Wii sat in the garage for 4 years! Now it'll be a great birthday present for my 2 boys.

e_gayheart - Yanıt Paylaş

Does anyone have a diagram for the Wii’s airflow? I’m looking to install a booster fan at the bottom to help blow air in but I want to make sure it is effective.

Jessica Parnelli Fawkes - Yanıt Paylaş

nice¡¡¡¡¡¡¡¡¡¡¡¡¡¡

RIGO NOLASCO - Yanıt Paylaş

Thanks! Wii Quarantine’n in 2021!

Daniel Thomas - Yanıt Paylaş

Yorum Ekle

İstatistikleri Görüntüle:

Son 24 Saat: 7

Son 7 gün: 60

Son 30 gün: 265

Her zaman: 51,159