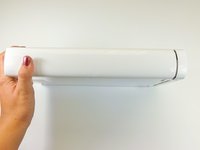
Ana içeriğe geç

Nintendo Wii U Front Faceplate Replacement

Neye ihtiyacın var

  1. Nintendo Wii U Front Faceplate Replacement, Console Outer Case: adım 1, 1 resimden 1.
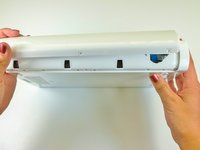
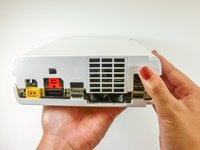
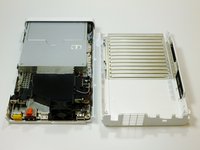
    • With the bottom of the console facing up, remove the following 6 screws hidden underneath the white square stickers:

    • Three 5.1mm Phillips #000 screws

    • Two 6.1mm Tri-wing Y0 screws

    • One 13.2mm Tri-wing Y1 screw

  2. Nintendo Wii U Front Faceplate Replacement: adım 2, 1 resimden 1.
    • Rotate the console 180 degrees so that the exhaust vents are facing you.

    • Remove the two 7.1mm Phillips #00 screws.

  3. Nintendo Wii U Front Faceplate Replacement: adım 3, 2 resimden 1. Nintendo Wii U Front Faceplate Replacement: adım 3, 2 resimden 2.
    • On the side opposite of the exhaust vents, slide the cover faceplate towards the back of the console and pull upwards to release it.

  4. Nintendo Wii U Front Faceplate Replacement: adım 4, 1 resimden 1.
    • On the bottom of the console beneath the previously removed faceplate, remove the three 13.2mm Tri-wing Y1 screws.

  5. Nintendo Wii U Front Faceplate Replacement: adım 5, 3 resimden 1. Nintendo Wii U Front Faceplate Replacement: adım 5, 3 resimden 2. Nintendo Wii U Front Faceplate Replacement: adım 5, 3 resimden 3.
    • On the back of the console, lift up and release the main top cover.

  6. Nintendo Wii U Front Faceplate Replacement, Front Faceplate: adım 6, 2 resimden 1. Nintendo Wii U Front Faceplate Replacement, Front Faceplate: adım 6, 2 resimden 2.
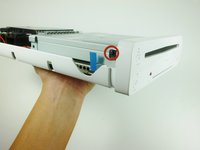
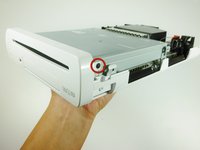
    • Rotate the device so that the front plate is facing you.

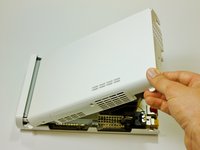
    • On each side of the console, remove the 3.5mm Phillips #0 screw connecting the DVD drive to the faceplate.

  7. Nintendo Wii U Front Faceplate Replacement: adım 7, 1 resimden 1.
    • Rotate the device so that the front plate is on the right side and the ribbon cable is visible.

    • The ribbon cable is connected to the system by a latch which holds in the blue tab. Flip this latch up to unlock it.

    • Lift up on the blue tab to release the ribbon cable.

  8. Nintendo Wii U Front Faceplate Replacement: adım 8, 1 resimden 1.
    • Remove the front faceplate.

Sonuç

To reassemble your device, follow these instructions in reverse order.

10 farklı kişi bu kılavuzu tamamladı.

Kim Arre

Üyelik tarihi: 01/11/13

4.888 İtibar

8 adet Kılavuz yazıldı

Ekip

Cal Poly, Team 17-20, Forte Winter 2013 Cal Poly, Team 17-20, Forte Winter 2013 üyesi

CPSU-FORTE-W13S17G20

5 Üyeler

38 adet Kılavuz yazıldı

4 Yorum

Great guide. I was able to fix the front USB door on my Wii u! Thanks guys!

Matt Jones - Yanıt

My ribbon seems to work but the little connection it plugs into on the circuit board in the console broke off. Not just the black clip but the whole little circuit. Seems like a clean break. Can I solder it back on? If I push it back on and hold the ribbon in the red light comes on and blinks. Occasionally I can get the white light to come on for like a second but I never hear fans spinning/more of the unit coming to life before it shuts itself off.

Thoughts on how to fix it?

Gutzin Fish - Yanıt

My daughter shoved change into my disc slot of my Wii I. I thought I got out all pulling through the faceplate dvd slot but now when I put in a game disc it won’t catcalls accept it. It pulls in, sounds like it turns a little bit and then ejects the disc. Could change still be stuck in the reader or do I need to replace it now?

Melissa - Yanıt

Bit sad that it doesn't show how to re-insert the little ribbon cable. The tiny black latch came off, and there's no way to refix the latch back to the connector.

Regards,

Adrie

Adrie Lute - Yanıt

Yorum Ekle

İstatistikleri Görüntüle:

Son 24 Saat: 0

Son 7 gün: 19

Son 30 gün: 88

Her zaman: 11,730