Giriş
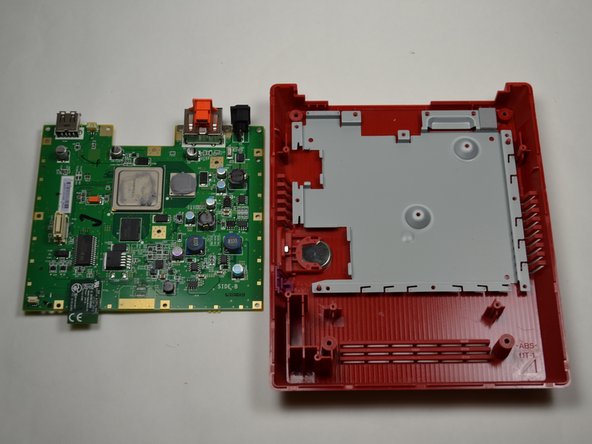
Bu kılavuz, bir Nintendo Wii Mini'deki anakartın değişimini detaylandırmaktadır. Görsellerde gösterilen adımlar sökme işlemine aittir; değişim ve yeniden montaj işlemleri, bu adımların tersten uygulanması kadar basittir.
Hassas elektronik cihazlarla çalışırken elektrostatik deşarj bilekliği kullanılması önerilir.
Wii Mini'nizde şu belirtiler görüldüğünde anakart değişimi gerekli olabilir: Güç kaynağının çalıştığı doğrulandığı halde Wii'nin açılmaması veya önyükleme yapmaması.
Neye ihtiyacın var
-
-
-
Gizli vidaları ortaya çıkarmak için konsolun arkasındaki iki lastik ayağı çıkarın.
-
Dört adet 6 mm'lik Phillips #0 vidayı sökün.
 FixBot'a Sor
-
-
-
Wii mini'yi düz konuma getirin. Ardından, üst kapağı gevşetmek için bir açma aletini konsolun orta kenarı boyunca gezdirin.
-
Konsolun üst kapağını nazikçe kaldırın ve bir kenara koyun.
-
-
-
-
Bu adımda kullanılan alet:Tweezers$4.99
-
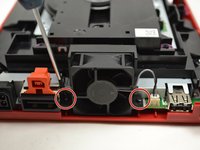
Wii mini cihazını, arka tarafı size bakacak şekilde çevirin.
-
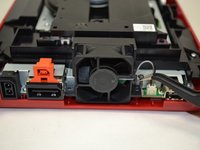
Bir yıldız tornavida kullanarak, fan parçasının her iki yanındaki iki adet 6 mm vidayı sökün.
-
-
-
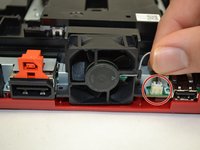
Parmaklarınızı kullanarak, fanı konsoldan ayırmak için pin konnektörünün üst kısmını nazikçe düz bir şekilde yukarı çekin.
-
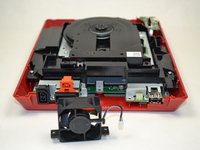
Fan parçasını çıkarın ve bir kenara koyun.
-
-
-
-
-
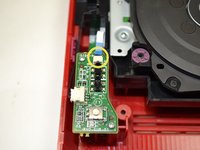
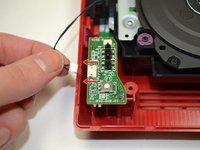
Parmaklarınızı kullanarak, mavi ribbon kabloyu güç kartının üst kısmından kaydırarak çıkarın.
-
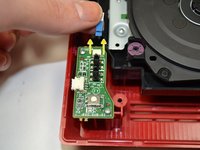
Bir Yıldız tornavida kullanarak, güç kartının üst ve alt kısmındaki iki adet 4 mm vidayı sökün.
-
-
-
-
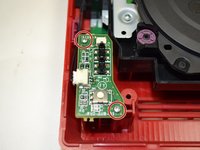
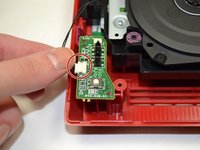
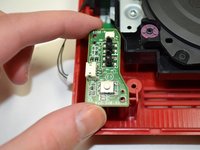
Parmaklarınızı kullanarak güç kartını disk sürücüsünden ayırmak için pin konnektörü nazikçe çekin.
-
-
-
-
-
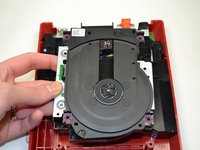
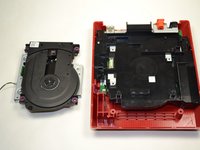
Disk sürücüsünü konsoldan kaldırarak çıkarın ve bir kenara koyun.
-
-
-
-
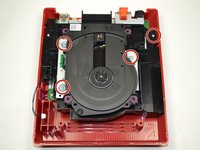
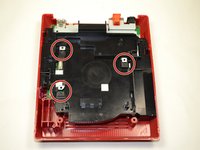
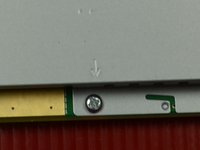
Yıldız tornavida kullanarak, siyah tepsinin üst kısmındaki 6 mm'lik vidayı sökün.
-
-
-
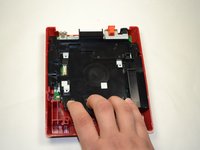
Siyah plastik tepsiyi konsoldan gevşetmek için parmaklarınızla kendinize doğru çekin.
-
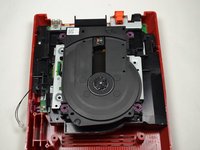
Tepsiyi yukarı kaldırmaya çalışmadan önce siyah kare parçaların metal kare parçalardan ayrıldığından emin olun.
-
Ayrıldıktan sonra plastik tepsiyi konsoldan yukarı kaldırarak çıkarın ve bir kenara koyun.
-
-
-
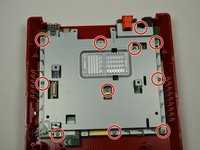
Bir Yıldız tornavida (Phillips #0) kullanarak, gümüş metal plakayı konsola sabitleyen on bir adet 5 mm vidayı sökün.
-
-
-
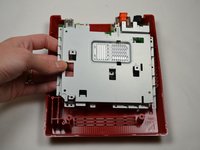
Metal plakayı kaldırarak çıkarın ve bir kenara koyun.
-
-


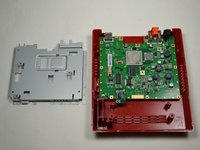

Cihazınızı yeniden monte etmek için bu talimatları tersten uygulayın.
İptal et: Bu kılavuzu tamamlamadım.
11 farklı kişi bu kılavuzu tamamladı.
Bu çevirmenlere özel teşekkürler:
100%

Translation Bot dünyayı onarmamıza yardım ediyor! Katkıda bulunmak ister misiniz?
Çeviriye Başlayın ›
Ekip

1Rehber Yorum
Can you fit a Wii Motherboard inside this casing, and use the dvd drive, if so I have a few wiis with broken DVD drives I would like to repair and this would be a cheap solution.