Ana içeriğe geç

Bu sürüm, hatalı düzenlemeler içerebilir. En son doğrulanmış bellek kopyası dönün.

Neye ihtiyacın var

  1. Bu adım çevrilmemiş. Çevrilmesine yardım edin

    : adım 1, 3 resimden 1. : adım 1, 3 resimden 2. : adım 1, 3 resimden 3.
    • Press down firmly to remove the battery cover and display battery.

    • Then remove the battery.

  2. Bu adım çevrilmemiş. Çevrilmesine yardım edin

    : adım 2, 2 resimden 1. : adım 2, 2 resimden 2.
    • Remove the 7mm Phillips #1 screw.

  3. Bu adım çevrilmemiş. Çevrilmesine yardım edin

    : adım 3, 2 resimden 1. : adım 3, 2 resimden 2.
    • Place the plastic opening tool in between the two plastic panels and slowly work your way around the device.

    • Unlatch the clips on the inside and pull device apart.

    • Some clips will break when forced open.

  4. Bu adım çevrilmemiş. Çevrilmesine yardım edin

    : adım 4, 2 resimden 1. : adım 4, 2 resimden 2.
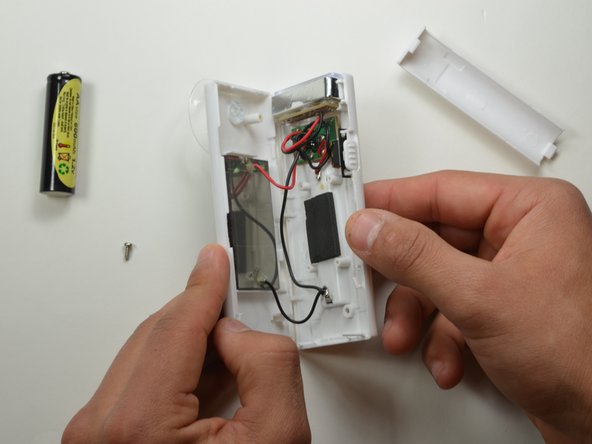
    • Pull the panel away from the rest of the assembly and cut the red and black wires coming from the panel

    • Be careful not to cut the ground-wire for the motherboard, it is the same color and goes to the exact same place as the solar panel wire.

    • For reassembly you will need to either splice, or solder the wires onto the replacement.

Bitiş Çizgisi

Daniel Bumiller

Üyelik tarihi: 01/20/15

201 İtibar

2 adet Kılavuz yazıldı

Ekip

USF Tampa, Team 19-2, Blackwell Winter 2015 USF Tampa, Team 19-2, Blackwell Winter 2015 üyesi

USFT-BLACKWELL-W15S19G2

4 Üyeler

5 adet Kılavuz yazıldı

0 Yorum

Yorum Ekle

İstatistikleri Görüntüle:

Son 24 Saat: 2

Son 7 gün: 7

Son 30 gün: 8

Her zaman: 140