Giriş
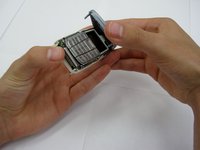
The faceplate is fairly easy to remove from the phone. It is help in place with interlocking plastic and requires some force to pry apart. Be careful not to break the plastic.
-
-
Remove the back cover plate of the phone. To do this press down the lock as you slide the cover toward the bottom of the phone.
 FixBot'a Sor
-
-
-
-
Once the back cover plate is removed, the battery should be exposed. Remove the battery by prying it out. This can be done with your finger-nail or a prying tool.
-
-
-
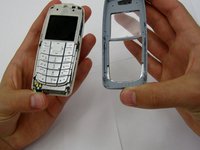
Using your fingernails or another tool, pry the front face plate out along its edges and corners.
-


To reassemble your device, follow these instructions in reverse order.

Ekip

Clemson, Team 13-2, Benson Spring 2013 Clemson, Team 13-2, Benson Spring 2013 üyesi
CLEM-BENSON-S13S13G2
3 Üyeler
30 adet Kılavuz yazıldı