Ana içeriğe geç

Nokia Lumia 520 Audio Jack Replacement

Neye ihtiyacın var

  1. Nokia Lumia 520 Audio Jack Replacement, Battery: adım 1, 2 resimden 1. Nokia Lumia 520 Audio Jack Replacement, Battery: adım 1, 2 resimden 2.
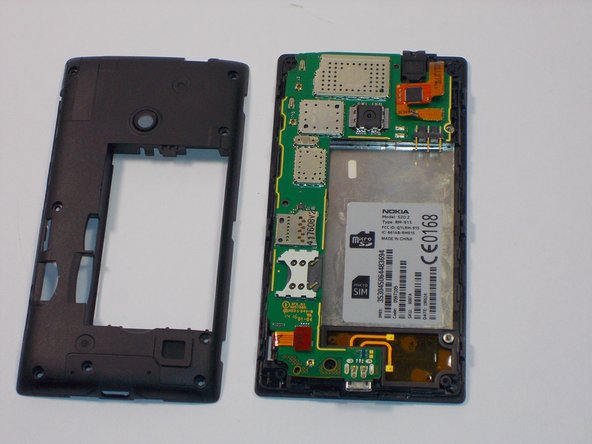
    • Insert the spudger into the crevice located between the back cover of the phone and the body of the phone.

  2. Nokia Lumia 520 Audio Jack Replacement: adım 2, 2 resimden 1. Nokia Lumia 520 Audio Jack Replacement: adım 2, 2 resimden 2.
    • Lift the spudger gently to open the back cover of the phone.

  3. Nokia Lumia 520 Audio Jack Replacement: adım 3, 2 resimden 1. Nokia Lumia 520 Audio Jack Replacement: adım 3, 2 resimden 2.
    • Insert the spudger into the space between the batter and the battery holder to remove the battery.

  4. Nokia Lumia 520 Audio Jack Replacement, Audio Jack: adım 4, 3 resimden 1. Nokia Lumia 520 Audio Jack Replacement, Audio Jack: adım 4, 3 resimden 2. Nokia Lumia 520 Audio Jack Replacement, Audio Jack: adım 4, 3 resimden 3.
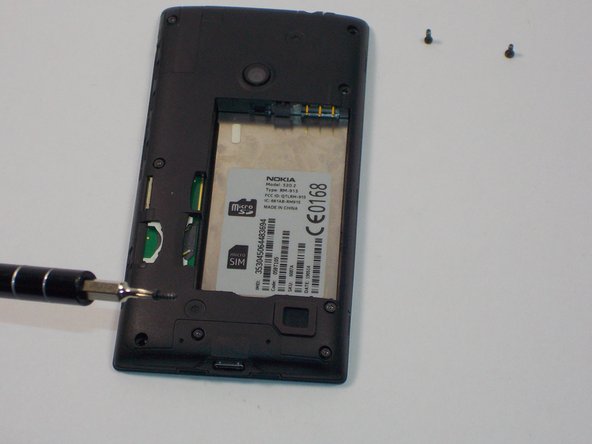
    • Unscrew the 8 screws with a Torx screw driver (T4) and make sure you know what screws went where because they are different.

  5. Nokia Lumia 520 Audio Jack Replacement: adım 5, 2 resimden 1. Nokia Lumia 520 Audio Jack Replacement: adım 5, 2 resimden 2.
    • Use your plastic spudger to remove the clips on the plastic casing over the motherboard. Note there are 10 clips holding the casing on(3 on the sides, 2 on the top and bottom).

  6. Nokia Lumia 520 Audio Jack Replacement: adım 6, 2 resimden 1. Nokia Lumia 520 Audio Jack Replacement: adım 6, 2 resimden 2.
    • Carefully unclip the digitizer touch screen cable and the display screen cable using the spudger.

  7. Nokia Lumia 520 Audio Jack Replacement: adım 7, 2 resimden 1. Nokia Lumia 520 Audio Jack Replacement: adım 7, 2 resimden 2.
    • Gently remove the motherboard.

  8. Nokia Lumia 520 Audio Jack Replacement: adım 8, 2 resimden 1. Nokia Lumia 520 Audio Jack Replacement: adım 8, 2 resimden 2.
    • Use the plastic spudger and gently remove the audio jack and the flex connector to the audio jack away from the case.

    • You will feel some pressure since the audio jack is held in place with two sided tape.

Sonuç

To reassemble your device, follow these instructions in reverse order.

5 farklı kişi bu kılavuzu tamamladı.

Tyler Chellis

Üyelik tarihi: 11/03/15

249 İtibar

1 Kılavuz yazıldı

Ekip

UMass Dartmouth, Team 1-5, Bhusal Fall 2015 UMass Dartmouth, Team 1-5, Bhusal Fall 2015 üyesi

UMASSD-BHUSAL-F15S1G5

3 Üyeler

8 adet Kılavuz yazıldı

0 Yorum

Yorum Ekle

İstatistikleri Görüntüle:

Son 24 Saat: 1

Son 7 gün: 2

Son 30 gün: 7

Her zaman: 2,635