Ana içeriğe geç

Bu sürüm, hatalı düzenlemeler içerebilir. En son doğrulanmış bellek kopyası dönün.

Neye ihtiyacın var

  1. Bu adım çevrilmemiş. Çevrilmesine yardım edin

    : adım 1, 2 resimden 1. : adım 1, 2 resimden 2.
    • Remove the sim card holder by inserting tweezers into the hole. Push down and the holder will spring back up.

    • Pull out the holder until it is completely separate.

    • Something like a paperclip will work if there are no tweezers available.

  2. Bu adım çevrilmemiş. Çevrilmesine yardım edin

    : adım 2, 3 resimden 1. : adım 2, 3 resimden 2. : adım 2, 3 resimden 3.
    • Slide a plastic opening tool under the back cover.

    • Slide the tool around the outsides of the cover to fully dislodge the pins holding the cover to the phone.

    • Some pins are facing the opposite way from the others.

  3. Bu adım çevrilmemiş. Çevrilmesine yardım edin

    : adım 3, 3 resimden 1. : adım 3, 3 resimden 2. : adım 3, 3 resimden 3.
    • Remove the 3 screws using the T7 Torx screwdriver.

    • Unclip the black tab connector.

  4. Bu adım çevrilmemiş. Çevrilmesine yardım edin

    : adım 4, 2 resimden 1. : adım 4, 2 resimden 2.
    • Remove the silver metal cover.

    • Be careful of the tape under the right square side of the panel. Using a spudger helps.

  5. Bu adım çevrilmemiş. Çevrilmesine yardım edin

    : adım 5, 3 resimden 1. : adım 5, 3 resimden 2. : adım 5, 3 resimden 3.
    • Unclip the two orange tabs.

    • Remove the four silver screws using the T5 Torx screwdriver.

  6. Bu adım çevrilmemiş. Çevrilmesine yardım edin

    : adım 6, 2 resimden 1. : adım 6, 2 resimden 2.
    • Remove the motherboard by sliding tweezers between it and the back of the screen. Lift up.

  7. Bu adım çevrilmemiş. Çevrilmesine yardım edin

    : adım 7, 2 resimden 1. : adım 7, 2 resimden 2.
    • Push the screen from the inside of the phone.

    • Pull the screen off.

    • Slide the electronic strip through the small opening.

  8. Bu adım çevrilmemiş. Çevrilmesine yardım edin

    : adım 8, 1 resimden 1.
    • Locate the grey speaker/camera cover.

    • Carefully remove the cover with either a pair of tweezers or your fingers.

  9. Bu adım çevrilmemiş. Çevrilmesine yardım edin

    : adım 9, 3 resimden 1. : adım 9, 3 resimden 2. : adım 9, 3 resimden 3.
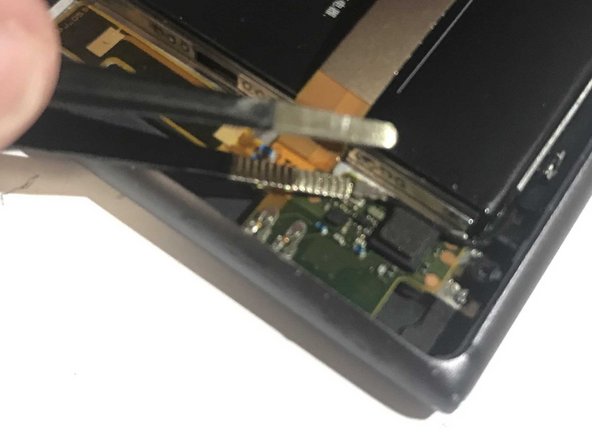
    • With a pair of tweezers, gently remove the orange colored tab closest to the speaker.

  10. Bu adım çevrilmemiş. Çevrilmesine yardım edin

    : adım 10, 1 resimden 1.
    • Pull at the orange section until it becomes loose.

    • It is located in the upper leftmost section of the phone behind the front camera.

  11. Bu adım çevrilmemiş. Çevrilmesine yardım edin

    : adım 11, 1 resimden 1.
    • Pull vertically on the same orange section until the front camera comes out.

    • The front camera as well as the speaker may come out after the last step so be careful.

  12. Bu adım çevrilmemiş. Çevrilmesine yardım edin

    : adım 12, 2 resimden 1. : adım 12, 2 resimden 2.
    • Remove the two black screws by using the T5 Torx screwdriver.

  13. Bu adım çevrilmemiş. Çevrilmesine yardım edin

    : adım 13, 2 resimden 1. : adım 13, 2 resimden 2.
    • Carefully pull the metal rod out.

  14. Bu adım çevrilmemiş. Çevrilmesine yardım edin

    : adım 14, 2 resimden 1. : adım 14, 2 resimden 2.
    • Pry off the speaker.

    • Apply heavy pressure, and pull towards the battery.

  15. Bu adım çevrilmemiş. Çevrilmesine yardım edin

    : adım 15, 2 resimden 1. : adım 15, 2 resimden 2.
    • Unclip the black wire.

  16. Bu adım çevrilmemiş. Çevrilmesine yardım edin

    : adım 16, 2 resimden 1. : adım 16, 2 resimden 2.
    • Peel off the electronic strip.

    • Be careful not to tear.

  17. Bu adım çevrilmemiş. Çevrilmesine yardım edin

    : adım 17, 2 resimden 1. : adım 17, 2 resimden 2.
    • Pry off the metal vibrating unit using tweezers.

    • This requires a lot of force.

  18. Bu adım çevrilmemiş. Çevrilmesine yardım edin

    : adım 18, 2 resimden 1. : adım 18, 2 resimden 2.
    • Insert the tweezers under the corner of the battery, and lift out.

    • You have successfully removed the battery.

Bitiş Çizgisi

3 farklı kişi bu kılavuzu tamamladı.

Guillermo Lara

Üyelik tarihi: 09/18/18

409 İtibar

3 adet Kılavuz yazıldı

2 Yorum

Add markers to steps 10 and 11 for clarity. Add the battery to the “parts” section. For step 5 make sure the bullet color matches the marking color. Remember to add an introduction.

Jackson Reynolds - Yanıt

\Some steps unnecessary e.g. remving the screen.

Also some other parts.

Use your brain.

malcolm redwood - Yanıt

Yorum Ekle

İstatistikleri Görüntüle:

Son 24 Saat: 0

Son 7 gün: 5

Son 30 gün: 41

Her zaman: 1,877