Ana içeriğe geç

Numark TT1600 Audio Jacks Replacement

Neye ihtiyacın var

  1. Numark TT1600 Audio Jacks Replacement, Audio Jacks: adım 1, 1 resimden 1.
    • Flip over the turntable and remove the nine screws on the outer edges.

  2. Numark TT1600 Audio Jacks Replacement: adım 2, 2 resimden 1. Numark TT1600 Audio Jacks Replacement: adım 2, 2 resimden 2.
    • Find the audio jacks located on the back side of the turntable.

    • Remove the screw located in between the right and left audio jacks.

  3. Numark TT1600 Audio Jacks Replacement: adım 3, 1 resimden 1.
    • Remove the back cover by pulling it apart.

  4. Numark TT1600 Audio Jacks Replacement: adım 4, 1 resimden 1.
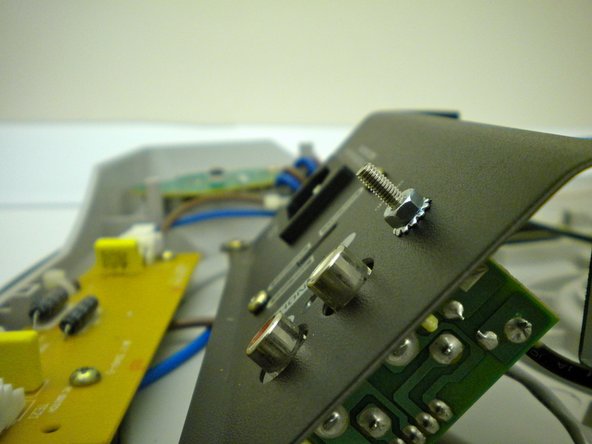
    • Remove the grounding hardware located next to the audio jacks.

  5. Numark TT1600 Audio Jacks Replacement: adım 5, 2 resimden 1. Numark TT1600 Audio Jacks Replacement: adım 5, 2 resimden 2.
    • Remove the ground screw and washers.

  6. Numark TT1600 Audio Jacks Replacement: adım 6, 1 resimden 1.
    • Remove the remaining nut and washer.

  7. Numark TT1600 Audio Jacks Replacement: adım 7, 1 resimden 1.
    • Remove the screw located on the back panel of the audio jack housing.

  8. Numark TT1600 Audio Jacks Replacement: adım 8, 3 resimden 1. Numark TT1600 Audio Jacks Replacement: adım 8, 3 resimden 2. Numark TT1600 Audio Jacks Replacement: adım 8, 3 resimden 3.
    • Remove the screw that connects the audio jacks to the biggest circuit board via wire.

  9. Numark TT1600 Audio Jacks Replacement: adım 9, 1 resimden 1.
    • Gently pull out the audio input jacks from the audio input housing.

Sonuç

To reassemble your device, follow these instructions in reverse order.

Bir başkası bu kılavuzu tamamladı.

Nikolai

Üyelik tarihi: 10/12/11

254 İtibar

5 adet Kılavuz yazıldı

Ekip

Cal Poly, Team 17-14, Regan Fall 2011 Cal Poly, Team 17-14, Regan Fall 2011 üyesi

CPSU-REGAN-F11S17G14

4 Üyeler

11 adet Kılavuz yazıldı

0 Yorum

Yorum Ekle

İstatistikleri Görüntüle:

Son 24 Saat: 0

Son 7 gün: 1

Son 30 gün: 2

Her zaman: 1,379