Giriş
A camera lens on any device is naturally exposed to the elements of nature to obtain the clearest photo; however, this leaves the lens susceptible to damage and cracking. Cameras are used extremely frequently, especially on a device as portable as the Nvidia Shield Tablet. Follow this guide to replace both cameras on your tablet.
Neye ihtiyacın var
-
Bu adımda kullanılan alet:Anti-Static Wrist Strap$7.95
-
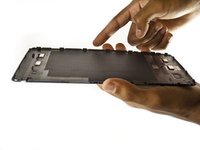
Set the tablet so the buttons, microSD, and stylus port are facing you.
-
Open the microSD slot.
-
Using the flat end of the spudger tool, carefully pry open the case starting from the microSD slot, slowly sliding the spudger along the inside edge of the case.
-
-
-
As you remove your case, be aware of small clips along the edges.
-
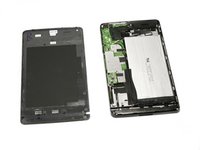
Finally, set the old casing aside.
-
-
-
-
Orient your tablet so that the top of the tablet is furthest away from you.
-
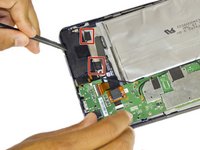
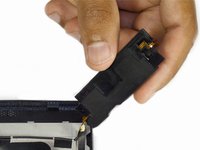
Locate the top speaker, a black semi-rectangular piece on the top right side of the tablet.
-
-
-
Gently pry the speaker up with the flat end of a spudger.
-
Use a plastic opening tool to peel up the tape covering the speaker wire.
-
-
Bu adımda kullanılan alet:Anti-Static Wrist Strap$7.95
-
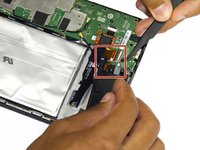
Next, with a gentle but firm grip, pull the audio input ribbon with the precision tweezers.
-
Finally, unplug the power source from your speaker using the precision tweezers.
-
-
-
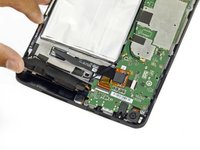
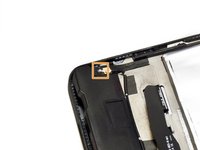
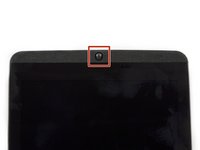
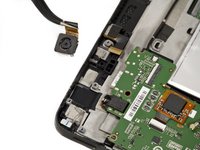
Having removed the speaker, locate the front-facing camera resting just underneath the speaker.
-
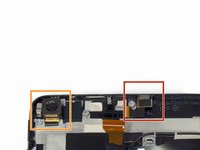
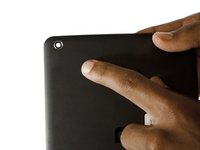
The rear-facing camera is on the left side of the tablet and it aligns with the camera hole on the back casing of your tablet.
-
-
Bu adımda kullanılan alet:Tweezers$4.99
-
Gently unplug each camera using the precision tweezers.
-


To reassemble your device, follow these instructions in reverse order.
İptal et: Bu kılavuzu tamamlamadım.
Bir başkası bu kılavuzu tamamladı.
Ekip

USF Tampa, Team 2-2, Blackwell Fall 2015 USF Tampa, Team 2-2, Blackwell Fall 2015 üyesi
USFT-BLACKWELL-F15S2G2
3 Üyeler
11 adet Kılavuz yazıldı