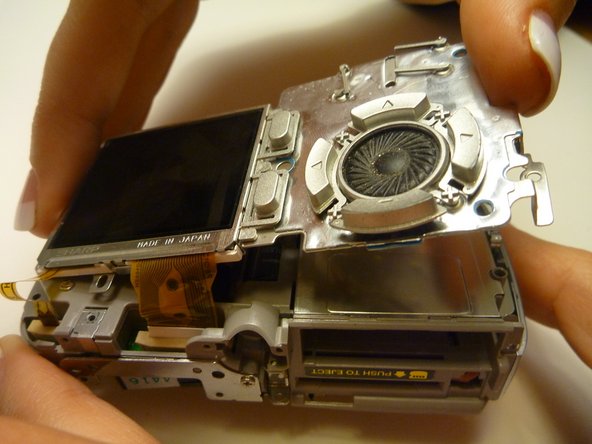
Ana içeriğe geç

Olympus D590 Lens Replacement

Neye ihtiyacın var

  1. Olympus D590 Lens Replacement, Face Plate: adım 1, 1 resimden 1.
    • Remove five baseplate screws using a Phillips #00 screwdriver.

  2. Olympus D590 Lens Replacement: adım 2, 1 resimden 1.
    • Press and slide the battery cover retainer clip to the left. Use tweezers to lift the battery cover away.

  3. Olympus D590 Lens Replacement: adım 3, 1 resimden 1.
    • Remove the single screw from the battery housing using a Phillips #00 screwdriver.

  4. Olympus D590 Lens Replacement: adım 4, 1 resimden 1.
    • Using tweezers, lift the rubber plate to expose the ports.

  5. Olympus D590 Lens Replacement: adım 5, 1 resimden 1.
    • Remove two screws from the ports using a Phillips #00 screwdriver.

  6. Olympus D590 Lens Replacement: adım 6, 1 resimden 1.
    • Use a spudger to pry the faceplate away from the rest of the camera.

  7. Olympus D590 Lens Replacement: adım 7, 1 resimden 1.
    • To avoid disconnection of the connector line to the motherboard, use caution when pulling faceplate away from camera case.

    • Damage to the connector line will prevent the on/off power switch's operational function.

  8. Olympus D590 Lens Replacement, Backplate: adım 8, 1 resimden 1.
    • Using a Phillips #00 screwdriver, remove three screws fastened to the camera backplate edge.

  9. Olympus D590 Lens Replacement: adım 9, 1 resimden 1.
    • Using a Phillips #00 screwdriver, remove the two camera flash screws secured to either side of bulb housing component.

  10. Olympus D590 Lens Replacement: adım 10, 1 resimden 1.
    • Using an iFixit opening tool, pry the backplate from the camera internal housing component.

  11. Olympus D590 Lens Replacement: adım 11, 1 resimden 1.
    • Pull the backplate away from the camera internal housing component.

  12. Olympus D590 Lens Replacement, LCD Screen: adım 12, 1 resimden 1.
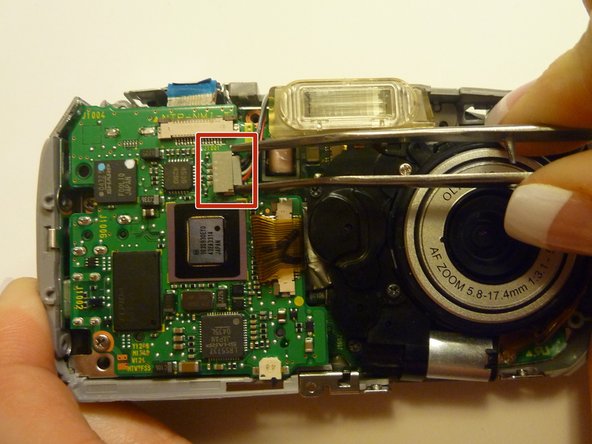
    • Remove one screw Phillips #00 from the right side of the LCD screen camera internal housing component.

  13. Olympus D590 Lens Replacement: adım 13, 2 resimden 1. Olympus D590 Lens Replacement: adım 13, 2 resimden 2.
    • To check that all screws are removed from the exterior side panel, gradually slide and lift no more than 3cm away from the camera internal component body.

  14. Olympus D590 Lens Replacement: adım 14, 2 resimden 1. Olympus D590 Lens Replacement: adım 14, 2 resimden 2.
    • View the front of the camera internal housing component.

    • Using tweezers, detach the gray connector and blue wiring tape.

    • Be cautious to gently wiggle and pull blue wiring tape and gray wire connector during detachment.

  15. Olympus D590 Lens Replacement: adım 15, 2 resimden 1. Olympus D590 Lens Replacement: adım 15, 2 resimden 2.
    • View the top of the camera internal housing component.

    • Using tweezers, gently lift the black tape exposing all connector wires.

  16. Olympus D590 Lens Replacement: adım 16, 1 resimden 1.
    • View the bottom of the camera internal housing component.

    • Caution: Keep yellow taped wire attached to the LCD screen.

    • Use tweezers to gently wiggle, pull, and detach tape from the surface of the camera internal housing component.

  17. Olympus D590 Lens Replacement: adım 17, 3 resimden 1. Olympus D590 Lens Replacement: adım 17, 3 resimden 2. Olympus D590 Lens Replacement: adım 17, 3 resimden 3.
    • View the front of the camera internal housing component.

    • Using tweezers, gently lift the speaker, cautiously maneuvering the wire away from the side of the internal housing component toward the front of the camera internal housing component.

  18. Olympus D590 Lens Replacement: adım 18, 2 resimden 1. Olympus D590 Lens Replacement: adım 18, 2 resimden 2.
    • Gently lift the LCD screen away from the camera internal housing component hinging the thick yellow wiring tape attached to the camera internal housing component.

    • Use a forefinger and thumb to gently pull the thick yellow wiring tape out of the camera internal housing component.

  19. Olympus D590 Lens Replacement, Lens: adım 19, 1 resimden 1.
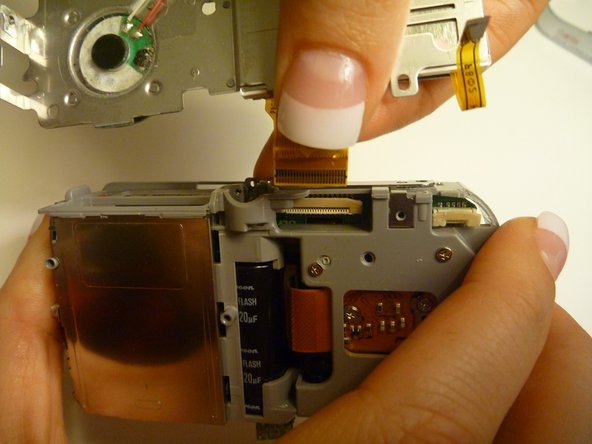
    • Flip the camera so you are looking at the back.

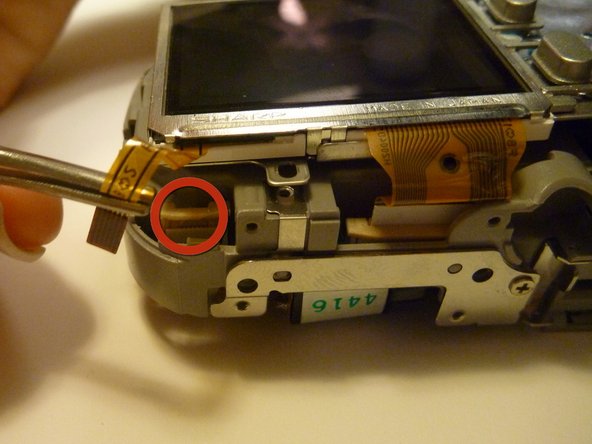
    • Looking at the back of the camera, remove the 3 screws behind the camera lens.

  20. Olympus D590 Lens Replacement: adım 20, 1 resimden 1.
    • Flip the camera so that the front lens is facing up.

    • Disconnect the lens from the logic board.

  21. Olympus D590 Lens Replacement: adım 21, 1 resimden 1.
    • Flip the camera back over so that the back of the camera is facing you, and the lens in facing away.

    • Disconnect the wire that connects the logic board to the lens assembly.

    • Gently pull back on the wire to disconnect it safely.

  22. Olympus D590 Lens Replacement: adım 22, 1 resimden 1.
    • Flip the camera back around so that the front is facing you.

    • Carefully lift the lens assembly out of the camera.

Sonuç

To reassemble your device, follow these instructions in reverse order.

Joshua

Üyelik tarihi: 04/15/10

7 İtibar

2 adet Kılavuz yazıldı

Ekip

Cal Poly, Team 28-23, Regan Spring 2010 Cal Poly, Team 28-23, Regan Spring 2010 üyesi

CPSU-REGAN-S10S28G23

4 Üyeler

14 adet Kılavuz yazıldı

0 Yorum

Yorum Ekle

İstatistikleri Görüntüle:

Son 24 Saat: 0

Son 7 gün: 0

Son 30 gün: 1

Her zaman: 2,497