Bu kılavuzda güncel değişiklikler var. En son onaylanmamış sürüme geçin.
Giriş
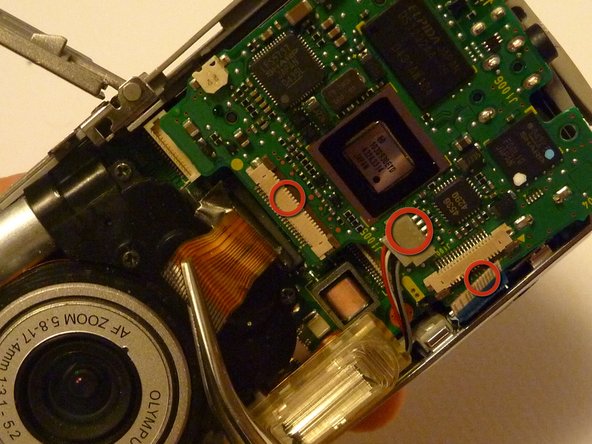
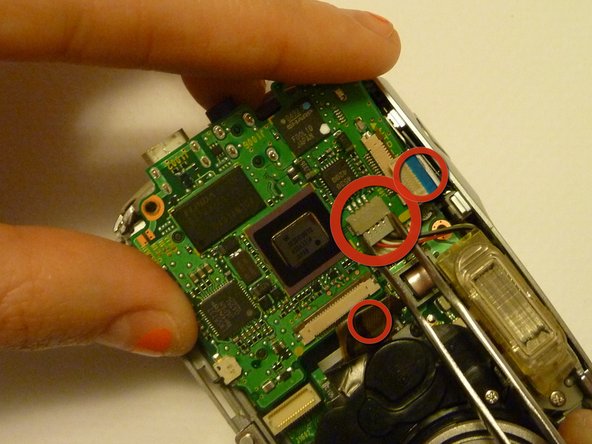
This guide will take you through all the steps to sucessfully install a new logic board to your Olympus D590 camera.
Neye ihtiyacın var


To reassemble your device, follow these instructions in reverse order.
To reassemble your device, follow these instructions in reverse order.
İptal et: Bu kılavuzu tamamlamadım.
2 farklı kişi bu kılavuzu tamamladı.
Ekip

Cal Poly, Team 28-23, Regan Spring 2010 Cal Poly, Team 28-23, Regan Spring 2010 üyesi
CPSU-REGAN-S10S28G23
4 Üyeler
14 adet Kılavuz yazıldı