Ana içeriğe geç
Onarım Topluluğuna Katılın - Hesap Oluşturun

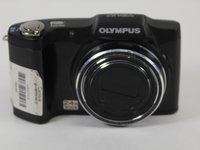
Olympus SZ-12 Lens Replacement

Neye ihtiyacın var

    1. Olympus SZ-12 Lens Replacement, Back Case: adım 1, 2 resimden 1. Olympus SZ-12 Lens Replacement, Back Case: adım 1, 2 resimden 2.
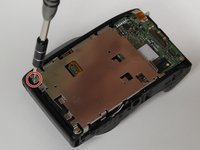
      • Remove nine 4.45mm Phillips #000 screws from the outside of the case.

      FixBot'a Sor

      Yorum Ekle

    2. Olympus SZ-12 Lens Replacement: adım 2, 1 resimden 1.
      • There are four screws to take out on the bottom of the camera.

      FixBot'a Sor

      Yorum Ekle

    3. Olympus SZ-12 Lens Replacement: adım 3, 1 resimden 1.
      • There are three screws to take out on this side.

      FixBot'a Sor

      Yorum Ekle

    4. Olympus SZ-12 Lens Replacement: adım 4, 1 resimden 1.
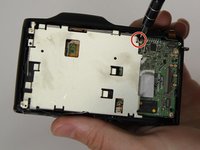
      • There is one screw to take out on this side.

      FixBot'a Sor

      Yorum Ekle

    5. Olympus SZ-12 Lens Replacement: adım 5, 1 resimden 1.
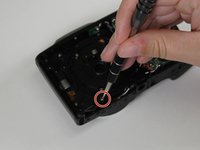
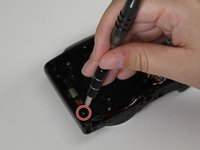
      • There is one hidden screw inside the HDMI port.

      FixBot'a Sor

      Yorum Ekle

    6. Olympus SZ-12 Lens Replacement: adım 6, 1 resimden 1.
      • Using the blue plastic opening tool, wedge open and remove the case.

      FixBot'a Sor

      Yorum Ekle

    1. Olympus SZ-12 Lens Replacement, LCD Screen: adım 7, 1 resimden 1.
      • Once you have the back case off, remove the LCD Screen.

      FixBot'a Sor

      Yorum Ekle

    2. Olympus SZ-12 Lens Replacement: adım 8, 1 resimden 1.
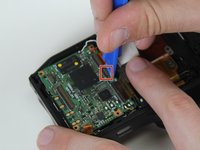
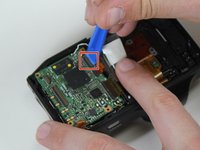
      • Using a plastic opening tool, gently lift the retaining flap on the display cable ZIF connector.

      • Pull the display cable from its socket on the motherboard.

      FixBot'a Sor

      Yorum Ekle

    3. Olympus SZ-12 Lens Replacement: adım 9, 1 resimden 1.
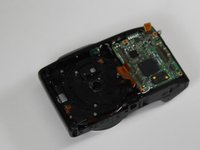
      • Remove the LCD screen from the device.

      • Be careful not to rip the display's ribbon cable as you pull the screen away from the device.

      FixBot'a Sor

      Yorum Ekle

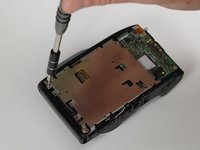
    1. Olympus SZ-12 Lens Replacement, Lens: adım 10, 2 resimden 1. Olympus SZ-12 Lens Replacement, Lens: adım 10, 2 resimden 2.
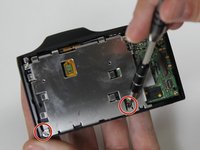
      • Remove the four 3.8mm Phillips #000 screws from the LCD frame.

      FixBot'a Sor

      Yorum Ekle

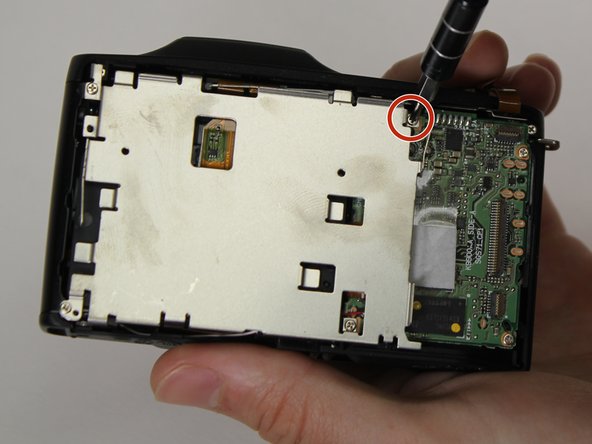
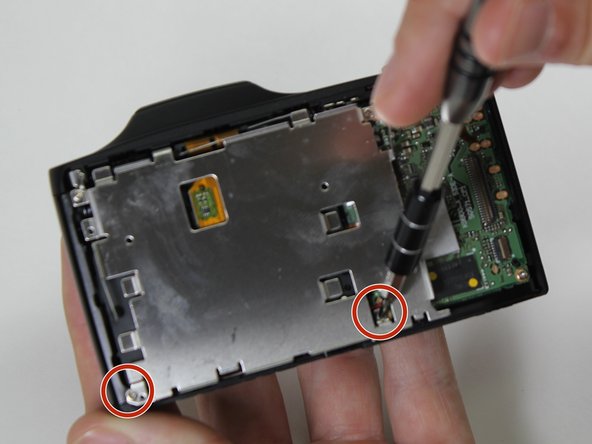
    2. Olympus SZ-12 Lens Replacement: adım 11, 3 resimden 1. Olympus SZ-12 Lens Replacement: adım 11, 3 resimden 2. Olympus SZ-12 Lens Replacement: adım 11, 3 resimden 3.
      • Remove the top left screw, top right screw, bottom left screw, and bottom right screw from LCD frame.

      FixBot'a Sor

      Yorum Ekle

    3. Olympus SZ-12 Lens Replacement: adım 12, 3 resimden 1. Olympus SZ-12 Lens Replacement: adım 12, 3 resimden 2. Olympus SZ-12 Lens Replacement: adım 12, 3 resimden 3.
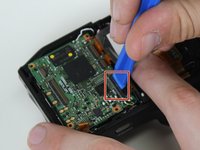
      • Lift the retaining flaps on the three remaining ZIF connectors connected to the motherboard.

      FixBot'a Sor

      Yorum Ekle

    4. Olympus SZ-12 Lens Replacement: adım 13, 1 resimden 1.
      • Remove the five 4.3mm Phillips #000 screws from the lens frame to access the lens.

      • Remove the lens frame.

      FixBot'a Sor

      Yorum Ekle

    5. Olympus SZ-12 Lens Replacement: adım 14, 3 resimden 1. Olympus SZ-12 Lens Replacement: adım 14, 3 resimden 2. Olympus SZ-12 Lens Replacement: adım 14, 3 resimden 3.
      • Remove two 4.3mm Phillips #000 screws from black plastic piece surrounding the lens.

      • Remove the lens.

      FixBot'a Sor

      Yorum Ekle

Sonuç

To reassemble your device, follow these instructions in reverse order.

İptal et: Bu kılavuzu tamamlamadım.

3 farklı kişi bu kılavuzu tamamladı.

1Rehber Yorum

Is her anything in the lens assembly that I could look for which may have dislodged showing up as a shadow on the bottom of the display screen

Deacon - Yanıt Paylaş

Yorum Ekle

İstatistikleri Görüntüle:

Son 24 Saat: 1

Son 7 gün: 7

Son 30 gün: 51

Her zaman: 2,528