Ana içeriğe geç

Olympus TG-820 iHS Locking Mechanism Replacement

Neye ihtiyacın var

  1. Olympus TG-820 iHS Locking Mechanism Replacement, Battery: adım 1, 1 resimden 1.
    • Orient camera to look directly at battery compartment side as shown.

  2. Olympus TG-820 iHS Locking Mechanism Replacement: adım 2, 3 resimden 1. Olympus TG-820 iHS Locking Mechanism Replacement: adım 2, 3 resimden 2. Olympus TG-820 iHS Locking Mechanism Replacement: adım 2, 3 resimden 3.
    • Locate the two latches on the battery compartment.

    • First, move the "lock" switch left to reveal red indicator.

    • Next, move the "cover latch" switch downward to reveal red indicator.

    • You have to move the switches in that order for the compartment to unlatch.

  3. Olympus TG-820 iHS Locking Mechanism Replacement: adım 3, 2 resimden 1. Olympus TG-820 iHS Locking Mechanism Replacement: adım 3, 2 resimden 2.
    • Allow the battery compartment latch to completely open.

    • Insert battery with the writing face up.

    • The bigger slot is for the battery. The smaller slot is for the memory card.

    • Battery not shown.

  4. Olympus TG-820 iHS Locking Mechanism Replacement, Locking Mechanism: adım 4, 3 resimden 1. Olympus TG-820 iHS Locking Mechanism Replacement, Locking Mechanism: adım 4, 3 resimden 2. Olympus TG-820 iHS Locking Mechanism Replacement, Locking Mechanism: adım 4, 3 resimden 3.
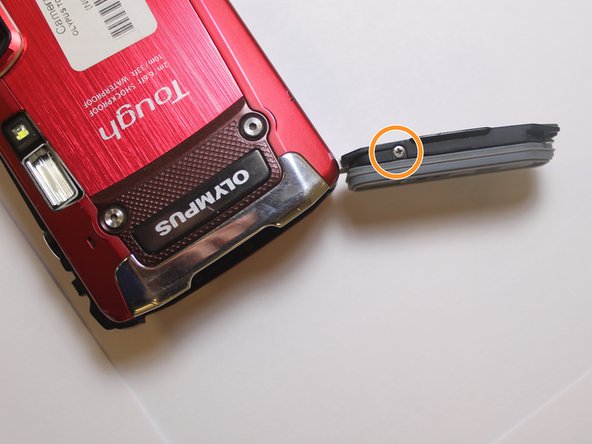
    • Locate and remove the 4.7mm Phillips #000 screw on the back side of the battery compartment locking mechanism.

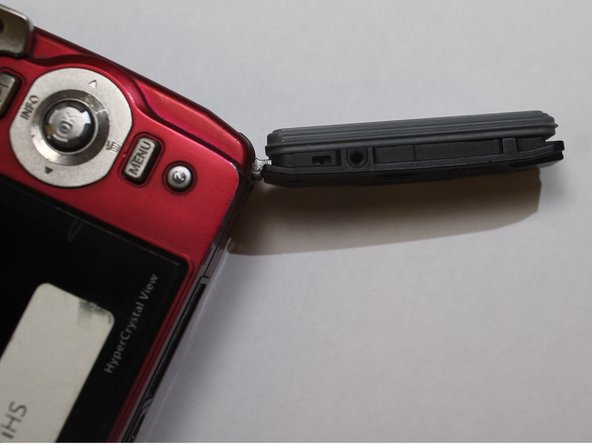
    • Locate and remove the 4.7mm Phillips #000 screw on the front side of the battery compartment locking mechanism.

  5. Olympus TG-820 iHS Locking Mechanism Replacement: adım 5, 1 resimden 1.
    • Locate the two screws on the side of the battery compartment.

    • Remove the two 4.85mm Phillips #000 screws.

  6. Olympus TG-820 iHS Locking Mechanism Replacement: adım 6, 2 resimden 1. Olympus TG-820 iHS Locking Mechanism Replacement: adım 6, 2 resimden 2.
    • Once all 4 screws are out, the back panel of the battery compartment will come off.

    • The entire battery compartment cover will also detach from the camera.

Sonuç

To reassemble your device, follow these instructions in reverse order.

Larissa Knight

Üyelik tarihi: 03/21/16

549 İtibar

5 adet Kılavuz yazıldı

Ekip

Clemson, Team 7-2, Benson Spring 2016 Clemson, Team 7-2, Benson Spring 2016 üyesi

CLEM-BENSON-S16S7G2

4 Üyeler

16 adet Kılavuz yazıldı

0 Yorum

Yorum Ekle

İstatistikleri Görüntüle:

Son 24 Saat: 0

Son 7 gün: 4

Son 30 gün: 8

Her zaman: 437