Ana içeriğe geç

OnePlus X Charging Port Replacement

Neye ihtiyacın var

  1. OnePlus X Charging Port Replacement, Rear Panel: adım 1, 2 resimden 1. OnePlus X Charging Port Replacement, Rear Panel: adım 1, 2 resimden 2.
    • Power off the phone by pressing the button on the right side of the phone, it will be the smaller button.

    • Press and hold the button down for a few seconds, until the option "Power Off" appears on the screen.

    • Select "Power Off" on the screen to turn off the phone.

  2. OnePlus X Charging Port Replacement: adım 2, 3 resimden 1. OnePlus X Charging Port Replacement: adım 2, 3 resimden 2. OnePlus X Charging Port Replacement: adım 2, 3 resimden 3.
    • Insert a SIM card removal tool into the small hole located on the top right corner of the phone, just above the volume buttons.

    • If you do not have the original packaging or a SIM card removal tool, you may use a straightened out paperclip or something similar.

    • Push the removal tool into the hole and the tray should pop out.

    • Remove the SIM tray from the phone.

  3. OnePlus X Charging Port Replacement: adım 3, 3 resimden 1. OnePlus X Charging Port Replacement: adım 3, 3 resimden 2. OnePlus X Charging Port Replacement: adım 3, 3 resimden 3.
    • Put on heat-resistant gloves and place the phone on a surface that will not catch fire or melt.

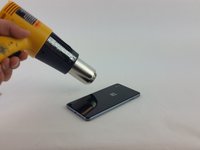
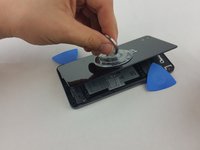
    • Using a heat gun, apply slow and even heat to the edges of the back panel.

    • DO NOT stay on one spot for too long, the heat gun can damage the phone if the heat is applied to the same area for a long period of time.

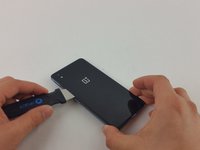
    • While heating the back panel, use a Jimmy to test if the adhesive is soft enough to allow the panel to separate from the device.

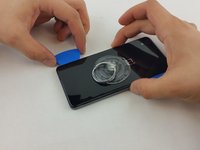
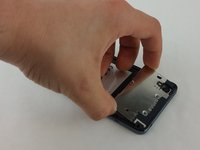
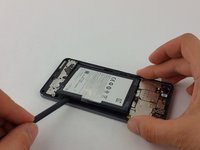
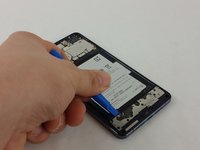
    • Carefully detach the back panel, using opening picks to hold the panel apart from the device.

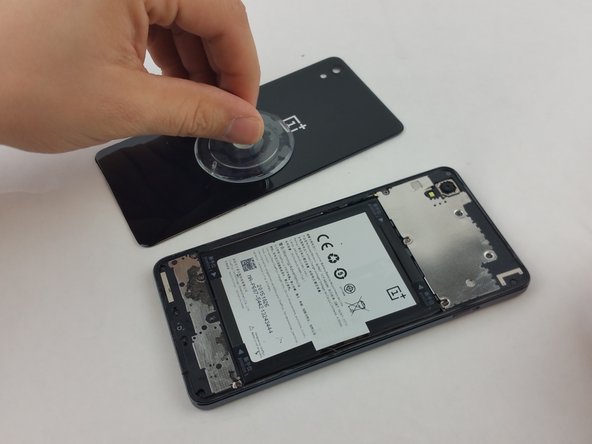
    • Once most of the edges are separated from the device, attach a suction cup to the back panel.

  4. OnePlus X Charging Port Replacement: adım 4, 3 resimden 1. OnePlus X Charging Port Replacement: adım 4, 3 resimden 2. OnePlus X Charging Port Replacement: adım 4, 3 resimden 3.
    • Press the suction cup to the back panel to secure it.

    • With the help of the suction cup, pull up on the panel to completely detach it from the device.

    • Use the suction cup to safely remove the panel from the device. As you work around the panel's edges, the lingering heat may cause the remaining adhesive to reattach the panel to the device, be sure to lift the back panel before the glue has time to set back.

  5. OnePlus X Charging Port Replacement, Battery: adım 5, 3 resimden 1. OnePlus X Charging Port Replacement, Battery: adım 5, 3 resimden 2. OnePlus X Charging Port Replacement, Battery: adım 5, 3 resimden 3.
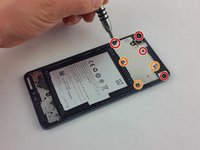
    • Using a PH000 screwdriver, remove the following seven screws circled with red and orange:

    • Four (longer) PH000 screws

    • Three shorter PH000 screws

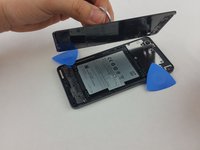
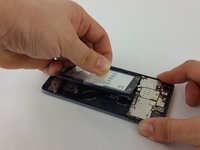
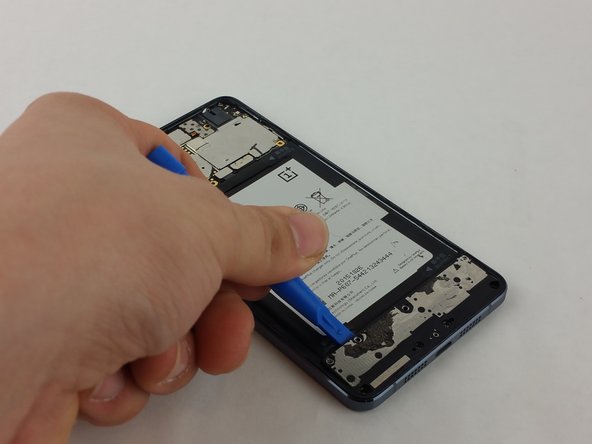
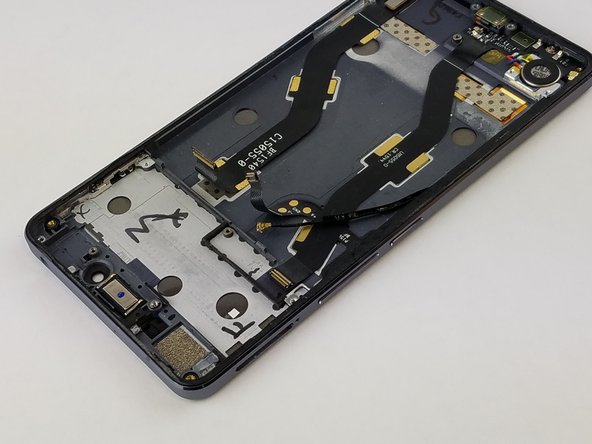
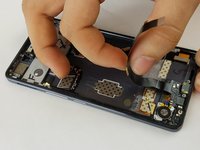
    • Once all of the screws are removed, proceed to using a plastic spudger to pry the metal cover off.

    • There are two clips near the bottom, right above the battery, so start by prying on the bottom edge of the plate.

  6. OnePlus X Charging Port Replacement: adım 6, 2 resimden 1. OnePlus X Charging Port Replacement: adım 6, 2 resimden 2.
    • Once the metal cover is removed, locate the battery connector wire, which clips into the motherboard.

    • Using a plastic spudger, gently pry on the clip to release it.

    • This will cut power to the phone, and prevent any power running to any of the components which is important while working on the phone.

  7. OnePlus X Charging Port Replacement: adım 7, 3 resimden 1. OnePlus X Charging Port Replacement: adım 7, 3 resimden 2. OnePlus X Charging Port Replacement: adım 7, 3 resimden 3.
    • On the battery, locate a clear tab. This will be used to pull the battery out.

    • Firmly grasp the clear tab and pull up and away from the phone to remove the battery.

    • Take your time during this step, as you do not want to apply too much force and damage the battery.

    • There is an adhesive underneath the battery so it might be useful to utilize the black plastic spudger to get between the battery and the phone to pry the battery up but be very careful not to break the ribbon cables underneath the battery.

    • Continue to pull slowly on the battery, until it is completely free from the phone.

  8. OnePlus X Charging Port Replacement, Charging Port: adım 8, 2 resimden 1. OnePlus X Charging Port Replacement, Charging Port: adım 8, 2 resimden 2.
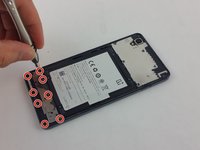
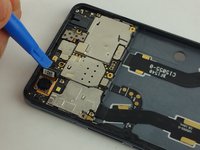
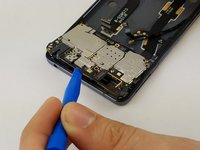
    • Using a PH #000 screwdriver, remove the 8 screws from the motherboard, circled red in the diagram.

    • As long as the screws have been removed prior to removing any cables or wires, the order in which you remove the screws does not matter.

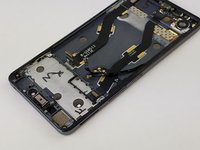
    • Once all the screws have been removed, use the plastic spudger to pry the metal cover off.

    • The metal cover will be a little difficult to pry off due to adhesive, make sure not to apply too much pressure.

  9. OnePlus X Charging Port Replacement: adım 9, 3 resimden 1. OnePlus X Charging Port Replacement: adım 9, 3 resimden 2. OnePlus X Charging Port Replacement: adım 9, 3 resimden 3.
    • With the battery removed and the metal covers off, disassembly can continue.

    • Using the plastic spudger, locate the rear-facing camera and unclip it. Once unclipped, set the camera aside.

    • Using the spudger, pull off the wire connector, circled red in the diagram, and push it away.

    • Make sure to have pushed away any cables or wire connectors before removing the upper motherboard.

  10. OnePlus X Charging Port Replacement: adım 10, 3 resimden 1. OnePlus X Charging Port Replacement: adım 10, 3 resimden 2. OnePlus X Charging Port Replacement: adım 10, 3 resimden 3.
    • Using the plastic opening tool pry the upper motherboard. Carefully pry it up until you can safely remove the upper motherboard completely.

    • Be careful when pulling up the upper motherboard, the front camera is clipped underneath and pulling too hard may damage it.

    • On the bottom left hand side of the phone, you will see a small screw. Use the PH #000 to remove that screw.

  11. OnePlus X Charging Port Replacement: adım 11, 3 resimden 1. OnePlus X Charging Port Replacement: adım 11, 3 resimden 2. OnePlus X Charging Port Replacement: adım 11, 3 resimden 3.
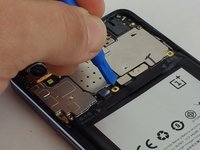
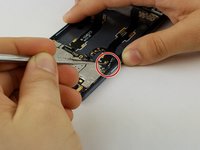
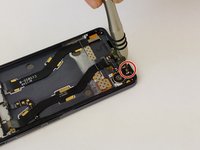
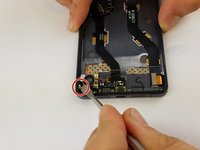
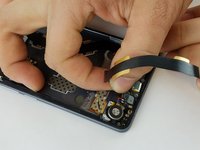
    • After removing the Phillips head screw, you will need to remove a black wire. Use a spudger to unclip the cable first.

    • It might be helpful to bend the cable out of the way when working on the phone.

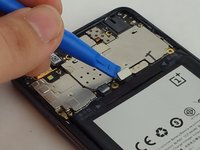
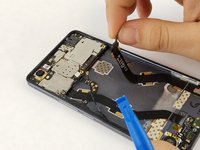
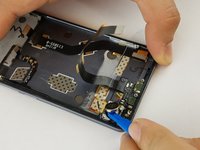
    • Pull back on the ribbon-cable as shown in the image. This is connected to both the charging port and the vibration module (which is similar to a small watch battery).

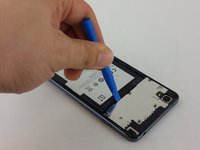
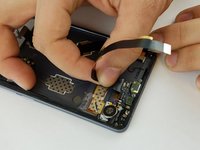
    • Gently pry the vibration module out with a plastic opening tool. Be gentle, for it is adhered to the phone.

    • You will need to remove the vibration module before the charging port.

  12. OnePlus X Charging Port Replacement: adım 12, 3 resimden 1. OnePlus X Charging Port Replacement: adım 12, 3 resimden 2. OnePlus X Charging Port Replacement: adım 12, 3 resimden 3.
    • Once the vibration module is out, pull up carefully on the cable as the charging port is attached with adhesive.

    • After carefully pulling the port and vibration module, it should now be free from the phone and can be replaced.

Sonuç

To reassemble your device, follow these instructions in reverse order.

15 farklı kişi bu kılavuzu tamamladı.

Luis Castro

Üyelik tarihi: 02/07/16

2.061 İtibar

4 adet Kılavuz yazıldı

Ekip

USF Tampa, Team 3-6, Wollert Spring 2016 USF Tampa, Team 3-6, Wollert Spring 2016 üyesi

USFT-WOLLERT-S16S3G6

2 Üyeler

10 adet Kılavuz yazıldı

7 Yorum

So how do you replace the part with a new one? Says in the top description "no parts required"

Robin - Yanıt

I had to reuse the vibration motor de- and solder it back on, because it is not included in the spare part.

Watch for the silence switch when you reasamble the phone. I had to unscrew the upper bord again because i didn't payed atention to it and it was locked. Also the mic is covered on the replacement part. Don't forget to remove the yellow "flag" there.

OxKing - Yanıt

I replaced USB flex port, now working, but now phone dont recognize SIM card..what i must check? Thanks for any help

superlerry -

What is the price of charging port with vibrator module

santhosh gowda - Yanıt

Good Instructions

In the upper right Corner is one more Screw

where the Logic-board is screwed directly.

That was not mentioned!

Also, you should pay attention that you do not pry where the PCP goes around the Camera.

I break off the Corner, fortunately it's only connected to the Status-LED.

Otherwise everything works.

Tesla Toni - Yanıt

Yorum Ekle

İstatistikleri Görüntüle:

Son 24 Saat: 3

Son 7 gün: 10

Son 30 gün: 66

Her zaman: 18,770