Ana içeriğe geç

Opening Procedure

Salt Önkoşul
Bu kılavuz yalnızca diğer kılavuzlar için bir ön koşul olarak kullanılmak üzere tasarlanmıştır. Tek başına eksiktir.

Neye ihtiyacın var

  1. Opening Procedure, Pentalobe Screws: adım 1, 1 resimden 1.
    • Before disassembling your iPhone, discharge the battery below 25%. A charged lithium-ion battery can catch fire and/or explode if accidentally punctured.

    • Power off your iPhone before beginning disassembly.

    • Remove the two 3.4 mm P2 Pentalobe screws on the bottom edge of the iPhone, on either side of the Lightning connector.

  2. Opening Procedure, Opening Procedure: adım 2, 1 resimden 1.
    Bu adımda kullanılan alet:
    Anti-Clamp
    $24.95
    Satın Al
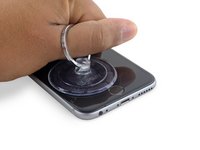
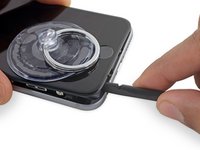
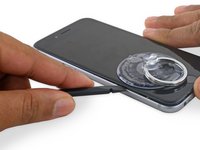
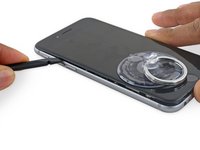
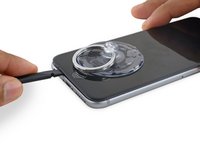
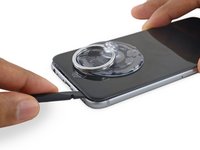
    • If you don't have an Anti-Clamp, follow the next three steps to use a suction handle.

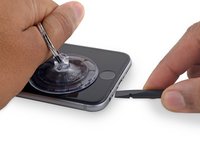
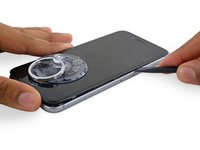
    • Apply mild heat to the lower edge of the iPhone using an iOpener or hair dryer for about a minute.

    • Heat softens the adhesive securing the display, making it easier to open.

  3. Opening Procedure: adım 3, 1 resimden 1.
    • Opening the display on the 6s separates a thin strip of adhesive around the perimeter of the display. If you prefer to replace the adhesive, have a set of new adhesive strips ready before you continue. It's possible to complete the repair without replacing the adhesive, and you probably won't notice any difference in functionality.

    • Apply a suction cup to the lower left corner of the display assembly.

    • Take care not to place the suction cup over the home button.

    • If your display is badly cracked, covering it with a layer of clear packing tape may allow the suction cup to adhere. Alternatively, very strong tape may be used instead of the suction cup. If all else fails, you can superglue the suction cup to the broken screen.

  4. Opening Procedure: adım 4, 2 resimden 1. Opening Procedure: adım 4, 2 resimden 2.
    • Pull up on the suction cup with firm, constant pressure to create a slight gap between the front panel and rear case.

    • Take your time and apply firm, constant force. The display assembly is a much tighter fit than most devices and is held down with adhesive.

    • Pulling too hard may damage the display assembly. Apply just enough pressure to create a small gap between the display assembly and the rear case.

    • If you have any trouble, heat the front of the iPhone using an iOpener, hair dryer, or heat gun until it's slightly too hot to touch. This will help soften the adhesive securing the edges of the display.

  5. Opening Procedure: adım 5, 2 resimden 1. Opening Procedure: adım 5, 2 resimden 2.
    • There is a notch on the underside of the display, just above the headphone jack. This is the safest place to begin prying the phone open.

    • Place the flat edge of a spudger into the gap between the screen and rear case, directly above the headphone jack.

  6. Opening Procedure: adım 6, 2 resimden 1. Opening Procedure: adım 6, 2 resimden 2.
    • Twist the spudger to widen the gap between the front panel assembly and the rest of the phone.

  7. Opening Procedure: adım 7, 2 resimden 1. Opening Procedure: adım 7, 2 resimden 2.
    • Insert the flat end of the spudger on the left side of the phone, between the display assembly and rear case.

    • Slide the spudger up the side of the phone to separate the adhesive and pop the clips free.

  8. Opening Procedure: adım 8, 2 resimden 1. Opening Procedure: adım 8, 2 resimden 2.
    • Remove the spudger and reinsert it on the bottom edge, where you pried the phone open.

    • Slide the spudger to the right, along the bottom edge of the phone.

  9. Opening Procedure: adım 9, 2 resimden 1. Opening Procedure: adım 9, 2 resimden 2.
    • Slide the spudger up the right side to continue separating the adhesive and popping the display clips free from the iPhone.

  10. Opening Procedure: adım 10, 2 resimden 1. Opening Procedure: adım 10, 2 resimden 2.
    • Use the suction cup to open the display, breaking the last of the adhesive.

    • Don't open the display more than 90º, as it is still connected at the top by three cables that may break if stretched.

  11. Opening Procedure: adım 11, 2 resimden 1. Opening Procedure: adım 11, 2 resimden 2.
    • Pull up on the nub on the top side of the suction cup to remove it from the front panel.

  12. Opening Procedure: adım 12, 3 resimden 1. Opening Procedure: adım 12, 3 resimden 2. Opening Procedure: adım 12, 3 resimden 3.
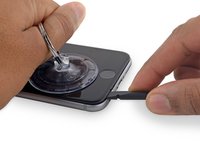
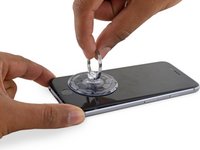
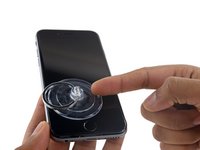
    • Gently grasp the display assembly and lift it up to open the phone, using the clips at the top of the front panel as a hinge.

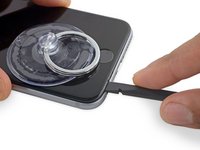
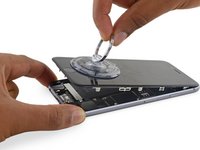
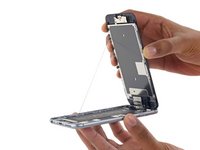
    • Open the display to about a 90º angle, and lean it against something to keep it propped up while you're working on the phone.

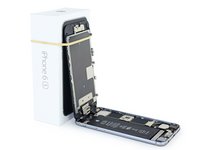
    • Add a rubber band to keep the display securely in place while you work. This prevents undue strain on the display cables.

    • In a pinch, you can use an unopened canned beverage to hold the display.

Sonuç

To reassemble your device, follow these instructions in reverse order.

8 farklı kişi bu kılavuzu tamamladı.

Evan Noronha

Üyelik tarihi: 02/05/15

223.163 İtibar

168 adet Kılavuz yazıldı

0 Yorum

Yorum Ekle

İstatistikleri Görüntüle:

Son 24 Saat: 0

Son 7 gün: 0

Son 30 gün: 1

Her zaman: 1,579