Giriş
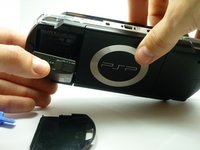
This guide will help you replace the LCD screen if it has been cracked or damaged.
Aletler
Parçalar
Hiçbir parçaya gerek yok.
-
Turn the PSP over so its back is facing you.
-
Locate the battery casing button on the rear-left side of the PSP.
-
Press down the button and remove the battery cover.
-
Using your finger, remove the battery upwards from the system as shown.
-
Remove the four screws shown with a Phillips #00 screwdriver.
-
Remove the screw from the bottom side of the PSP. Keep it separated from the rest of the screws.
-
Remove screws from back righthand side within the holes.
-
Gently separate the outer plastic casing from the rest of the system as shown.
-
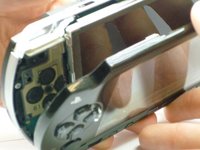
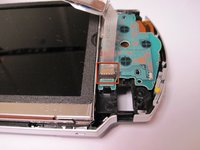
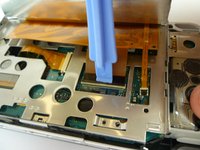
The Button Board, at the base of the LCD Screen, is held by two clips.
-
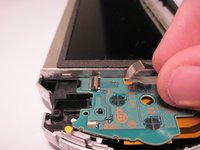
Pry these clips over the nubs using a PSP opening tool. This will release the clips.
-
The Button Board Ribbon Cable is held down with a latch. Lift the latch open, away from the ribbon cable.
-
Pull the cable away from the latch.
-
The LCD Screen is held by the LCD Frame with similar clips. Slide a thin tool between the clip and the screen and gently pry them apart while beginning to lift the screen.
-
The LCD screen is still attached with ribbon cables. Gently lift up the LCD screen so you do not break them.
-
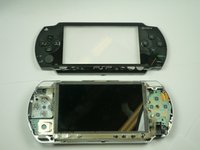
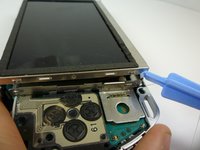
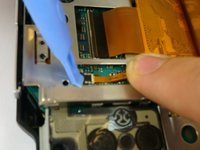
The thin Ribbon Cable opens from the opposite side in which the Ribbon Cable enters. Open up the latch towards the Ribbon Cable. The latch will pull up and release the ribbon cable. Put your tool behind the black part, then pry up the black piece of plastic.
-
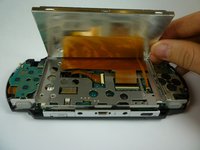
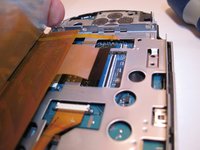
The wide Ribbon Cable opens from the same side in which the Ribbon Cable attatches, and opens away from the cable.
-
Both of these latches are the black pieces.
-
-
Gently pull the ribbon cables away from the latches. The LCD screen can now be removed.
İptal et: Bu kılavuzu tamamlamadım.
56 başka kişi bu kılavuzu tamamladı.
7 Yorum
This is not easy...I tore up the outer casing trying to do this. I better see money in the mail for this
People!! If you weren't gifted in screws and bolts, then bring your console to a repair shop. Seriously blaming this for your Dick Fingers?
dick fingers!!
It needs to be mentioned that the power switch is very fragile. When reassembling the front cover you need to first make sure that the small black switch on the circuit board sits in the yellow part of the switch, otherwise when you apply pressure to click the cover back in place the black switch will break off.
Great tutorial, thanks to this I manage to fix the R button, it turns out the ribbon cable of the right section of buttons was dirty and a little bit off of place, and taking out the screen was necessary to get to that connector.