Ana içeriğe geç

Bu sürüm, hatalı düzenlemeler içerebilir. En son doğrulanmış bellek kopyası dönün.

Neye ihtiyacın var

  1. Bu adım çevrilmemiş. Çevrilmesine yardım edin

    : adım 1, 1 resimden 1.
    • Keep track of all pieces removed from the device.

    • Gently pull off the device cover. The cover snaps on and off easily where the cover attaches to the Palm IIIc device

  2. Bu adım çevrilmemiş. Çevrilmesine yardım edin

    : adım 2, 1 resimden 1.
    • Using a Phillips head screwdriver, take out the four screws on the back of the device. You may have to pull them out with your hands once they are unscrewed.

    • There will be two long screws and two short screws. The long screws come from the top of the device, and the short screws come from the bottom of the device.

  3. Bu adım çevrilmemiş. Çevrilmesine yardım edin

    : adım 3, 1 resimden 1.
    • Lay Palm IIIc face-up and remove the front cover.

    • Do this firmly but not with too much force so as to not break or disturb anything you're not supposed to.

  4. Bu adım çevrilmemiş. Çevrilmesine yardım edin

    : adım 4, 2 resimden 1. : adım 4, 2 resimden 2.
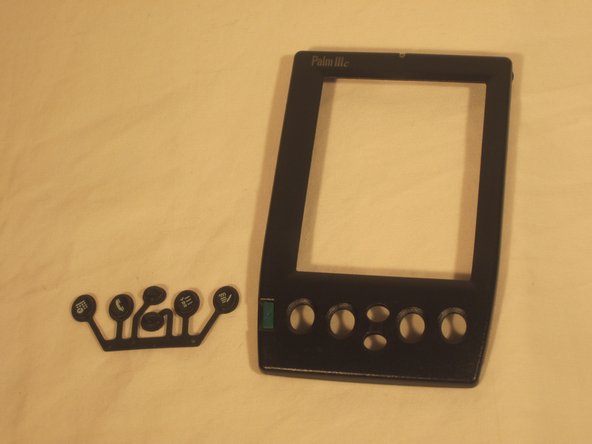
    • Using a prying tool, carefully pop button pad out of the cover.

  5. Bu adım çevrilmemiş. Çevrilmesine yardım edin

    : adım 5, 1 resimden 1.
    • Insert the new button pad where the old one used to be.

Bitiş Çizgisi

Paulina Trujillo

Üyelik tarihi: 04/07/11

265 İtibar

8 adet Kılavuz yazıldı

Ekip

Cal Poly, Team 20-69, Walters Spring 2011 Cal Poly, Team 20-69, Walters Spring 2011 üyesi

CPSU-WALTERS-S11S20G69

5 Üyeler

8 adet Kılavuz yazıldı

0 Yorum

Yorum Ekle

İstatistikleri Görüntüle:

Son 24 Saat: 0

Son 7 gün: 4

Son 30 gün: 4

Her zaman: 1,352