Ana içeriğe geç
Palm Treo 680 Back Panel Replacement

Palm Treo 680 Back Panel Replacement

Maiya123

Maiya123 ve 15 diğer katkıda bulunanlar

En son January 10, 2025 tarihinde güncellendi

15 - 20 dakika
Orta

This guide shows you how to take off the back panel to the Palm Treo 680 in order to reach the other components within side the phone.

Neye ihtiyacın var

Aletler

Daha fazlasını göster…

  1. Palm Treo 680 Back Panel Replacement, Battery: adım 1, 2 resimden 1. Palm Treo 680 Back Panel Replacement, Battery: adım 1, 2 resimden 2.
    • Remove the battery cover by pressing on the small rectangular button located on the back of the phone.

  2. Palm Treo 680 Back Panel Replacement: adım 2, 1 resimden 1.
    • Remove the battery by pulling it out towards you.

  3. Palm Treo 680 Back Panel Replacement, Back Panel: adım 3, 2 resimden 1. Palm Treo 680 Back Panel Replacement, Back Panel: adım 3, 2 resimden 2.
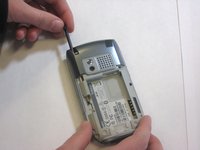
    • Remove the stylus in order to access the screw.

    • Remove the 27mm top-left screw using a T6 Torx screwdriver.

  4. Palm Treo 680 Back Panel Replacement: adım 4, 2 resimden 1. Palm Treo 680 Back Panel Replacement: adım 4, 2 resimden 2.
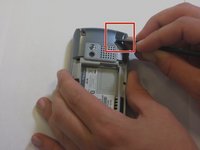
    • Using the spudger, remove the rubber rectangular cover located in the upper rear, right-hand corner.

    • Remove the 27mm screw using the T6 Torx screwdriver.

    • If there is a red Palm sticker covering this screw, puncture it to access the screw.

  5. Palm Treo 680 Back Panel Replacement: adım 5, 1 resimden 1.
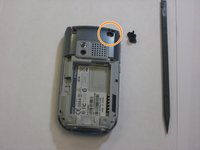
    • Remove the remaining two 27mm screws from the bottom using the T6 screwdriver.

  6. Palm Treo 680 Back Panel Replacement: adım 6, 3 resimden 1. Palm Treo 680 Back Panel Replacement: adım 6, 3 resimden 2. Palm Treo 680 Back Panel Replacement: adım 6, 3 resimden 3.
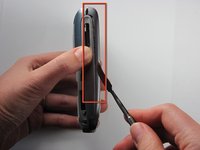
    • Turn the phone so the screen is facing the right side.

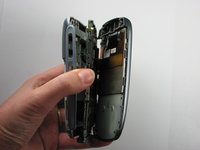
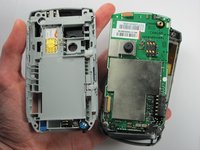
    • Use a spudger to carefully separate the back panel from the front panel to access components inside the phone.

    • Separate the covers from the left side of the device as indicated in the picture.

    • The right side contains orange ribbons that are easily damaged.

Sonuç

To reassemble your device, follow these instructions in reverse order.

Bir başkası bu kılavuzu tamamladı.

Maiya123

Üyelik tarihi: 10/22/09

84 İtibar

6 adet Kılavuz yazıldı

Ekip

Cal Poly, Team 6-4, Maness Fall 2009 Cal Poly, Team 6-4, Maness Fall 2009 üyesi

CPSU-MANESS-F09S6G4

4 Üyeler

15 adet Kılavuz yazıldı

0 Yorum

Yorum Ekle

İstatistikleri Görüntüle:

Son 24 Saat: 0

Son 7 gün: 4

Son 30 gün: 4

Her zaman: 3,017