Ana içeriğe geç
Onarım Topluluğuna Katılın - Hesap Oluşturun

Panasonic Lumix DMC-FX01 Front Casing Replacement

Neye ihtiyacın var

  1. Panasonic Lumix DMC-FX01 Front Casing Replacement, Battery: adım 1, 1 resimden 1.
    • Locate the memory card and battery card latch on the bottom of the camera.

    • Slide the latch to the open position.

    FixBot'a Sor
  2. Panasonic Lumix DMC-FX01 Front Casing Replacement: adım 2, 1 resimden 1.
    • Open the battery latch, and slide the battery release lever to the right.

    FixBot'a Sor
  3. Panasonic Lumix DMC-FX01 Front Casing Replacement: adım 3, 1 resimden 1.
    • Remove the battery from the camera.

    FixBot'a Sor
  4. Panasonic Lumix DMC-FX01 Front Casing Replacement, Rear Casing: adım 4, 1 resimden 1.
    • Remove the three 4.6 mm screws on the bottom of the camera using a Phillips #00 screwdriver.

    FixBot'a Sor
  5. Panasonic Lumix DMC-FX01 Front Casing Replacement: adım 5, 1 resimden 1.
    • Remove the single 3.2 mm screw on the left side of the camera using a Phillips #00 screwdriver.

    FixBot'a Sor
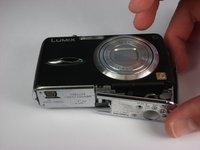
  6. Panasonic Lumix DMC-FX01 Front Casing Replacement: adım 6, 2 resimden 1. Panasonic Lumix DMC-FX01 Front Casing Replacement: adım 6, 2 resimden 2.
    • Remove the left side casing.

    FixBot'a Sor
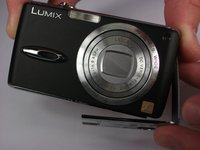
  7. Panasonic Lumix DMC-FX01 Front Casing Replacement: adım 7, 1 resimden 1.
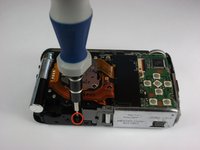
    • Remove the two 3.2 mm screws on the right side of the camera using a Phillips #00 screwdriver.

    FixBot'a Sor
  8. Panasonic Lumix DMC-FX01 Front Casing Replacement: adım 8, 1 resimden 1.
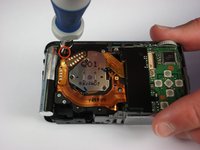
    • Remove the bottom right panel.

    FixBot'a Sor
  9. Panasonic Lumix DMC-FX01 Front Casing Replacement: adım 9, 2 resimden 1. Panasonic Lumix DMC-FX01 Front Casing Replacement: adım 9, 2 resimden 2.
    • Gently remove the back casing.

    • Start at the bottom and carefully pry towards the top to get this piece free.

    FixBot'a Sor
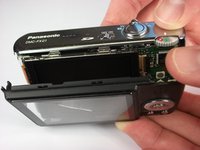
  10. Panasonic Lumix DMC-FX01 Front Casing Replacement, LCD Screen: adım 10, 1 resimden 1.
    • Gently lift up the LCD screen.

    • Using a plastic prying tool, flip up the latch that holds the thin ribbon in place.

    • It should fall out on its own or with a gentle tug.

    FixBot'a Sor
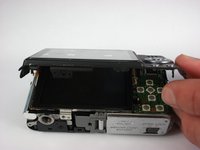
  11. Panasonic Lumix DMC-FX01 Front Casing Replacement: adım 11, 1 resimden 1.
    • Gently tug the thicker ribbon to remove it from its housing.

    FixBot'a Sor
  12. Panasonic Lumix DMC-FX01 Front Casing Replacement, Front Casing: adım 12, 2 resimden 1. Panasonic Lumix DMC-FX01 Front Casing Replacement, Front Casing: adım 12, 2 resimden 2.
    • Remove the two black 5.4 mm screws that hold in the front faceplate using a Phillips #00 screwdriver.

    • There may be a third screw the the right of the lens assembly.

    FixBot'a Sor
  13. Panasonic Lumix DMC-FX01 Front Casing Replacement: adım 13, 3 resimden 1. Panasonic Lumix DMC-FX01 Front Casing Replacement: adım 13, 3 resimden 2. Panasonic Lumix DMC-FX01 Front Casing Replacement: adım 13, 3 resimden 3.
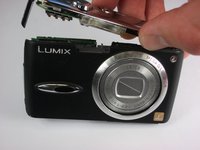
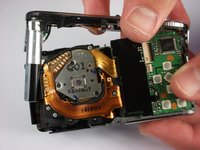
    • Carefully remove the upper assembly, which houses the buttons and the flash battery.

    FixBot'a Sor
  14. Panasonic Lumix DMC-FX01 Front Casing Replacement: adım 14, 1 resimden 1.
    • Carefully remove the front casing after verifying that the thin plastic around the lens is not still attached.

    FixBot'a Sor
Sonuç

To reassemble your device, follow these instructions in reverse order.

2 farklı kişi bu kılavuzu tamamladı.

Andrew

Üyelik tarihi: 10/11/10

396 İtibar

4 adet Kılavuz yazıldı

Ekip

Cal Poly, Team 9-22, Regan Fall 2010 Cal Poly, Team 9-22, Regan Fall 2010 üyesi

CPSU-REGAN-F10S9G22

4 Üyeler

8 adet Kılavuz yazıldı

0Kılavuz Yorumları

Yorum Ekle

İstatistikleri Görüntüle:

Son 24 Saat: 2

Son 7 gün: 13

Son 30 gün: 67

Her zaman: 4,644