Ana içeriğe geç

Panasonic Lumix DMC-FX9 Selector Buttons Replacement

Neye ihtiyacın var

  1. Panasonic Lumix DMC-FX9 Selector Buttons Replacement, Selector Buttons: adım 1, 1 resimden 1.
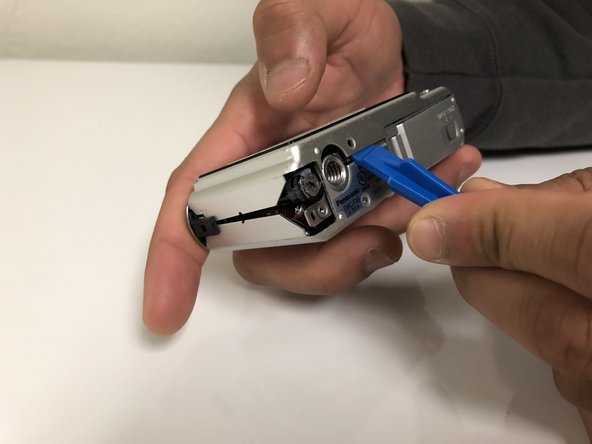
    • Make sure the power is off by switching the power switch to the left.

  2. Panasonic Lumix DMC-FX9 Selector Buttons Replacement: adım 2, 2 resimden 1. Panasonic Lumix DMC-FX9 Selector Buttons Replacement: adım 2, 2 resimden 2.
    • Use a Phillips #00 screwdriver to remove the screws on the left side of the camera.

  3. Panasonic Lumix DMC-FX9 Selector Buttons Replacement: adım 3, 1 resimden 1.
    • Remove the screws on the right side of the camera by using the Philips #00 screwdriver.

  4. Panasonic Lumix DMC-FX9 Selector Buttons Replacement: adım 4, 2 resimden 1. Panasonic Lumix DMC-FX9 Selector Buttons Replacement: adım 4, 2 resimden 2.
    • Remove the screws on the bottom side of the camera using the Philips #00 Screwdriver.

    • Separate the covers by gently applying force upwards, carefully placing the opening tool between the two covers.

  5. Panasonic Lumix DMC-FX9 Selector Buttons Replacement: adım 5, 2 resimden 1. Panasonic Lumix DMC-FX9 Selector Buttons Replacement: adım 5, 2 resimden 2.
    • Lift the ZIF tabs up with the opening tool and carefully remove the digitizer ribbon cables.

    • Remove the LCD Screen from the glass frame carefully with the opening tool.

  6. Panasonic Lumix DMC-FX9 Selector Buttons Replacement: adım 6, 2 resimden 1. Panasonic Lumix DMC-FX9 Selector Buttons Replacement: adım 6, 2 resimden 2.
    • Push on the back panel buttons on the front side to remove the buttons.

    • Be cautious of the adhesive holding the button panels to the cover. Apply extra force if necessary.

Sonuç

To reassemble your device, follow these instructions in reverse order.

Kriselle Tubongbanua

Üyelik tarihi: 02/21/18

133 İtibar

1 Kılavuz yazıldı

0 Yorum

Yorum Ekle

İstatistikleri Görüntüle:

Son 24 Saat: 0

Son 7 gün: 3

Son 30 gün: 8

Her zaman: 256