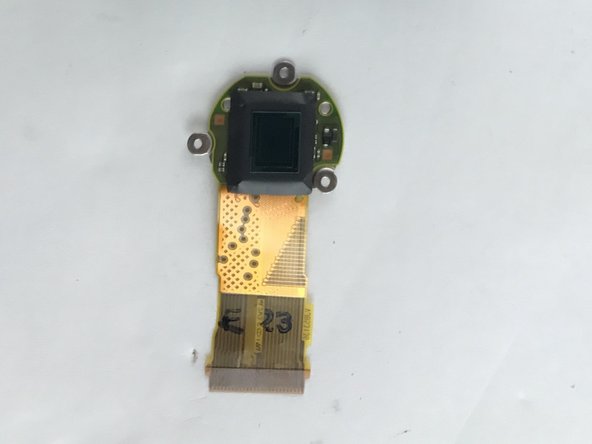
Ana içeriğe geç

Panasonic Lumix DMC-ZS40 Camera Sensor Replacement

Neye ihtiyacın var

  1. Panasonic Lumix DMC-ZS40 Camera Sensor Replacement, Battery: adım 1, 2 resimden 1. Panasonic Lumix DMC-ZS40 Camera Sensor Replacement, Battery: adım 1, 2 resimden 2.
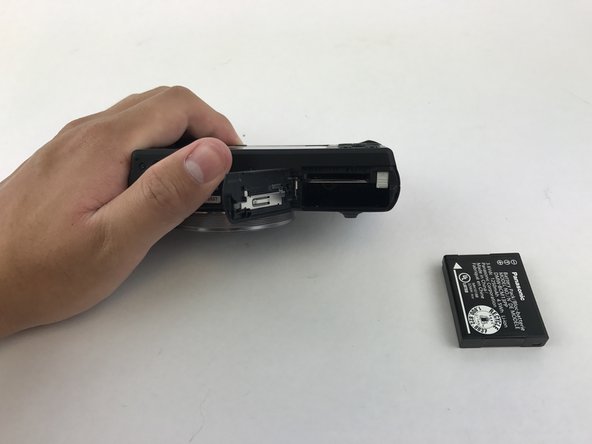
    • Find the battery/memory card door on the bottom right of the camera.

    • Use your finger or screw driver to slide the grey latch from the locked position to the open position. This will swing open the door.

  2. Panasonic Lumix DMC-ZS40 Camera Sensor Replacement: adım 2, 1 resimden 1.
    • Push up on the right-hand-side tab to release the battery.

  3. Panasonic Lumix DMC-ZS40 Camera Sensor Replacement: adım 3, 2 resimden 1. Panasonic Lumix DMC-ZS40 Camera Sensor Replacement: adım 3, 2 resimden 2.
    • Remove battery from camera.

  4. Panasonic Lumix DMC-ZS40 Camera Sensor Replacement, Camera Sensor: adım 4, 3 resimden 1. Panasonic Lumix DMC-ZS40 Camera Sensor Replacement, Camera Sensor: adım 4, 3 resimden 2. Panasonic Lumix DMC-ZS40 Camera Sensor Replacement, Camera Sensor: adım 4, 3 resimden 3.
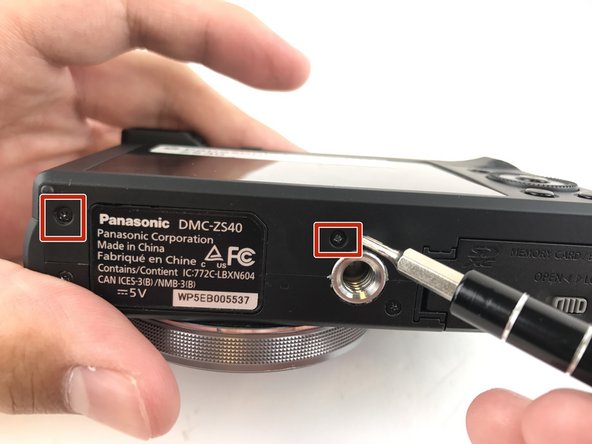
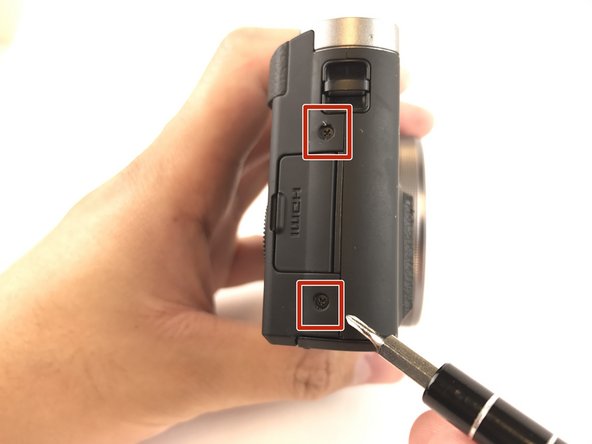
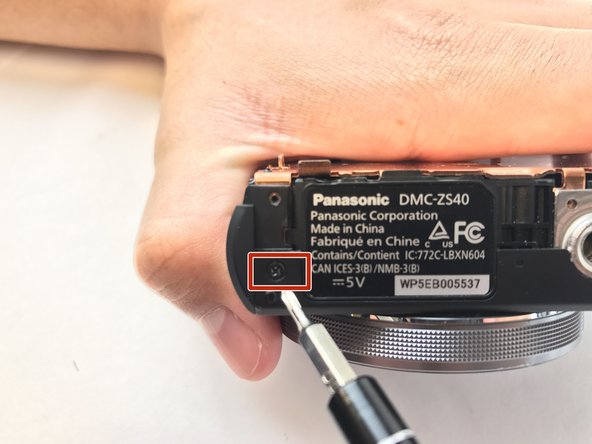
    • Unscrew these five 3mm screws located around the sides of the camera using a screw driver with a PH000 bit head.

  5. Panasonic Lumix DMC-ZS40 Camera Sensor Replacement: adım 5, 2 resimden 1. Panasonic Lumix DMC-ZS40 Camera Sensor Replacement: adım 5, 2 resimden 2.
    • Pry off the back casing of the camera and place the camera face down.

  6. Panasonic Lumix DMC-ZS40 Camera Sensor Replacement: adım 6, 1 resimden 1.
    • Flip the right hand side control dial circuit board up.

  7. Panasonic Lumix DMC-ZS40 Camera Sensor Replacement: adım 7, 3 resimden 1. Panasonic Lumix DMC-ZS40 Camera Sensor Replacement: adım 7, 3 resimden 2. Panasonic Lumix DMC-ZS40 Camera Sensor Replacement: adım 7, 3 resimden 3.
    • Place the LCD screen to the side while you remove the plate cover. The LCD has already been removed in this picture. It is not necessary to remove the LCD screen or the control dial for this guide.

    • Remove these four 4mm screws and the 3mm screw on the top of the plate cover and on the side of the camera using a PH000 bit head. Once the screws are removed, the plate cover should lift right up.

    • Keep track of the different screw lengths and do not mix them up.

  8. Panasonic Lumix DMC-ZS40 Camera Sensor Replacement: adım 8, 1 resimden 1.
    Bu adımda kullanılan alet:
    Tweezers
    $4.99
    Satın Al
    • Remove the ribbon cable connecting the sensor to the motherboard. Use tweezers or a screw driver to lift up on the retaining flap of the ZIF connector to remove the cable.

  9. Panasonic Lumix DMC-ZS40 Camera Sensor Replacement: adım 9, 1 resimden 1.
    • Using the T3 Phillips Screwdriver, unscrew the three Torx T3 2.5mm screws holding the sensor down.

  10. Panasonic Lumix DMC-ZS40 Camera Sensor Replacement: adım 10, 2 resimden 1. Panasonic Lumix DMC-ZS40 Camera Sensor Replacement: adım 10, 2 resimden 2.
    • Gently lift the sensor off of the springs.

Sonuç

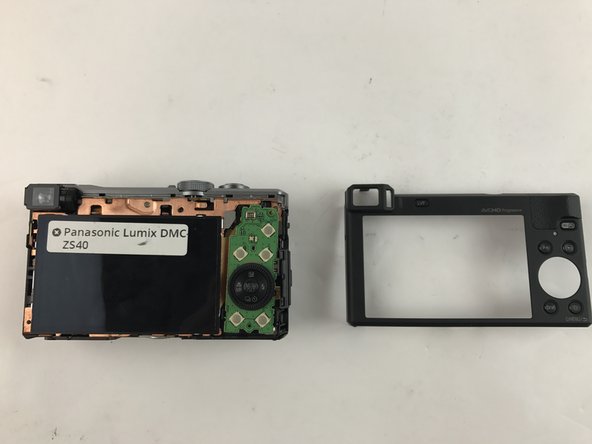
To reassemble your device, follow these instructions in reverse order.

Bir başkası bu kılavuzu tamamladı.

Dean Favetta

Üyelik tarihi: 02/14/17

340 İtibar

3 adet Kılavuz yazıldı

Ekip

USF Tampa, Team 20-3, Remmell Spring 2017 USF Tampa, Team 20-3, Remmell Spring 2017 üyesi

USFT-REMMELL-S17S20G3

3 Üyeler

10 adet Kılavuz yazıldı

Bir Yorum

After the CCD is replaced, how do you adjust the 3 torx screws, so the ccd is in alignment? After the replacement the right side of my pictures are out of focus.

resufix888 - Yanıt

Yorum Ekle

İstatistikleri Görüntüle:

Son 24 Saat: 0

Son 7 gün: 3

Son 30 gün: 19

Her zaman: 957