Ana içeriğe geç

Bu kılavuzda güncel değişiklikler var. En son onaylanmamış sürüme geçin.

Panasonic PV-GS9 outercasing replacement

Neye ihtiyacın var

  1. Panasonic PV-GS9 outercasing replacement, Outer Casing: adım 1, 3 resimden 1. Panasonic PV-GS9 outercasing replacement, Outer Casing: adım 1, 3 resimden 2. Panasonic PV-GS9 outercasing replacement, Outer Casing: adım 1, 3 resimden 3.
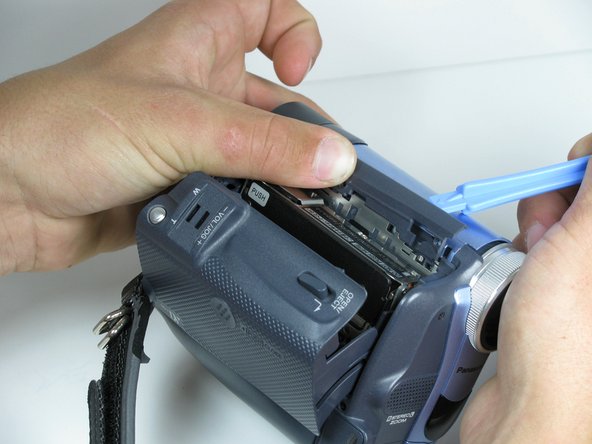
    • Using a plastic opening tool, remove the record/playback and record/power control knobs from the camcorder.

  2. Panasonic PV-GS9 outercasing replacement: adım 2, 2 resimden 1. Panasonic PV-GS9 outercasing replacement: adım 2, 2 resimden 2.
    • Open the tape compartment.

    • Using a #00 Phillips head screwdriver, remove the two 4.5mm screws from the camcorder.

  3. Panasonic PV-GS9 outercasing replacement: adım 3, 3 resimden 1. Panasonic PV-GS9 outercasing replacement: adım 3, 3 resimden 2. Panasonic PV-GS9 outercasing replacement: adım 3, 3 resimden 3.
    • Use a plastic opening tool to remove the gray trim piece from top of the camcorder.

    • Take care when removing the trim piece. The plastic parts are fragile and can break easily.

  4. Panasonic PV-GS9 outercasing replacement: adım 4, 1 resimden 1.
    • Rotate the camcorder so that the eye piece is facing you.

    • Remove the battery.

    • Remove the four black 4.5mm screws, sitting behind the battery.

    • Remove the 5th screw to the right of the battery dock.

    • Be careful not to lose any screws whilst trying to remove them.

  5. Panasonic PV-GS9 outercasing replacement: adım 5, 2 resimden 1. Panasonic PV-GS9 outercasing replacement: adım 5, 2 resimden 2.
    • Rotate the camcorder so that the tape compartment is facing you.

    • Remove the single 4.5mm black screw above the hook for the hand strap.

    • Undoing the strap on one end may help.

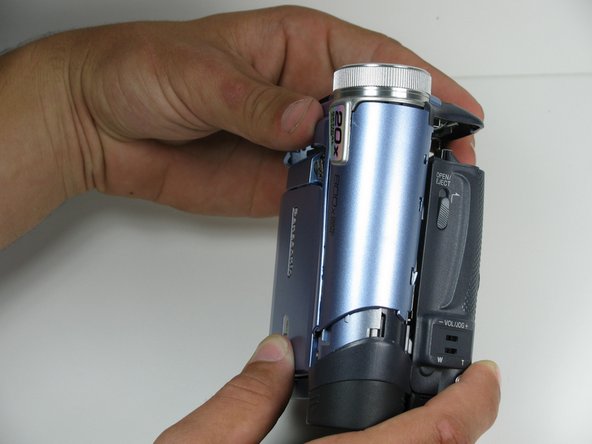
    • Rotate the camcorder so that the lens is facing you.

    • Remove the single 4.5mm black screw from the front panel.

  6. Panasonic PV-GS9 outercasing replacement: adım 6, 2 resimden 1. Panasonic PV-GS9 outercasing replacement: adım 6, 2 resimden 2.
    • Rotate the camcorder so that the bottom is facing towards you.

    • Remove the single remaining 4.5mm black screw from the bottom.

    • Remove the four silver 4.5mm screws from the body.

  7. Panasonic PV-GS9 outercasing replacement: adım 7, 1 resimden 1.
    • Open the LCD screen on the side of the camcorder.

    • Using a #00 screwdriver, remove the two 4.5mm silver screws located on either side of the hinge of the LCD screen.

  8. Panasonic PV-GS9 outercasing replacement: adım 8, 2 resimden 1. Panasonic PV-GS9 outercasing replacement: adım 8, 2 resimden 2.
    • Very carefully remove the front cover from the main body of the camcorder.

    • This should come apart with relative ease, however a plastic opening tool may help remove the panel.

    • There is a ribbon cable attached to the front panel and the camcorder body, so be careful not to pull that off when you remove this panel.

  9. Panasonic PV-GS9 outercasing replacement: adım 9, 2 resimden 1. Panasonic PV-GS9 outercasing replacement: adım 9, 2 resimden 2.
    • Using your fingers, carefully pull the ribbon cable away from the logic board.

Sonuç

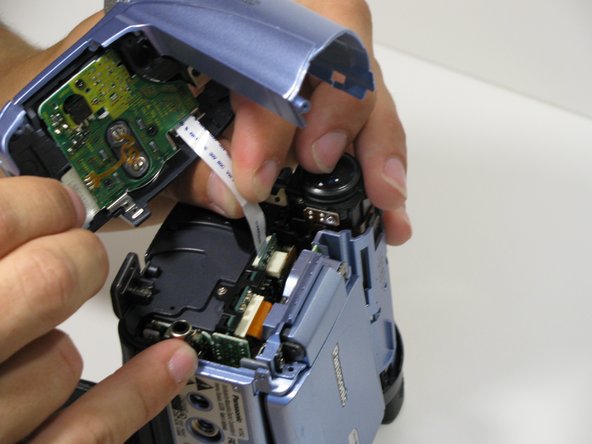
To reassemble your device, follow these instructions in reverse order.

Bir başkası bu kılavuzu tamamladı.

Trevor Johnson

Üyelik tarihi: 04/18/10

31 İtibar

2 adet Kılavuz yazıldı

Ekip

Cal Poly, Team 7-9, Maness Spring 2010 Cal Poly, Team 7-9, Maness Spring 2010 üyesi

CPSU-MANESS-S10S7G9

4 Üyeler

15 adet Kılavuz yazıldı

0 Yorum

Yorum Ekle

İstatistikleri Görüntüle:

Son 24 Saat: 1

Son 7 gün: 3

Son 30 gün: 13

Her zaman: 2,701