Ana içeriğe geç

Panasonic SA-HT810V VHS Drive Replacement

Neye ihtiyacın var

  1. Panasonic SA-HT810V VHS Drive Replacement, VHS Drive: adım 1, 3 resimden 1. Panasonic SA-HT810V VHS Drive Replacement, VHS Drive: adım 1, 3 resimden 2. Panasonic SA-HT810V VHS Drive Replacement, VHS Drive: adım 1, 3 resimden 3.
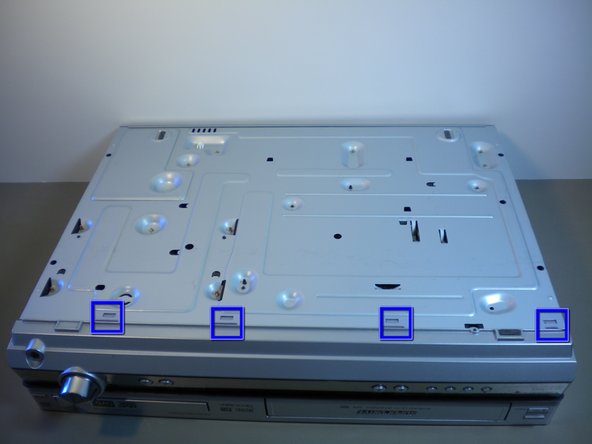
    • With the front display of the device facing you, rotate the device 90 degrees counter clockwise.

    • Now rotate the device 180 degrees and remove the second screw.

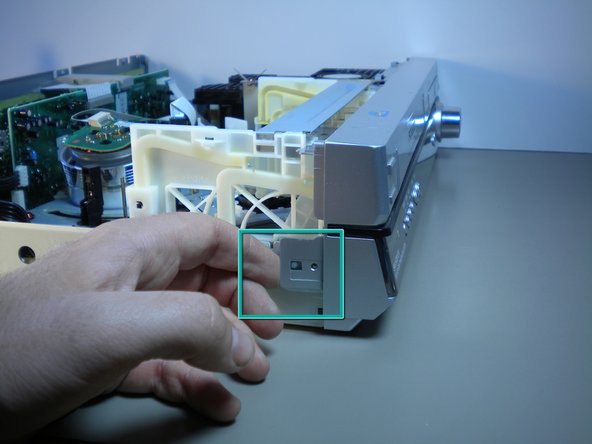
    • Remove the screw that is on the right side of the panel facing you.

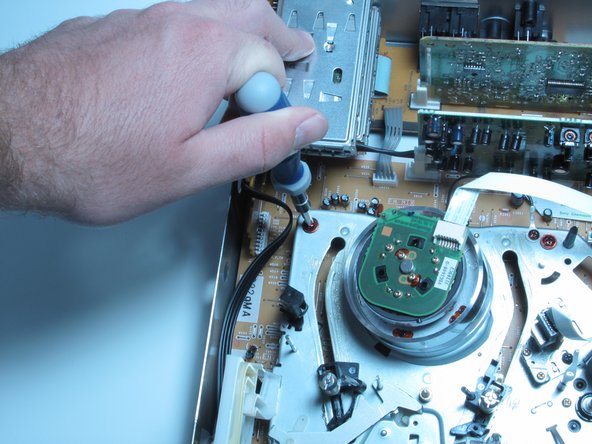
    • All screws will need to be removed with a phillips head screwdriver.

  2. Panasonic SA-HT810V VHS Drive Replacement: adım 2, 2 resimden 1. Panasonic SA-HT810V VHS Drive Replacement: adım 2, 2 resimden 2.
    • Rotate the device so that the back faces you.

    • With a phillips heat screwdriver, locate and remove the four screws highlighted by the red circles in image one.

  3. Panasonic SA-HT810V VHS Drive Replacement: adım 3, 1 resimden 1.
    • Before removing cover make sure that the back of the device is facing you.

    • Remove the top cover by bending out on the sides, and pulling the cover towards you while applying upward pressure.

  4. Panasonic SA-HT810V VHS Drive Replacement: adım 4, 3 resimden 1. Panasonic SA-HT810V VHS Drive Replacement: adım 4, 3 resimden 2. Panasonic SA-HT810V VHS Drive Replacement: adım 4, 3 resimden 3.
    • Pull up the two tabs on top

    • Pull the the three tabs on the side there is one on the left and two and the right side of the device when it is facing you.

    • Depress the four tabs on the bottom of the device.

  5. Panasonic SA-HT810V VHS Drive Replacement: adım 5, 1 resimden 1.
    • Carefully pull off the front panel of the device.

    • The front is attached to the device with cables so be careful when removing.

  6. Panasonic SA-HT810V VHS Drive Replacement: adım 6, 2 resimden 1. Panasonic SA-HT810V VHS Drive Replacement: adım 6, 2 resimden 2.
    • With the device front facing you remove the six screws with a phillips head screwdriver around the VHS drive.

  7. Panasonic SA-HT810V VHS Drive Replacement: adım 7, 1 resimden 1.
    • Remove the three cables attaching the VHS to the Mother Board.

    • Carefully pull the VHS drive out of the device and follow the steps in reverse to place the new one in.

    • Make sure the cables connecting the VHS Drive are fully inserted before powering the machine on to prevent damage to the internal components.

Sonuç

To reassemble your device, follow these instructions in reverse order.

Nathan Cheadle

Üyelik tarihi: 04/15/10

161 İtibar

7 adet Kılavuz yazıldı

Ekip

Cal Poly, Team 16-5, Maness Spring 2010 Cal Poly, Team 16-5, Maness Spring 2010 üyesi

CPSU-MANESS-S10S16G5

4 Üyeler

7 adet Kılavuz yazıldı

0 Yorum

Yorum Ekle

İstatistikleri Görüntüle:

Son 24 Saat: 0

Son 7 gün: 1

Son 30 gün: 5

Her zaman: 1,010