Neye ihtiyacın var
-
-
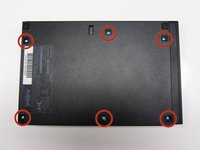
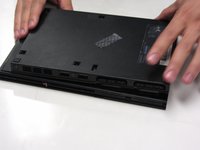
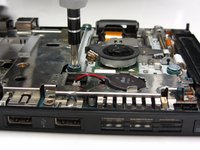
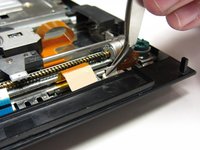
Disconnect all cables from the console and flip the unit over to reveal its base.
-
-
-
-
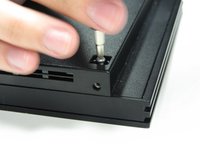
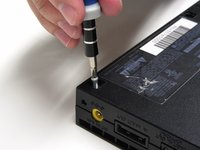
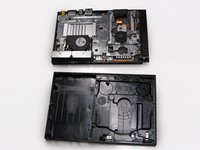
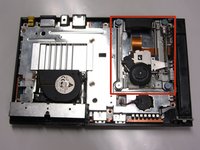
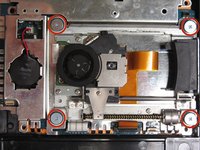
Locate the optical drive which occupies most of the space on the right side of the unit. It can be identified by the four screws with wide-diameter heads fastening the optical drive to the motherboard.
-


To reassemble your device, follow these instructions in reverse order.
To reassemble your device, follow these instructions in reverse order.
İptal et: Bu kılavuzu tamamlamadım.
27 farklı kişi bu kılavuzu tamamladı.
7Kılavuz Yorumları
انا أريد للغة عربية
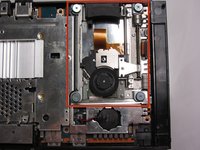
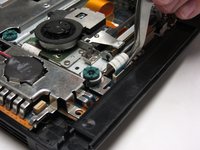
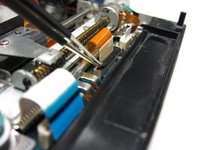
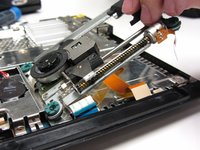
you also must disconnect the ribbon cable from the laser assembly by flipping back the little brown lever and removing the cable. This frees the assembly from the rest of the console. To actually replace the drive, you need to move the lens away from the disc hub by gently turning the worm gear. Flip the new assembly over and connect the brown ribbon that is glued to the metal shield. DO NOT REMOVE THE GLUED RIBBON UNLESS YOU INTEND TO REPLACE IT. After that one is connected, you can slowly flip the assembly and rest is in place. Connect the other ribbons to their respective connectors. Return all the screws to their positions and tighten so they are firm. Don’t go overboard screwing them back in.
Hello is the optical drive from my ps2 70004 compatible in my ps2 slim 75001?
I don't see any reason why it shouldn't be.
This is a great instructional aside from one thing, if you don’t not have the tape/glue for the ribbon cable that goes under the assembly, do not remove that ribbon cable from the shell. just disconnect it from the assembly, and put it in the new assembly. I wish I had read the comments before I did this myself. Please add this to the notes for the instructional. Now one of my games are ruined, and I have to buy a new one.