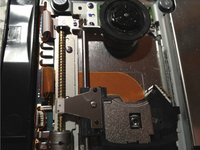
Ana içeriğe geç
Onarım Topluluğuna Katılın - Hesap Oluşturun

PlayStation 2 Slimline Optical Drive Replacement

Neye ihtiyacın var

  1. PlayStation 2 Slimline Optical Drive Replacement, Optical Drive: adım 1, 3 resimden 1. PlayStation 2 Slimline Optical Drive Replacement, Optical Drive: adım 1, 3 resimden 2. PlayStation 2 Slimline Optical Drive Replacement, Optical Drive: adım 1, 3 resimden 3.
    • Remove the rubber feet on two of the screw covers on the bottom of the console.

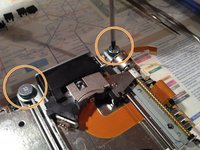
    • Remove the screw covers and the screws themselves.

    • Caution: One of the screws is underneath the "Do not void" seal

  2. PlayStation 2 Slimline Optical Drive Replacement: adım 2, 2 resimden 1. PlayStation 2 Slimline Optical Drive Replacement: adım 2, 2 resimden 2.
    • If all screws are removed.

    • Use a metal spunger to open the chassis

  3. PlayStation 2 Slimline Optical Drive Replacement: adım 3, 3 resimden 1. PlayStation 2 Slimline Optical Drive Replacement: adım 3, 3 resimden 2. PlayStation 2 Slimline Optical Drive Replacement: adım 3, 3 resimden 3.
    • Slip the three cables out of the sockets.

    • Use a PH01 screwdriver to remove the four screws securing the optical drive

    • Lift up the optical drive and remove the duct tape under the flex cable.

    • Now the optical drive is free and ready for replacement

Sonuç

To reassemble your device, follow these instructions in reverse order.

17 farklı kişi bu kılavuzu tamamladı.

tlroesner

Üyelik tarihi: 05/13/12

1.891 İtibar

4 adet Kılavuz yazıldı

3Kılavuz Yorumları

How is it that this guide says difficult and the other PS2 drive replacement on here says easy?

Mark - Yanıt Paylaş

it really depends on your level of skill/experience.

Damien Simons - Yanıt Paylaş

How many different versions of drive is there for the slim model? When you go to replace it, do you just compare the model number on the laser?

Trevor V - Yanıt Paylaş

Yorum Ekle

İstatistikleri Görüntüle:

Son 24 Saat: 5

Son 7 gün: 22

Son 30 gün: 153

Her zaman: 25,029