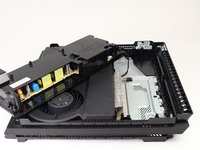
Ana içeriğe geç

PlayStation 4 Pro Power Supply Unit Replacement

Neye ihtiyacın var

  1. PlayStation 4 Pro Power Supply Unit Replacement, Power Supply Unit: adım 1, 3 resimden 1. PlayStation 4 Pro Power Supply Unit Replacement, Power Supply Unit: adım 1, 3 resimden 2. PlayStation 4 Pro Power Supply Unit Replacement, Power Supply Unit: adım 1, 3 resimden 3.
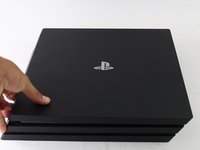
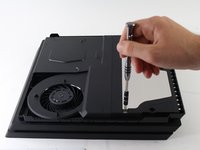
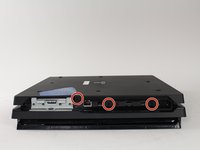
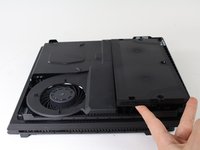
    • Begin by flipping the console upside down.

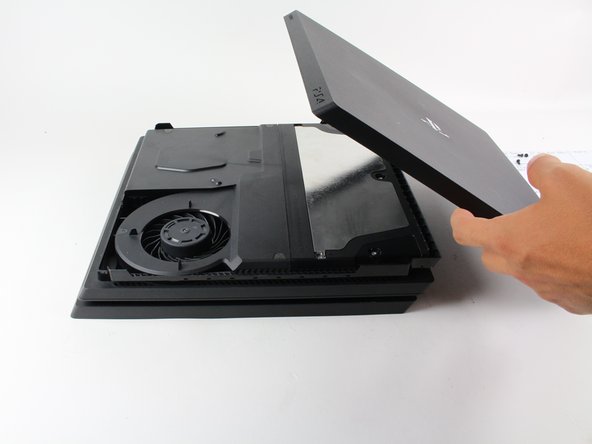
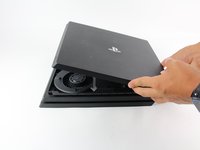
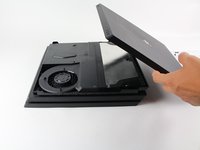
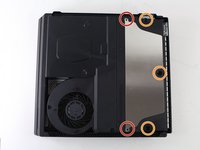
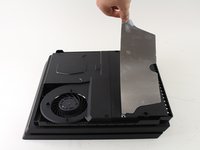
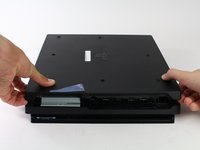
    • Use your finger to pull and snap off the plastic cover over the hard drive.

  2. PlayStation 4 Pro Power Supply Unit Replacement: adım 2, 2 resimden 1. PlayStation 4 Pro Power Supply Unit Replacement: adım 2, 2 resimden 2.
    • Use a screwdriver to remove the single Phillips #0 screw securing the hard drive caddy.

    • Pull the hard drive caddy straight out.

  3. PlayStation 4 Pro Power Supply Unit Replacement: adım 3, 3 resimden 1. PlayStation 4 Pro Power Supply Unit Replacement: adım 3, 3 resimden 2. PlayStation 4 Pro Power Supply Unit Replacement: adım 3, 3 resimden 3.
    • Flip the console right side up.

    • Grip the two corners located at the front of the device.

    • Pull upwards until a loud click is heard.

    • This may require a lot of force, so do not be afraid to get a little rough with your console.

    • After both corners detach, slide the cover backwards and lift off.

  4. PlayStation 4 Pro Power Supply Unit Replacement: adım 4, 3 resimden 1. PlayStation 4 Pro Power Supply Unit Replacement: adım 4, 3 resimden 2. PlayStation 4 Pro Power Supply Unit Replacement: adım 4, 3 resimden 3.
    • Use a T8 Torx Security screwdriver to remove the five screws.

    • Two 31mm screws.

    • Three 10mm screws.

    • Remove the metal plate.

  5. PlayStation 4 Pro Power Supply Unit Replacement: adım 5, 3 resimden 1. PlayStation 4 Pro Power Supply Unit Replacement: adım 5, 3 resimden 2. PlayStation 4 Pro Power Supply Unit Replacement: adım 5, 3 resimden 3.
    • Flip the console to its back once again.

    • Use a T8 Torx Security screwdriver to remove the three black 7mm screws in the back panel.

    • Remove the bottom cover in the same way as the top cover. Grip on both sides, pull up until a click is heard and slide off.

  6. PlayStation 4 Pro Power Supply Unit Replacement: adım 6, 2 resimden 1. PlayStation 4 Pro Power Supply Unit Replacement: adım 6, 2 resimden 2.
    • Use a T8 Torx security screwdriver to remove the two 10mm silver screws from the metal plate.

  7. PlayStation 4 Pro Power Supply Unit Replacement: adım 7, 3 resimden 1. PlayStation 4 Pro Power Supply Unit Replacement: adım 7, 3 resimden 2. PlayStation 4 Pro Power Supply Unit Replacement: adım 7, 3 resimden 3.
    • Flip the console over to continue working on the top side.

    • Place fingers underneath edge of power supply unit on both sides and pull straight up.

    • Be careful not to pull too far, the assembly is still connected at one point.

    • Grip the connector behind the power supply and pull straight out.

Sonuç

To reassemble your device, follow these instructions in reverse order.

36 farklı kişi bu kılavuzu tamamladı.

Ashlyn Chow

Üyelik tarihi: 04/25/17

3.345 İtibar

1 Kılavuz yazıldı

Ekip

Cal Poly, Team S21-G5, Livingston Spring 2017 Cal Poly, Team S21-G5, Livingston Spring 2017 üyesi

CPSU-LIVINGSTON-S17S21G5

4 Üyeler

49 adet Kılavuz yazıldı

10 Yorum

Thank you soooo much for helping me save my ps4 pro guys! At the moment I love you like no one before! ;D

Fayce D D - Yanıt

Can you go further in your tear-down and show us how to open up the power supply without breaking the PSU plastic case? Thanks. ^_^

Matt - Yanıt

I bought a PS4 power supply CR 300 and my PS4 has an FR 300 power supply will they interchange

joseph fish - Yanıt

My PlayStation Pro has a power supply FR 300 and the power supply I bought was a CR 300 power supply will they interchange

joseph fish - Yanıt

Hola como saber que tipo de fuente vida mi ps4 pro modelo 7215b

Tomás Javier - Yanıt

Yorum Ekle

İstatistikleri Görüntüle:

Son 24 Saat: 24

Son 7 gün: 172

Son 30 gün: 781

Her zaman: 91,036