Ana içeriğe geç

PlayStation Laser from a SCPH-7501 or SCPH-9001 Replacement

Arşivlenmiş Kılavuz
Bu kılavuz sadece arşivsel amaçlarla muhafaza edilmiştir. Onarımınızı gerçekleştirmek için kılavuzun güncel halini kullanın.

Neye ihtiyacın var

  1. PlayStation Laser from a SCPH-7501 or SCPH-9001 Replacement, Laser from a SCPH-7501: adım 1, 3 resimden 1. PlayStation Laser from a SCPH-7501 or SCPH-9001 Replacement, Laser from a SCPH-7501: adım 1, 3 resimden 2. PlayStation Laser from a SCPH-7501 or SCPH-9001 Replacement, Laser from a SCPH-7501: adım 1, 3 resimden 3.
    • Remove the parallel port cover on the back of the PlayStation.

    • Flip over the PlayStation and remove the six screws from the bottom.

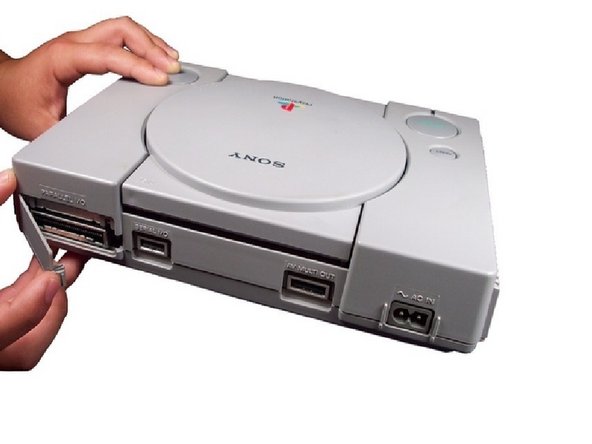
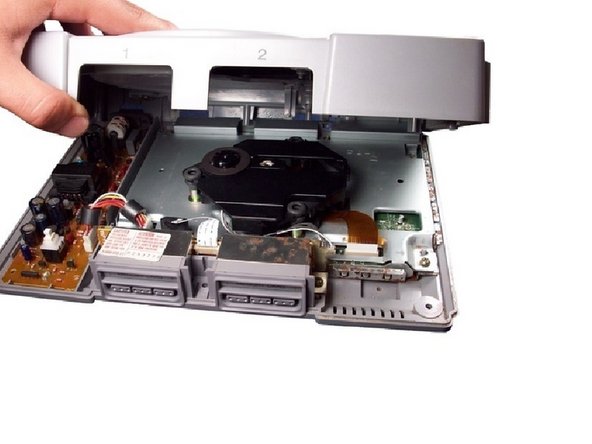
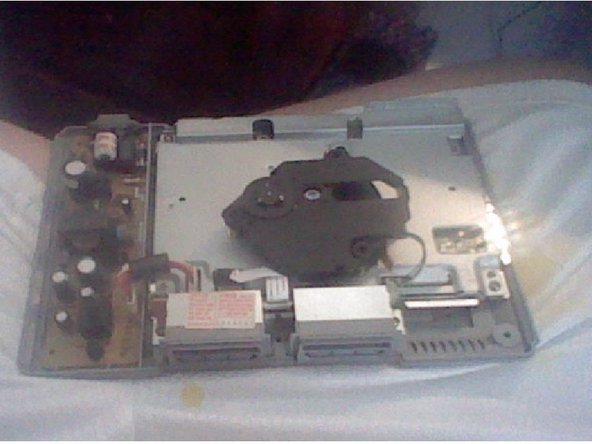
    • Turn the PlayStation upright. Remove the cover by lifting it up.

  2. PlayStation Laser from a SCPH-7501 or SCPH-9001 Replacement: adım 2, 3 resimden 1. PlayStation Laser from a SCPH-7501 or SCPH-9001 Replacement: adım 2, 3 resimden 2. PlayStation Laser from a SCPH-7501 or SCPH-9001 Replacement: adım 2, 3 resimden 3.
    • Carefully disconnect the gold-colored ribbon cable from it's connector. To avoid damaging the cable, pull it by the white, reinforced tab.

  3. PlayStation Laser from a SCPH-7501 or SCPH-9001 Replacement: adım 3, 3 resimden 1. PlayStation Laser from a SCPH-7501 or SCPH-9001 Replacement: adım 3, 3 resimden 2. PlayStation Laser from a SCPH-7501 or SCPH-9001 Replacement: adım 3, 3 resimden 3.
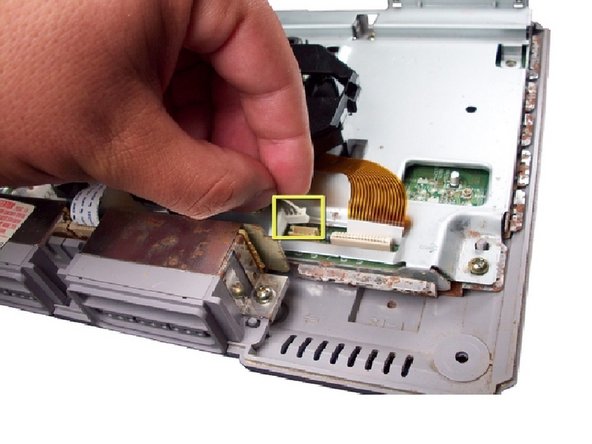
    • Disconnect the second cable by pulling up on the plastic connector at the end.

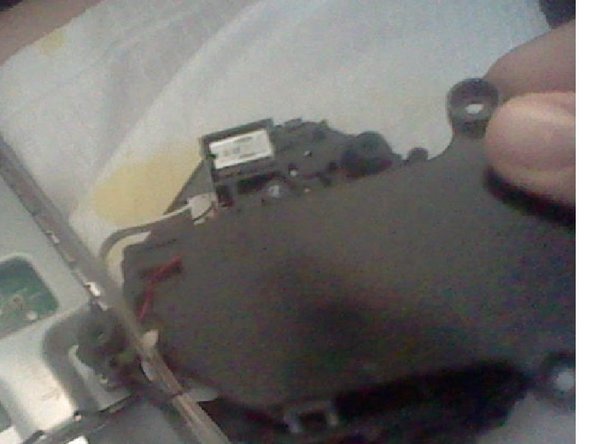
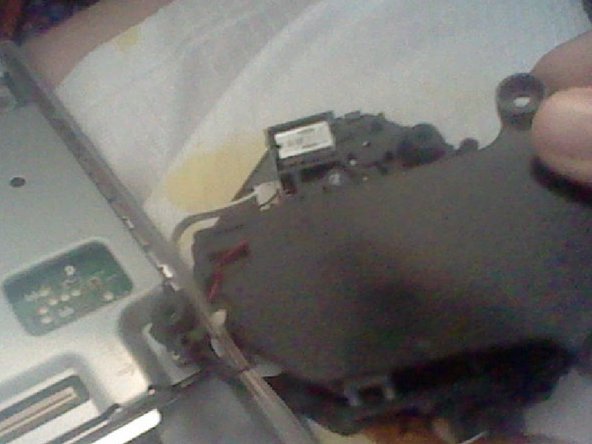
    • Remove the 2 screws and take the black bottom piece of the old Optical drive.

    • Take the new Optical drive from either a SCPH-7501 or an SCPH-9001.

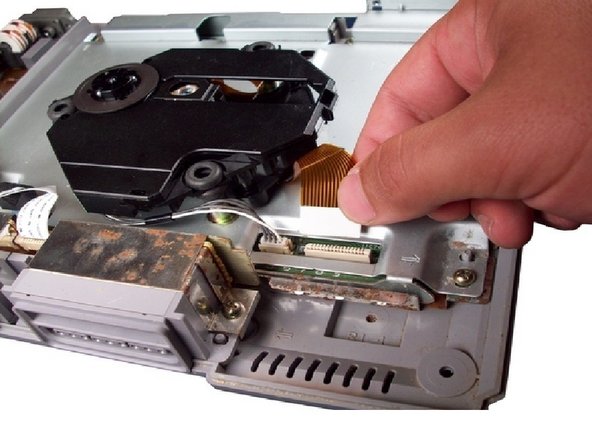
    • Gently pull on the orange ribbon, but not too much or you could rip it.

  4. PlayStation Laser from a SCPH-7501 or SCPH-9001 Replacement: adım 4, 1 resimden 1.
    • Take the bottom piece you took out and place it on the new Optical drive and screw it on the new drive.

  5. PlayStation Laser from a SCPH-7501 or SCPH-9001 Replacement: adım 5, 1 resimden 1.
    • Here is what your work should look like.

    • Put it back together, plug it in, turn it on and test it to see if it works.

Sonuç

To reassemble your device, follow these instructions in reverse order.

2 farklı kişi bu kılavuzu tamamladı.

Unchi

Üyelik tarihi: 10/27/13

367 İtibar

2 adet Kılavuz yazıldı

0 Yorum

Yorum Ekle

İstatistikleri Görüntüle:

Son 24 Saat: 0

Son 7 gün: 0

Son 30 gün: 0

Her zaman: 1,620