Bu sürüm, hatalı düzenlemeler içerebilir. En son doğrulanmış bellek kopyası dönün.
Neye ihtiyacın var
-
Bu adım çevrilmemiş. Çevrilmesine yardım edin
-
Unscrew and remove the four screws from the left side of the camera (from the screen's view)
-
-
Bu adım çevrilmemiş. Çevrilmesine yardım edin
-
Unscrew and remove the three screws from the bottom of the camera
-
-
Bu adım çevrilmemiş. Çevrilmesine yardım edin
-
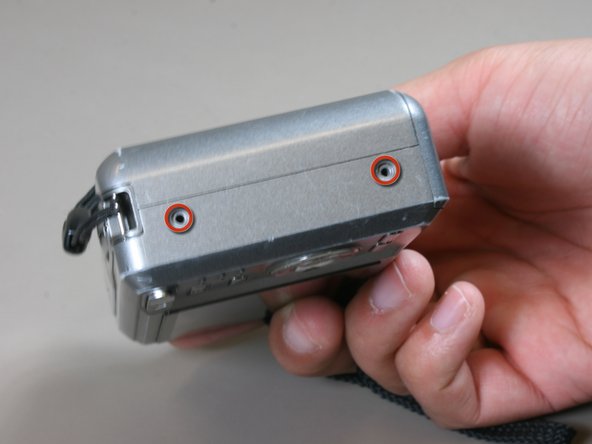
Unscrew and remove the two screws from the right side of the camera.
-
-
Bu adım çevrilmemiş. Çevrilmesine yardım edin
-
Open the battery flap and remove the batteries.
-
Keep the battery flap open.
-
-
Bu adım çevrilmemiş. Çevrilmesine yardım edin
-
Use a spudger to gently separate the two halves of the camera's outer casing.
-
-
-
Bu adım çevrilmemiş. Çevrilmesine yardım edin
-
Gently pull the half of the case with the screen (the back half) from the rest of the camera.
-
-
Bu adım çevrilmemiş. Çevrilmesine yardım edin
-
The back half (the half with the screen on it) should now be separate from the rest of the camera, but still attached by the ribbon.
-
-
Bu adım çevrilmemiş. Çevrilmesine yardım edin
-
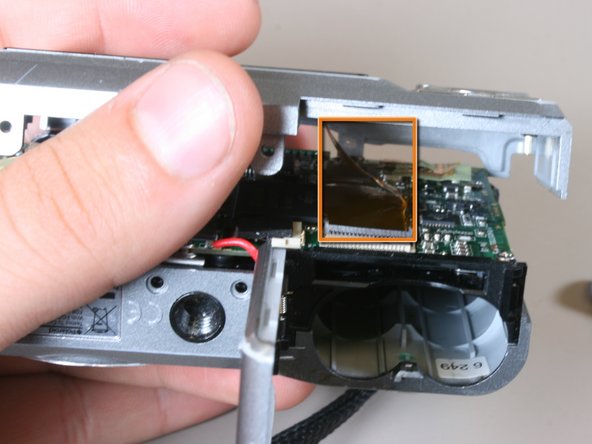
Use a spudger to lift the black flap that clamps the ribbon towards you.
-
When the black flap is open it will be straight up. (like in the second picture)
-
-
Bu adım çevrilmemiş. Çevrilmesine yardım edin
-
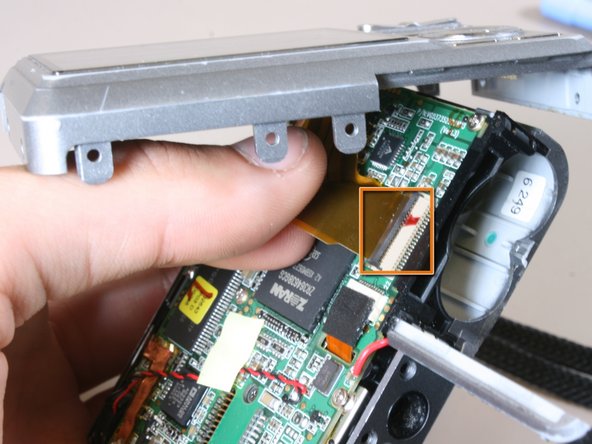
Now that the black flap is open, gently pull the ribbon out.
-
You should now have the back half of the camera completely separate from the rest of the camera.
-
-
Bu adım çevrilmemiş. Çevrilmesine yardım edin
-
This is what the back half of the camera should look like.
-
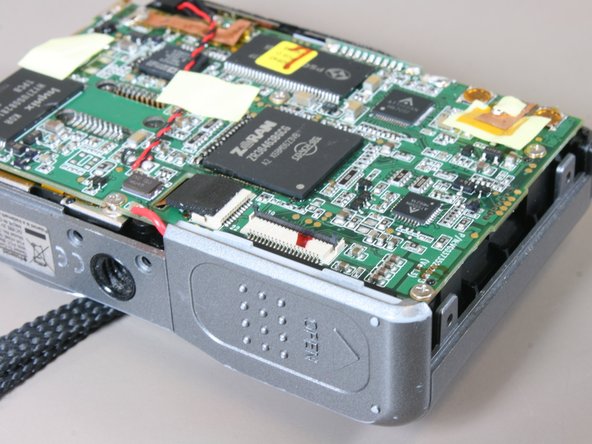
This is what the rest of the camera will look like.
-


Ekip

Cal Poly, Team 3-4, Johann Summer 2010 Cal Poly, Team 3-4, Johann Summer 2010 üyesi
CPSU-JOHANN-R10S3G4
4 Üyeler
8 adet Kılavuz yazıldı