Ana içeriğe geç

Portable Power Station Battery Disconnection

Salt Önkoşul
Bu kılavuz yalnızca diğer kılavuzlar için bir ön koşul olarak kullanılmak üzere tasarlanmıştır. Tek başına eksiktir.

Neye ihtiyacın var

  1. Portable Power Station Battery Disconnection, Shut down your power station: adım 1, 3 resimden 1. Portable Power Station Battery Disconnection, Shut down your power station: adım 1, 3 resimden 2. Portable Power Station Battery Disconnection, Shut down your power station: adım 1, 3 resimden 3.
    • Let your Portable Power Station's battery drain below 25% before starting this repair. A charged lithium‑ion battery may catch fire if damaged.

    • Hold down the blue action button for five seconds to shut down your power station.

    • Collapse the kickstand.

  2. Portable Power Station Battery Disconnection, Remove the rear cover screws: adım 2, 2 resimden 1. Portable Power Station Battery Disconnection, Remove the rear cover screws: adım 2, 2 resimden 2.
    Bu adımda kullanılan alet:
    FixMat
    $36.95
    • Throughout this repair, keep track of each screw and make sure it goes back exactly where it came from.

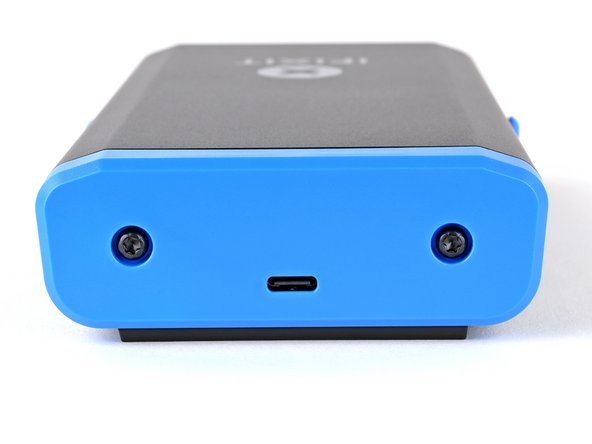
    • Use a T10 Torx screwdriver to remove the two 8 mm‑long screws securing the rear cover.

  3. Portable Power Station Battery Disconnection, Remove the rear cover: adım 3, 3 resimden 1. Portable Power Station Battery Disconnection, Remove the rear cover: adım 3, 3 resimden 2. Portable Power Station Battery Disconnection, Remove the rear cover: adım 3, 3 resimden 3.
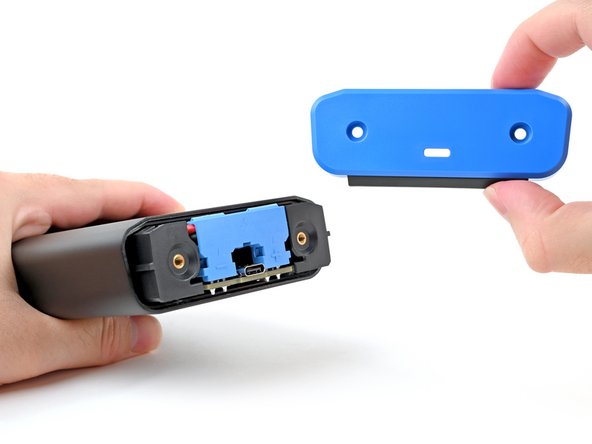
    • Grab the rear cover and pull the bottom edge towards you.

    • Remove the rear cover.

    • Don't try to remove the enclosure while the battery is still connected, or you'll damage the battery connector.

    • During reassembly, hook in the top edge of the rear cover first, then press the bottom edge into place.

  4. Portable Power Station Battery Disconnection, Pry up the battery connector: adım 4, 2 resimden 1. Portable Power Station Battery Disconnection, Pry up the battery connector: adım 4, 2 resimden 2.
    • To avoid an electrical shock, don't use metal tools to disconnect the battery.

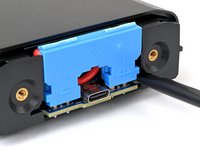
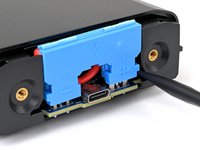
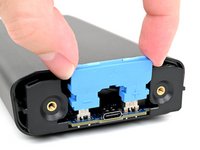
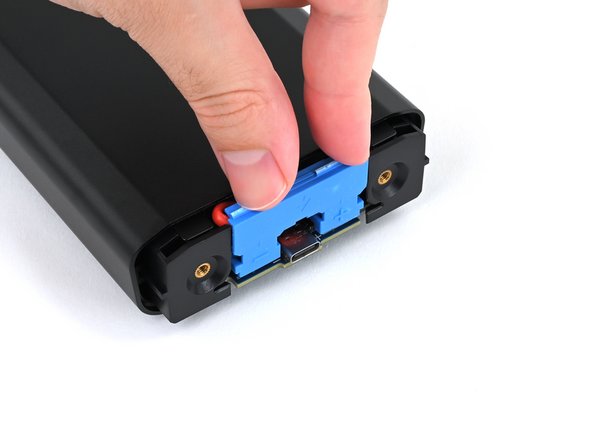
    • Insert the flat end of a spudger into one of the slots on either side of the battery connector. They're shaped just for this!

    • Use the spudger to begin prying up the connector.

    • If it's your first time disconnecting the battery, this may take some force.

  5. Portable Power Station Battery Disconnection: adım 5, 3 resimden 1. Portable Power Station Battery Disconnection: adım 5, 3 resimden 2. Portable Power Station Battery Disconnection: adım 5, 3 resimden 3.
    • Repeat the process and pry up on alternating sides of the battery connector to "walk" it off of the two plugs, enough that you can easily grip it with your fingers.

    • You may have to reposition your spudger to fully release the battery connector. Be careful not to damage the board if you pry against it.

  6. Portable Power Station Battery Disconnection, Disconnect the battery: adım 6, 2 resimden 1. Portable Power Station Battery Disconnection, Disconnect the battery: adım 6, 2 resimden 2.
    • Don't try to force the connector off or you might hurt yourself on the metal edges of the enclosure. If the connector doesn't come off easily, continue prying up with your spudger until the connector is loose enough to easily disconnect.

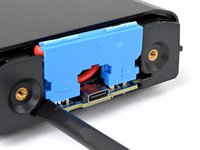
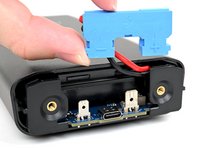
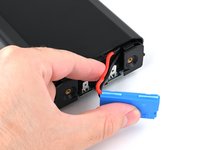
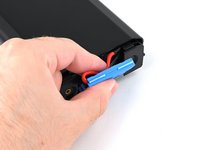
    • Grasp the battery connector by its edges and pull straight up to disconnect it.

  7. Portable Power Station Battery Disconnection, Reassembly information: adım 7, 3 resimden 1. Portable Power Station Battery Disconnection, Reassembly information: adım 7, 3 resimden 2. Portable Power Station Battery Disconnection, Reassembly information: adım 7, 3 resimden 3.
    • During reassembly, follow these steps to reconnect the battery:

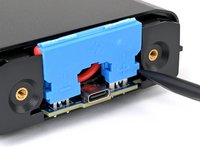
    • Tuck the wires behind the connector, so the side of the connector with positive (+) and negative (-) markings is facing outward.

    • Make sure the wires aren't pinched by the enclosure.

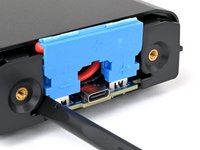
    • Align the connector over its two metal plugs so the negative (-) side is on the left of the USB‑C port and the positive (+) side is on the right.

    • Slide the connector onto its plugs and push down firmly until it's fully seated.

Bitiş Çizgisi

Nick Schultz

Üyelik tarihi: 03/24/24

19.496 İtibar

114 adet Kılavuz yazıldı

Ekip

iFixit iFixit üyesi

Staff

120 Üyeler

19.665 adet Kılavuz yazıldı

0Kılavuz Yorumları

Yorum Ekle

İstatistikleri Görüntüle:

Son 24 Saat: 1

Son 7 gün: 1

Son 30 gün: 22

Her zaman: 35