Ana içeriğe geç

Porter-Cable 382 Dust Seal | Dust Break Replacement

Neye ihtiyacın var

  1. Porter-Cable 382 Dust Seal | Dust Break Replacement, Sander Pad: adım 1, 1 resimden 1.
    • When changing the sander pad, be sure to rotate the sander upside down so the pad and three highlighted screws are facing upward toward you.

    • Once the sander is upside down begin by removing your old sandpaper.

    • Once the sandpaper is removed locate the three screws on your sander pad.

  2. Porter-Cable 382 Dust Seal | Dust Break Replacement: adım 2, 1 resimden 1.
    • Remove the three, (star bolt) screws with the iFixit screw driver with a "T20" head. Be sure to hold the pad of the sander as it will rotate as you try to loosen the screws.

    • Once the screws are removed pull upward toward you and the sander pad will come apart from the device.

  3. Porter-Cable 382 Dust Seal | Dust Break Replacement, Dust Seal/ Break: adım 3, 1 resimden 1.
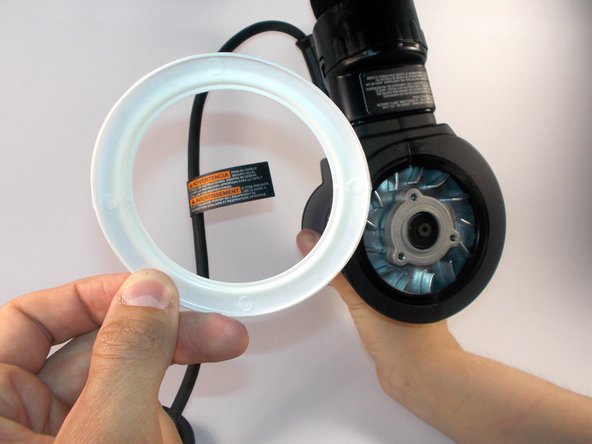
    • Once the sander pad is removed and the sander is exposed locate the white plastic like circular piece surrounding the outside of the sander.

  4. Porter-Cable 382 Dust Seal | Dust Break Replacement: adım 4, 2 resimden 1. Porter-Cable 382 Dust Seal | Dust Break Replacement: adım 4, 2 resimden 2.
    • Once you have located the plastic white ring pull up its outer edge as shown. The lip on the inside will bend and be freed from its secured placement.

    • To reassemble, you will have to line up the protruding square with the key slot as shown otherwise your dust seal/ brake will not go back in.

Sonuç

To reassemble your device, follow these instructions in reverse order.

jpfoxracing9

Üyelik tarihi: 03/11/16

189 İtibar

1 Kılavuz yazıldı

Ekip

UMass Dartmouth, Team 8-7, Botvin Spring 2016 UMass Dartmouth, Team 8-7, Botvin Spring 2016 üyesi

UMASSD-BOTVIN-S16S8G7

3 Üyeler

4 adet Kılavuz yazıldı

0 Yorum

Yorum Ekle

İstatistikleri Görüntüle:

Son 24 Saat: 0

Son 7 gün: 6

Son 30 gün: 9

Her zaman: 545