Ana içeriğe geç

Porter-Cable 382 Fan Replacement

Neye ihtiyacın var

  1. Porter-Cable 382 Fan Replacement, Sander Pad: adım 1, 1 resimden 1.
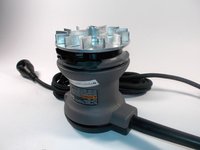
    • When changing the sander pad, be sure to rotate the sander upside down so the pad and three highlighted screws are facing upward toward you.

    • Once the sander is upside down begin by removing your old sandpaper.

    • Once the sandpaper is removed locate the three screws on your sander pad.

  2. Porter-Cable 382 Fan Replacement: adım 2, 1 resimden 1.
    • Remove the three, (star bolt) screws with the iFixit screw driver with a "T20" head. Be sure to hold the pad of the sander as it will rotate as you try to loosen the screws.

    • Once the screws are removed pull upward toward you and the sander pad will come apart from the device.

  3. Porter-Cable 382 Fan Replacement, Dust Seal/ Break: adım 3, 1 resimden 1.
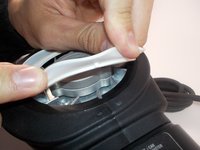
    • Once the sander pad is removed and the sander is exposed locate the white plastic like circular piece surrounding the outside of the sander.

  4. Porter-Cable 382 Fan Replacement: adım 4, 2 resimden 1. Porter-Cable 382 Fan Replacement: adım 4, 2 resimden 2.
    • Once you have located the plastic white ring pull up its outer edge as shown. The lip on the inside will bend and be freed from its secured placement.

    • To reassemble, you will have to line up the protruding square with the key slot as shown otherwise your dust seal/ brake will not go back in.

  5. Porter-Cable 382 Fan Replacement, Fan: adım 5, 2 resimden 1. Porter-Cable 382 Fan Replacement, Fan: adım 5, 2 resimden 2.
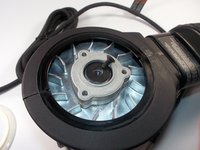
    • Once the dust brake/ seal is removed locate the screw in the center of the device holding down the bearing and fan assembly.

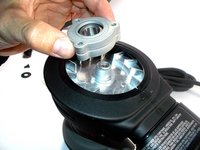
    • unscrew this bolt using a T20 star bit and carefully remove the washer and bearing as shown.

  6. Porter-Cable 382 Fan Replacement: adım 6, 1 resimden 1.
    • Next locate the bolts holding down the guard assembly as shown. There will be one bolt on each side, two in total.

    • Using a T15 star bit unscrew these bolts and make sure you keep them in a safe place.

  7. Porter-Cable 382 Fan Replacement: adım 7, 1 resimden 1.
    • Once the two screws are removed locate the o-ring that seals the dust collector to its opening.

    • Very delicately pry the o-ring out of its slot using a nylon spudger or plastic opening tool. Then roll it off of the opening as shown.

  8. Porter-Cable 382 Fan Replacement: adım 8, 2 resimden 1. Porter-Cable 382 Fan Replacement: adım 8, 2 resimden 2.
    • Now the two guards will come apart as shown, giving you access to the fan.

    • During reassembly, the two guards will line up so that the dust collector opening lines up with the power cord as shown.

  9. Porter-Cable 382 Fan Replacement: adım 9, 1 resimden 1.
    • The fan can then simply be pulled from its axle and be replaced with the fan blades facing up.

Sonuç

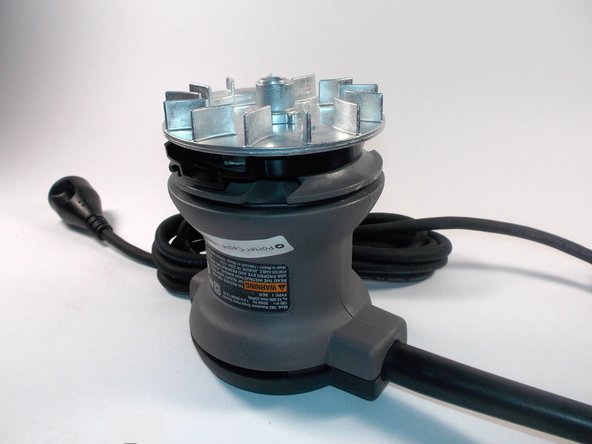
To reassemble your device, follow these instructions in reverse order.

Nick O'Sadcia

Üyelik tarihi: 03/11/16

421 İtibar

3 adet Kılavuz yazıldı

Ekip

UMass Dartmouth, Team 8-7, Botvin Spring 2016 UMass Dartmouth, Team 8-7, Botvin Spring 2016 üyesi

UMASSD-BOTVIN-S16S8G7

3 Üyeler

4 adet Kılavuz yazıldı

0 Yorum

Yorum Ekle

İstatistikleri Görüntüle:

Son 24 Saat: 0

Son 7 gün: 0

Son 30 gün: 4

Her zaman: 307