Ana içeriğe geç

Power Mac G4 Cube Video Card Replacement

Neye ihtiyacın var

  1. Power Mac G4 Cube Video Card Replacement, Outer Case: adım 1, 3 resimden 1. Power Mac G4 Cube Video Card Replacement, Outer Case: adım 1, 3 resimden 2. Power Mac G4 Cube Video Card Replacement, Outer Case: adım 1, 3 resimden 3.
    • Release the back handle of the PowerMac. Slowly pull out the cube by holding the end of the handle. Watch for any parts that may become entangled with the outer case.

    • Push back the handle after you have taken the core out of the case.

  2. Power Mac G4 Cube Video Card Replacement: adım 2, 2 resimden 1. Power Mac G4 Cube Video Card Replacement: adım 2, 2 resimden 2.
    • Place the cube upside down and remove the four T10 Torx screws on the front plate. Then remove the two screws on each side.

  3. Power Mac G4 Cube Video Card Replacement: adım 3, 1 resimden 1.
    • Slowly lift the plate off the cube and disconnect the power cord.

  4. Power Mac G4 Cube Video Card Replacement: adım 4, 1 resimden 1.
    • Remove the four pillars from each corner.

    • The pillars should come out fairly easily.

  5. Power Mac G4 Cube Video Card Replacement, Video Card: adım 5, 1 resimden 1.
    • Remove the screws on the back of the VGA port.

  6. Power Mac G4 Cube Video Card Replacement: adım 6, 1 resimden 1.
    • Remove the screw attaching the video card to the logic board.

  7. Power Mac G4 Cube Video Card Replacement: adım 7, 2 resimden 1. Power Mac G4 Cube Video Card Replacement: adım 7, 2 resimden 2.
    • Remove power cord from the video card.

  8. Power Mac G4 Cube Video Card Replacement: adım 8, 1 resimden 1.
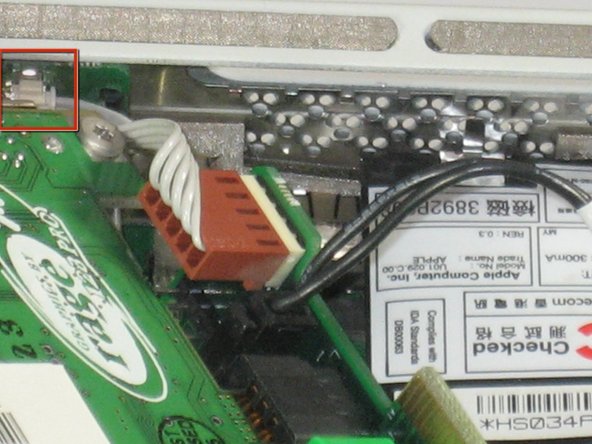
    • Remove the power cord.

    • Remove the connector.

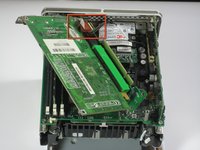
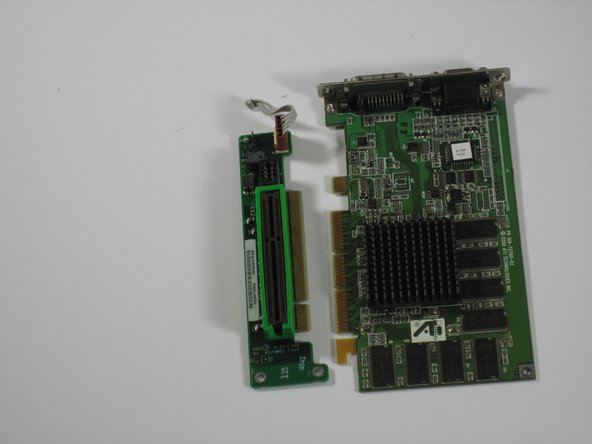
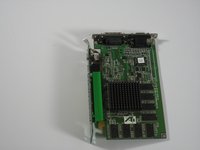
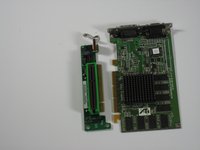
    • Remove the video card from the logic board.

  9. Power Mac G4 Cube Video Card Replacement: adım 9, 1 resimden 1.
    • Carefully lift the video card from the logic board.

    • The video card should come out easily.

  10. Power Mac G4 Cube Video Card Replacement: adım 10, 2 resimden 1. Power Mac G4 Cube Video Card Replacement: adım 10, 2 resimden 2.
    • Separate the video card from the adapter.

Sonuç

To reassemble your device, follow these instructions in reverse order.

9 farklı kişi bu kılavuzu tamamladı.

Ryan Chun

Üyelik tarihi: 06/24/10

1.076 İtibar

7 adet Kılavuz yazıldı

Ekip

Cal Poly, Team 2-7, Johann Summer 2010 Cal Poly, Team 2-7, Johann Summer 2010 üyesi

CPSU-JOHANN-R10S2G7

5 Üyeler

14 adet Kılavuz yazıldı

0 Yorum

Yorum Ekle

İstatistikleri Görüntüle:

Son 24 Saat: 1

Son 7 gün: 11

Son 30 gün: 30

Her zaman: 10,532