Ana içeriğe geç

Qanba Crystal Joystick and Buttons Replacement

Neye ihtiyacın var

  1. Qanba Crystal Joystick and Buttons Replacement, Button, Joystick and Artwork: adım 1, 3 resimden 1. Qanba Crystal Joystick and Buttons Replacement, Button, Joystick and Artwork: adım 1, 3 resimden 2. Qanba Crystal Joystick and Buttons Replacement, Button, Joystick and Artwork: adım 1, 3 resimden 3.
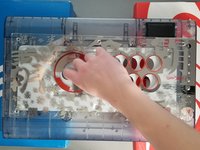
    • Use the Phillips #1 screwdriver to remove the eight 20 mm screws.

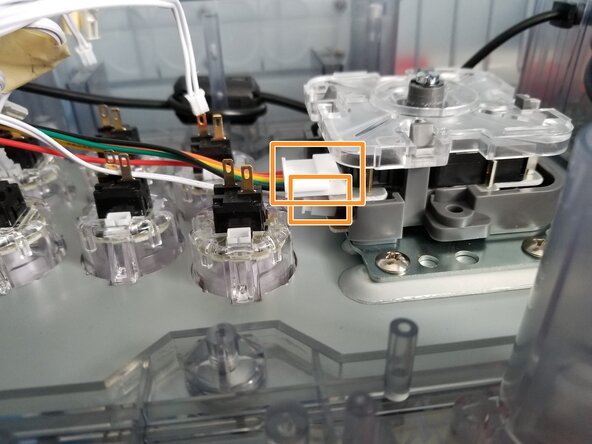
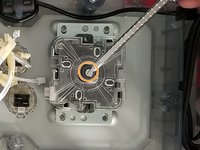
    • Remove the metal plate to gain access to the internals of the device.

  2. Qanba Crystal Joystick and Buttons Replacement: adım 2, 3 resimden 1. Qanba Crystal Joystick and Buttons Replacement: adım 2, 3 resimden 2. Qanba Crystal Joystick and Buttons Replacement: adım 2, 3 resimden 3.
    Bu adımda kullanılan alet:
    Tweezers
    $4.99
    Satın Al
    • Taking a picture or marking cables with masking tape is advised as it will help with the reassembly process.

    • Each button has three cables, unplug these from each one.

    • The joystick has two cables, unplug both of these.

    • The use of ESD safe tweezers may assist with unplugging the cables.

  3. Qanba Crystal Joystick and Buttons Replacement: adım 3, 3 resimden 1. Qanba Crystal Joystick and Buttons Replacement: adım 3, 3 resimden 2. Qanba Crystal Joystick and Buttons Replacement: adım 3, 3 resimden 3.
    • Use the Phillips #1 screwdriver to remove the four 10 mm screws.

    • Use a flathead screwdriver to hold the screw in place.

    • Twist off the ball top of the joystick while holding the screw in place with a screwdriver.

    • Remove the joystick and all of it's components.

  4. Qanba Crystal Joystick and Buttons Replacement: adım 4, 1 resimden 1.
    • Press in the tabs on the top and bottom of the buttons to remove them.

    • The outline of the buttons are sharp, do exercise caution with the removal of the buttons.

  5. Qanba Crystal Joystick and Buttons Replacement: adım 5, 3 resimden 1. Qanba Crystal Joystick and Buttons Replacement: adım 5, 3 resimden 2. Qanba Crystal Joystick and Buttons Replacement: adım 5, 3 resimden 3.
    • Flip the controller over.

    • Peel the six shiny stickers and their epoxy glue off of the controller.

    • Remove the six newly revealed Phillips screws.

    • Remove the acrylic panel.

Sonuç

To reassemble your device, follow these instructions in reverse order.

Kevin Vu

Üyelik tarihi: 06/29/21

121 İtibar

1 Kılavuz yazıldı

0 Yorum

Yorum Ekle

İstatistikleri Görüntüle:

Son 24 Saat: 7

Son 7 gün: 33

Son 30 gün: 188

Her zaman: 2,551