Ana içeriğe geç

RCA Visys 25212 Ear Piece Speaker Replacement

Neye ihtiyacın var

  1. RCA Visys 25212 Ear Piece Speaker Replacement, Handset Battery: adım 1, 1 resimden 1.
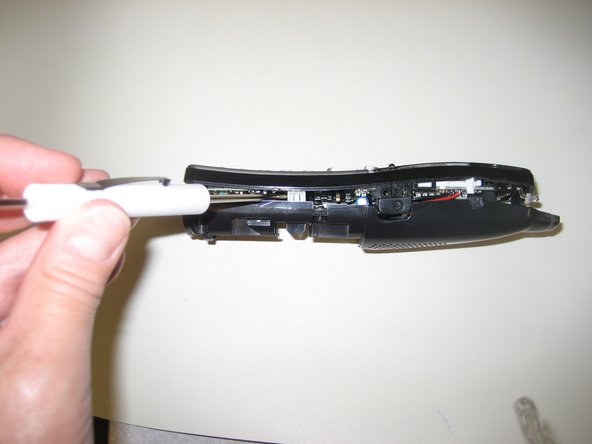
    • Place your thumb in the groove on the back of handset. Next, push down with your thumb and then slide the battery cover towards the bottom of the phone to remove the battery cover.

  2. RCA Visys 25212 Ear Piece Speaker Replacement: adım 2, 2 resimden 1. RCA Visys 25212 Ear Piece Speaker Replacement: adım 2, 2 resimden 2.
    • To remove the battery, gently pull up on the white connector located on the left side of the phone.

  3. RCA Visys 25212 Ear Piece Speaker Replacement, Handset: adım 3, 1 resimden 1.
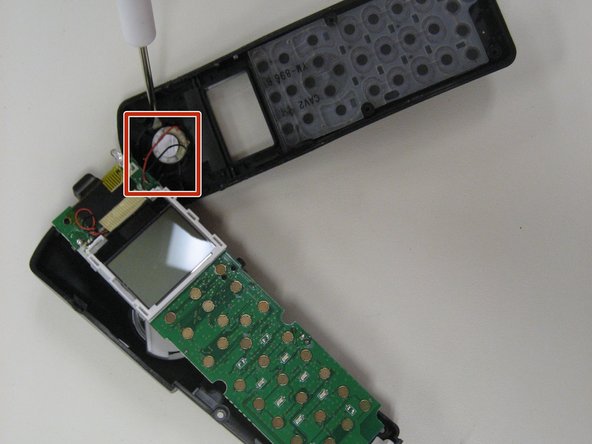
    • Remove the four screws, located at each of the corners within the back encasing, with a small Phillips head screwdriver.

  4. RCA Visys 25212 Ear Piece Speaker Replacement: adım 4, 2 resimden 1. RCA Visys 25212 Ear Piece Speaker Replacement: adım 4, 2 resimden 2.
    • Insert a small flathead screwdriver between the face plate and the back of the handset.

    • Gently pry open the handset. You may need to insert the flathead screwdiver at multiple points in order to open the handset.

  5. RCA Visys 25212 Ear Piece Speaker Replacement: adım 5, 1 resimden 1.
    • Using a small Phillips head screwdriver, remove the single screw (located at the top right) holding the circuit board in place.

  6. RCA Visys 25212 Ear Piece Speaker Replacement: adım 6, 2 resimden 1. RCA Visys 25212 Ear Piece Speaker Replacement: adım 6, 2 resimden 2.
    • Lift up the circuit board to expose the keypad.

    • Be careful not to disconnect the two wires that connect the speaker to the circuit board.

    • Also, notice the two wires located at the bottom when lifting the circuit board, as these are apart of the charger.

  7. RCA Visys 25212 Ear Piece Speaker Replacement, Ear Piece Speaker: adım 7, 1 resimden 1.
    • Gently lift out speaker using a small flathead screwdriver.

  8. RCA Visys 25212 Ear Piece Speaker Replacement: adım 8, 1 resimden 1.
    • Set the speaker with the wires still attached on a flat surface. Place the tip of the soldering iron next to one of the leads until you are able to lift up the wire.

    • Repeat this process for the other lead.

    • Be sure you replace the wires at the same location on the new speaker.

Sonuç

To reassemble your device, follow these instructions in reverse order.

Sandy South

Üyelik tarihi: 01/26/15

431 İtibar

4 adet Kılavuz yazıldı

Ekip

Pasco Hernando, Team 5-3, Prince Winter 2015 Pasco Hernando, Team 5-3, Prince Winter 2015 üyesi

PHSC-PRINCE-W15S5G3

6 Üyeler

8 adet Kılavuz yazıldı

0 Yorum

Yorum Ekle

İstatistikleri Görüntüle:

Son 24 Saat: 0

Son 7 gün: 0

Son 30 gün: 0

Her zaman: 149