Bu çeviri bir makine tarafından oluşturulmuştur ve henüz bir kişi tarafından incelenmemiştir. Bu dili konuşuyor musunuz? İnceleme için.
Giriş
RIDGID matkap onarımının ilk adımı. Tek yapmanız gereken kasayı çıkarmak...
Neye ihtiyacın var
-
-
-
Arka plakayı çıkarın.
-
Bir Torx T20 tornavida kullanarak arka plakayı sabitleyen dört vidayı çıkarın.
 FixBot'a Sor
-
-
-
-
Matkap kolunu çıkarın.
-
Yıldız tornavida kullanarak, matkap kolunu gövdeye sabitleyen beş yıldız vidayı çıkarın.
-
-
-
Dişli muhafazasını gövdeden çıkarın.
-
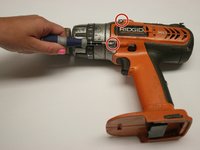
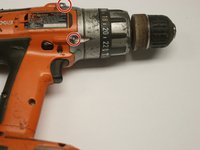
Philips #2 tornavidayı kullanarak, dişli muhafazasını gövdeye sabitleyen dört vidayı sökün.
-
-


Cihazınızı tekrar monte etmek için bu talimatları tersten uygulayın.
İptal et: Bu kılavuzu tamamlamadım.
2 farklı kişi bu kılavuzu tamamladı.

Ekip

Cal Poly, Team 15-48, Garner Spring 2010 Cal Poly, Team 15-48, Garner Spring 2010 üyesi
CPSU-GARNER-S10S15G48
6 Üyeler
60 adet Kılavuz yazıldı
