Ana içeriğe geç

RIDGID R84015 X2 Case Removal

Neye ihtiyacın var

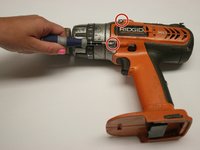
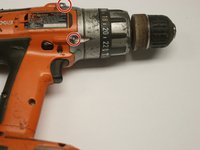
  1. RIDGID R84015 X2 Case Removal, RIDGID R84015 X2 Case Removal: adım 1, 2 resimden 1. RIDGID R84015 X2 Case Removal, RIDGID R84015 X2 Case Removal: adım 1, 2 resimden 2.
    • Remove the backplate.

    • Using a Torx T20 screwdriver, remove the four screws attaching the back plate.

  2. RIDGID R84015 X2 Case Removal: adım 2, 1 resimden 1.
    • Remove the drill handle.

    • Using the Phillips #2 screwdriver, remove the five screws attaching the drill handle to the body.

  3. RIDGID R84015 X2 Case Removal: adım 3, 2 resimden 1. RIDGID R84015 X2 Case Removal: adım 3, 2 resimden 2.
    • Remove the gear casing from the body.

    • Using the Philips #2 screwdriver, remove the four screws attaching the gear casing to the body.

Sonuç

To reassemble your device, follow these instructions in reverse order.

Bir başkası bu kılavuzu tamamladı.

Evan Long

Üyelik tarihi: 04/15/10

262 İtibar

4 adet Kılavuz yazıldı

Ekip

Cal Poly, Team 15-48, Garner Spring 2010 Cal Poly, Team 15-48, Garner Spring 2010 üyesi

CPSU-GARNER-S10S15G48

6 Üyeler

10 adet Kılavuz yazıldı

0 Yorum

Yorum Ekle

İstatistikleri Görüntüle:

Son 24 Saat: 0

Son 7 gün: 1

Son 30 gün: 3

Her zaman: 3,946