Giriş
When a radiator is not getting warm, despite the valve being fully opened, it does not mean you have to call a heating technician right away.
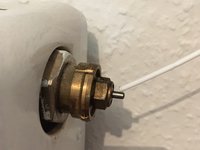
Most likely it is only the transmission pin which controls the flow of hot water that is stuck and not moving as intended.
Neye ihtiyacın var
-
-
-
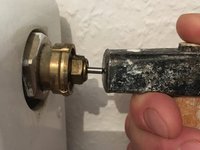
Add some additional lubrication to the pin before screwing the thermostat back on.
-
By pushing the pin in and let it come back out several times using the hammer again, the oil should evenly distribute on the pin, so that in future it is very unlikely, that it is seizing up soon again.
-
That's it! Put the valve/thermostat back on and fix it in place.
-


To reassemble your device, follow the steps in reverse order.
To reassemble your device, follow the steps in reverse order.
İptal et: Bu kılavuzu tamamlamadım.
5 farklı kişi bu kılavuzu tamamladı.
Bu çevirmenlere özel teşekkürler:
100%

Bu çevirmenler dünyayı onarmamıza yardım ediyor! Katkıda bulunmak ister misiniz?
Çeviriye Başlayın ›
Ekip
