Ana içeriğe geç

Bu sürüm, hatalı düzenlemeler içerebilir. En son doğrulanmış bellek kopyası dönün.

Neye ihtiyacın var

  1. Bu adım çevrilmemiş. Çevrilmesine yardım edin

    : adım 1, 3 resimden 1. : adım 1, 3 resimden 2. : adım 1, 3 resimden 3.
    Bu adımda kullanılan alet:
    Safety Glasses
    $3.19
    Satın Al
    • If your display glass is cracked, keep further breakage contained and prevent bodily harm during your repair by taping the glass.

    • Lay overlapping strips of clear packing tape over the iPad's display until the whole face is covered. For particularly bad breaks, you may need to lay down two layers.

    • This will keep glass shards contained and provide structural integrity when prying and lifting the display.

    • Do your best to follow the rest of the guide as described. However, once the glass is broken, it will likely continue to crack as you work, and you may need to use a metal prying tool to scoop the glass out.

    • Protect your eyes! This procedure will cause small pieces of glass to fly directly toward your face. Do not attempt without safety glasses.

  2. , iOpener'ı Isıtma: adım 2, 2 resimden 1. , iOpener'ı Isıtma: adım 2, 2 resimden 2.
    • İşleme başlamadan önce mikrodalganızı temizlenmenizi tavsiye ederiz. Aksi takdirde, yüzeydeki yağlı maddeler iOpener'a yapışabilir.

    • iOpener'ı mikrodalga fırının ortasına yerleştirin.

    • Döner tablalı mikrodalga fırınlar için: Tablanın sorunsuz bir şekilde döndüğünden emin olun. Aksi takdirde, iOpener'ınız takılıp fazla ısınabilir ve yanabilir.

  3. : adım 3, 1 resimden 1.
    • iOpener'ı otuz saniye boyunca ısıtın.

    • Tamir süresince iOpener ısınacağı için, tek seferde otuz saniye olmak üzere yeniden ısıtın.

    • Tamir süresince iOpener'ı fazla ısıtmamaya dikkat edin; fazla ısıtma iOpener'ın patlamasına sebep olabilir.

    • iOpener'ın kabarık bir görüntüsü varsa, kesinlikle dokunmayın.

    • iOpener'ın orta kısmı hala dokunulamayacak kadar sıcaksa, tekrar ısıtmadan önce biraz daha kullanabilirsiniz. Doğru bir şekilde ısıtılmış iOpener, yaklaşık 10 dakika kadar sıcak kalacaktır.

  4. : adım 4, 1 resimden 1.
    • iOpener'ı sıcak olan ortasından değil, herhangi iki ucun birinden tutarak mikrodalga fırından çıkartın.

    • iOpener fırından çıktığında epey sıcak olacaktır, dikkat edin. Gerekli ise, fırın eldiveni kullanabilirsiniz.

  5. Bu adım çevrilmemiş. Çevrilmesine yardım edin

    : adım 5, 2 resimden 1. : adım 5, 2 resimden 2.
    • If you don't have a microwave, follow this step to heat your iOpener in boiling water.

    • Fill a pot or pan with enough water to fully submerge an iOpener.

    • Heat the water to a boil. Turn off the heat.

    • Place an iOpener into the hot water for 2-3 minutes. Make sure the iOpener is fully submerged in the water.

    • Use tongs to extract the heated iOpener from the hot water.

    • Thoroughly dry the iOpener with a towel.

    • The iOpener will be very hot, so be careful to hold it only by the end tabs.

    • Your iOpener is ready for use! If you need to reheat the iOpener, heat the water to a boil, turn off the heat, and place the iOpener in the water for 2-3 minutes.

  6. Bu adım çevrilmemiş. Çevrilmesine yardım edin

    : adım 6, 1 resimden 1.
    • Use your hot iOpener to heat up all four edges of the front panel. Let the iOpener rest on each edge for at least 90 seconds, microwaving for 30 seconds at a time as needed.

    • Take your time and ensure the entire bezel is warm. The more time you spend on this, the less time you'll spend picking out glass shards in the next steps.

    • Once all of the adhesive is warmed, pick out the edge with the largest uncracked section of glass.

    • Try using a suction up to pull up on this section, and then wedge a guitar pick beneath the glass.

    • If the glass is too badly cracked for the suction cup to grab, apply more heat and force the pick in, careful not to damage the LCD.

  7. Bu adım çevrilmemiş. Çevrilmesine yardım edin

    : adım 7, 2 resimden 1. : adım 7, 2 resimden 2.
    • Work your way around the entire perimeter of the front panel with an opening pick.

    • Much of the glass around the bezel will break off from the rest of the panel, and will stay adhered to the rear case of the iPad. Work your way past these pieces to free as much of the glass panel as possible.

    • When you get to the digitizer and (on iPad 4) home button cables, you may find it helpful to cut these cables, rather than risk ripping them out of their sockets and damaging the logic board.

    • Remove the taped-together glass panel from the iPad. Be careful as this will have sharp edges and may drop pieces of glass. Dispose of safely.

  8. Bu adım çevrilmemiş. Çevrilmesine yardım edin

    : adım 8, 3 resimden 1. : adım 8, 3 resimden 2. : adım 8, 3 resimden 3.
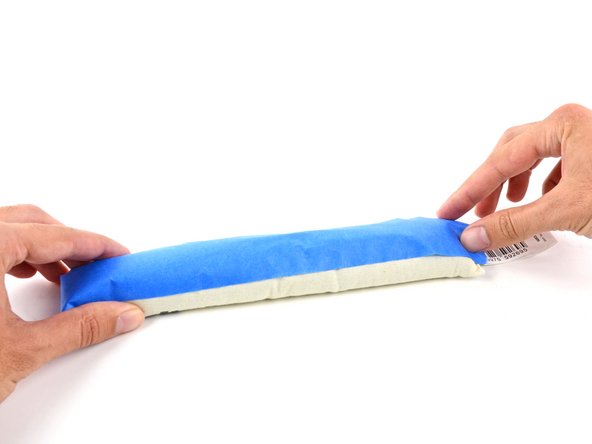
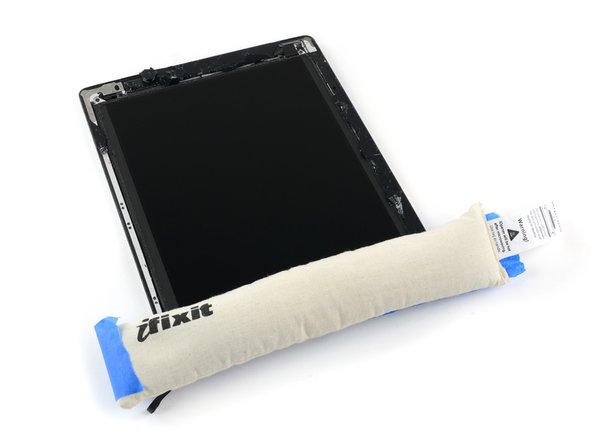
    • For the next step, you'll need to apply your iOpener directly to the broken glass left adhered to the iPad.

    • To protect your iOpener from the glass and keep it from filling with glass dust, stick some masking tape to one side.

    • Heat the iOpener and apply it to one edge of the iPad, directly on top of the pieces of glass that are still adhered to the rear case of the iPad.

    • Leave the iOpener there for at least 90 seconds, to soften the adhesive holding these small pieces in place.

    • Be careful not to touch or otherwise disturb the LCD.

  9. Bu adım çevrilmemiş. Çevrilmesine yardım edin

    : adım 9, 2 resimden 1. : adım 9, 2 resimden 2.
    • Did you take off your safety glasses? If so, put them back on now. Seriously.

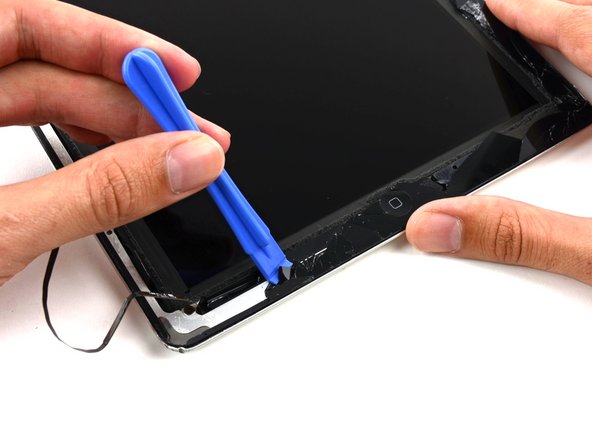
    • Grab your favorite plastic tool and start prying out the remaining pieces of glass from the iPad frame.

    • This is a slow and tedious process, but benefits greatly from heating the adhesive.

    • There is a serious risk of cutting yourself while working with this glass. Work slowly and with controlled force. You may wish to wear thin leather gloves.

    • Remove all of the glass and residual adhesive and continue your repair.

Bitiş Çizgisi

17 farklı kişi bu kılavuzu tamamladı.

Andrew Optimus Goldheart

Üyelik tarihi: 10/17/09

503.280 İtibar

407 adet Kılavuz yazıldı

Ekip

iFixit iFixit üyesi

Staff

136 Üyeler

17.428 adet Kılavuz yazıldı

Bir Yorum

During step 9, if you can manage to grab an end of the adhesive going under glass, see if you can slowly pull it out and to the side of the frame. If the strip doesn’t break too much, this should greatly reduce shard spread and increase speed!

Zachary Pontius - Yanıt

Yorum Ekle

İstatistikleri Görüntüle:

Son 24 Saat: 1

Son 7 gün: 18

Son 30 gün: 82

Her zaman: 11,810