Ana içeriğe geç

Replacing VTech MobiGo Touch Learning System Speaker

Neye ihtiyacın var

  1. Replacing VTech MobiGo Touch Learning System Speaker, Case: adım 1, 1 resimden 1.
    • Remove the battery covers and the four batteries.

  2. Replacing VTech MobiGo Touch Learning System Speaker: adım 2, 2 resimden 1. Replacing VTech MobiGo Touch Learning System Speaker: adım 2, 2 resimden 2.
    • Remove the four plastic caps with a metal spudger to expose the 6.0 mm Philips JIS #0 case screws.

    • Remove the eight 6.0 mm JIS #0 case screws.

  3. Replacing VTech MobiGo Touch Learning System Speaker: adım 3, 2 resimden 1. Replacing VTech MobiGo Touch Learning System Speaker: adım 3, 2 resimden 2.
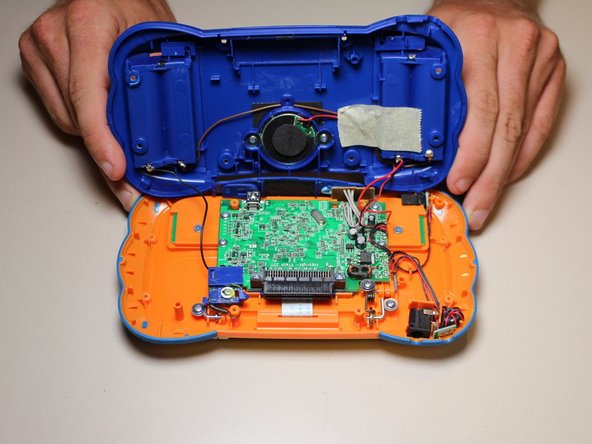
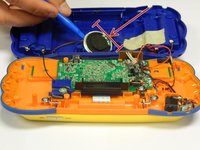
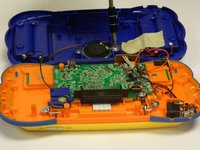
    • Using a plastic opening tool, separate the two pieces of the case carefully.

  4. Replacing VTech MobiGo Touch Learning System Speaker, Speaker: adım 4, 2 resimden 1. Replacing VTech MobiGo Touch Learning System Speaker, Speaker: adım 4, 2 resimden 2.
    • The speaker will be attached to the back of the case.

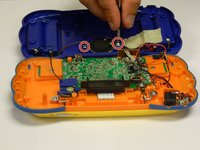
    • Unscrew the two 6.0 mm Philips J0 screws.

    • Careful! The wires are still attached to the back of the case and to the speakers.

  5. Replacing VTech MobiGo Touch Learning System Speaker: adım 5, 2 resimden 1. Replacing VTech MobiGo Touch Learning System Speaker: adım 5, 2 resimden 2.
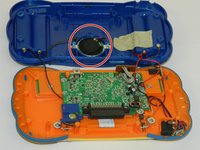
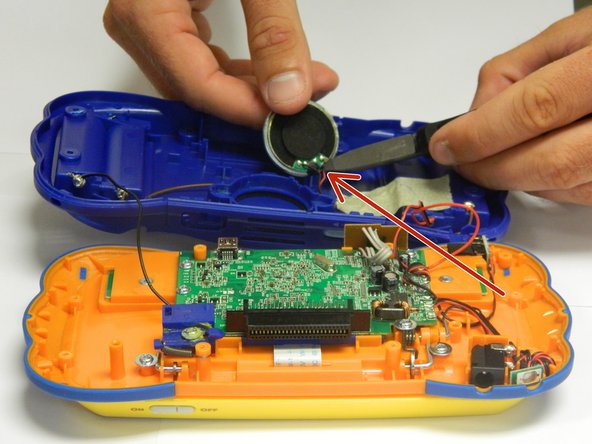
    • Lift the round speaker with a plastic opening tool.

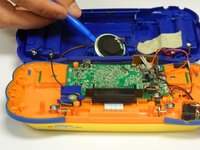
    • Remove the two wires connected to the speaker.

    • You can use wire cutters or regular needle nose pliers to disconnect the wires from the speaker.

    • Once the wires are disconnected, remove the speaker from the back of the case.

  6. Replacing VTech MobiGo Touch Learning System Speaker: adım 6, 2 resimden 1. Replacing VTech MobiGo Touch Learning System Speaker: adım 6, 2 resimden 2.
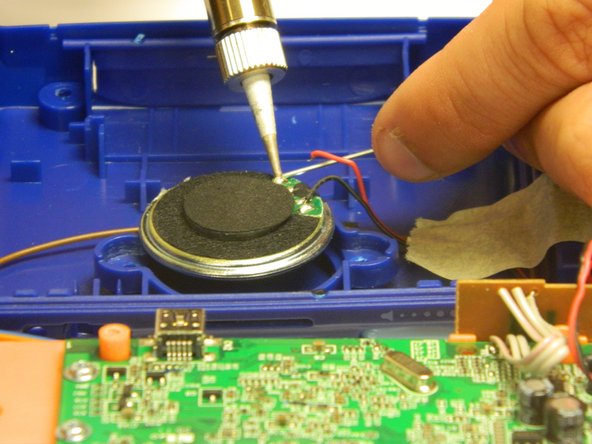
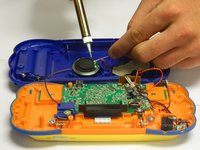
    • Solder the wires to the appropriate spots on the new speaker, making sure that both wires are properly connected.

    • The wires may be hot.

  7. Replacing VTech MobiGo Touch Learning System Speaker: adım 7, 2 resimden 1. Replacing VTech MobiGo Touch Learning System Speaker: adım 7, 2 resimden 2.
    • Insert the new speaker into the hatch located in the middle part of the panel using a plastic spudger.

    • Make sure the speaker is the right size for the panel.

    • Once the speaker is properly placed, screw in the two 6.0 mm Philips J0 screws.

    • Do not over tighten the screws or the panel will break.

Sonuç

To reassemble your case, follow the case instructions in reverse order.

RBansil

Üyelik tarihi: 08/27/15

221 İtibar

2 adet Kılavuz yazıldı

Ekip

USF Tampa, Team 8-3, Eyestone Fall 2015 USF Tampa, Team 8-3, Eyestone Fall 2015 üyesi

USFT-EYESTONE-F15S8G3

3 Üyeler

17 adet Kılavuz yazıldı

0 Yorum

Yorum Ekle

İstatistikleri Görüntüle:

Son 24 Saat: 2

Son 7 gün: 7

Son 30 gün: 11

Her zaman: 1,375