Ana içeriğe geç
Onarım Topluluğuna Katılın - Hesap Oluşturun
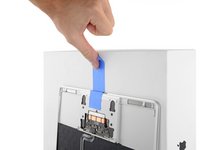
Retina MacBook 2015 Upper Case Assembly Replacement

Neye ihtiyacın var

  1. Retina MacBook 2015 Upper Case Assembly Replacement, Unfasten the lower case: adım 1, 1 resimden 1.
    Bu adımda kullanılan alet:
    Magnetic Project Mat
    $19.95
    • Before proceeding, unplug and power down your MacBook. Close the display and flip it upside-down.

    • Remove the following eight screws securing the lower case:

    • Two 1.8 mm P5 Pentalobe screws

    • Four 2.9 mm P5 Pentalobe screws

    • Two 6.1 mm P5 Pentalobe screws

    • Note the orientation of the screws as you remove them—they need to be reinstalled at a slight angle.

    • Throughout this repair, keep track of each screw and make sure it goes back exactly where it came from to avoid damaging your device.

    FixBot'a Sor

    Yorum Ekle

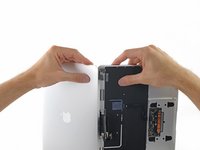
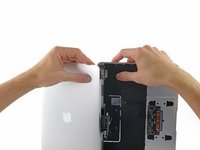
  2. Retina MacBook 2015 Upper Case Assembly Replacement: adım 2, 3 resimden 1. Retina MacBook 2015 Upper Case Assembly Replacement: adım 2, 3 resimden 2. Retina MacBook 2015 Upper Case Assembly Replacement: adım 2, 3 resimden 3.
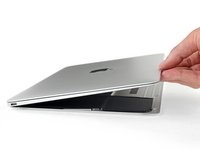
    • Wedge your fingers between the upper case and the lower case, starting from the rear of the MacBook between the hinges.

    • Lift the lower case only slightly to avoid damaging the cables that connect the lower case to the upper case.

    • Keeping a firm grip, lift steadily until the lower case separates slightly from the upper case.

    • You may experience a lot of resistance when lifting the lower case. If necessary, slide an opening pick or other ESD-safe pry tool down the side edges of the lower case to pop the two hidden retaining clips free.

    • During reassembly, to re-engage the clips, press firmly near both side edges of the lower case (near where the pick is inserted in the third image) until you hear the clips snap into place.

    FixBot'a Sor

    Yorum Ekle

  3. Retina MacBook 2015 Upper Case Assembly Replacement: adım 3, 1 resimden 1.
    • While holding the lower case in place, carefully flip the MacBook over so the Apple logo faces up.

    FixBot'a Sor

    Yorum Ekle

  4. Retina MacBook 2015 Upper Case Assembly Replacement: adım 4, 2 resimden 1. Retina MacBook 2015 Upper Case Assembly Replacement: adım 4, 2 resimden 2.
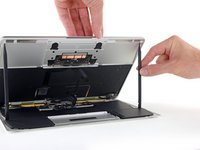
    • Lift the upper case and display together from the front edge and raise it to about a 45˚ angle.

    • It may be helpful to prop the MacBook open in this position for the next step.

    FixBot'a Sor

    Yorum Ekle

  5. Retina MacBook 2015 Upper Case Assembly Replacement: adım 5, 3 resimden 1. Retina MacBook 2015 Upper Case Assembly Replacement: adım 5, 3 resimden 2. Retina MacBook 2015 Upper Case Assembly Replacement: adım 5, 3 resimden 3.
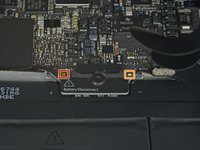
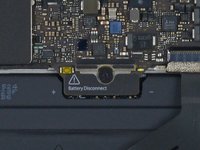
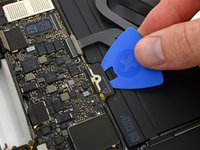
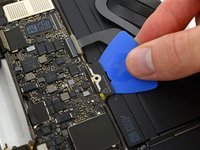
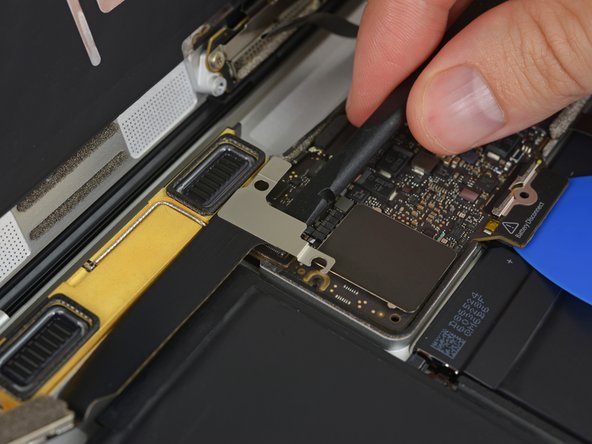
    • Use the flat end of a spudger to press and hold the small gold 'battery disconnect' button.

    • If the power LED is lit up, continue holding the button until the LED goes dark, and then release. This may take up to 10 seconds.

    • If the LED does not light, release the button after 5-10 seconds. Press and hold it again for 5-10 seconds, and release. Finally, press and hold it a third time for 5-10 seconds, and release.

    • This step ensures the MacBook is fully powered down and safe to work on.

    FixBot'a Sor

    Yorum Ekle

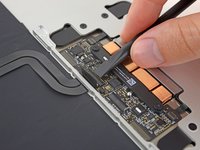
  6. Retina MacBook 2015 Upper Case Assembly Replacement: adım 6, 1 resimden 1.
    • Close the MacBook and carefully flip it upside-down.

    FixBot'a Sor

    Yorum Ekle

  7. Retina MacBook 2015 Upper Case Assembly Replacement: adım 7, 1 resimden 1.
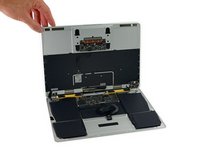
    • Lifting from the front edge, open the lower case to an angle of about 45°.

    • Take care not to damage the ribbon cables that still attach the lower case to the MacBook.

    FixBot'a Sor

    Yorum Ekle

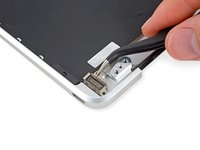
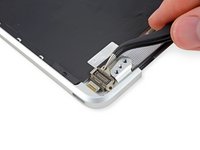
  8. Retina MacBook 2015 Upper Case Assembly Replacement: adım 8, 2 resimden 1. Retina MacBook 2015 Upper Case Assembly Replacement: adım 8, 2 resimden 2.
    Bu adımda kullanılan alet:
    Tweezers
    $4.99
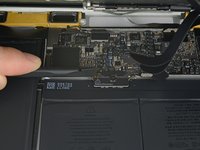
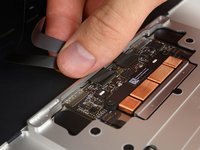
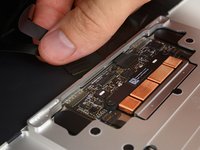
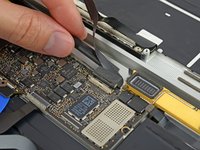
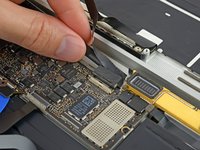
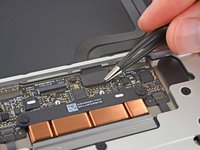
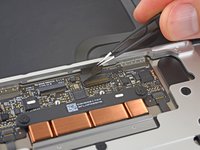
    • Use tweezers to peel back the tape covering the trackpad cable ZIF connector.

    FixBot'a Sor

    Yorum Ekle

  9. Retina MacBook 2015 Upper Case Assembly Replacement: adım 9, 2 resimden 1. Retina MacBook 2015 Upper Case Assembly Replacement: adım 9, 2 resimden 2.
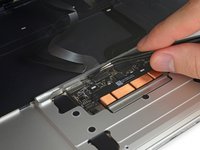
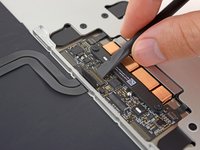
    • Use a spudger to carefully flip up the retaining flap on the trackpad cable ZIF connector.

    FixBot'a Sor

    Yorum Ekle

  10. Retina MacBook 2015 Upper Case Assembly Replacement: adım 10, 2 resimden 1. Retina MacBook 2015 Upper Case Assembly Replacement: adım 10, 2 resimden 2.
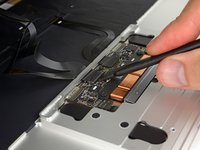
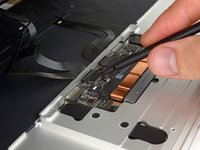
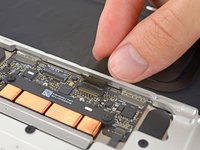
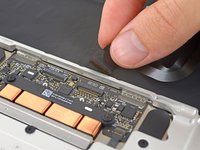
    • Disconnect the trackpad ribbon cable from the trackpad by pulling it gently through its slot in the frame.

    FixBot'a Sor

    Yorum Ekle

  11. Retina MacBook 2015 Upper Case Assembly Replacement: adım 11, 2 resimden 1. Retina MacBook 2015 Upper Case Assembly Replacement: adım 11, 2 resimden 2.
    • Carefully turn the MacBook over, so that the lower case lays flat.

    • Raise the upper case/display assembly to about a 90° angle, and prop it up against something sturdy so you don't have to hold it.

    • Add a piece of tape near the track pad to secure the upper case and prevent accidental movement.

    • It's possible to open the MacBook all the way and lay both sides down flat, but this may damage the flex cables and is not recommended.

    FixBot'a Sor

    Yorum Ekle

  12. Retina MacBook 2015 Upper Case Assembly Replacement: adım 12, 2 resimden 1. Retina MacBook 2015 Upper Case Assembly Replacement: adım 12, 2 resimden 2.
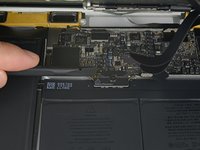
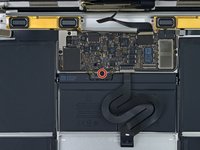
    • Remove the single 2.9 mm T5 Torx screw securing the battery connector to the logic board.

    • 2015 models have a silver grounding clip with two foam pads directly under this screw, which may come loose. Be sure to reinstall it during reassembly.

    FixBot'a Sor

    Yorum Ekle

  13. Retina MacBook 2015 Upper Case Assembly Replacement: adım 13, 2 resimden 1. Retina MacBook 2015 Upper Case Assembly Replacement: adım 13, 2 resimden 2.
    Bu adımda kullanılan alet:
    Battery Blocker
    $5.95
    • As an added precaution, you may physically disconnect the battery by inserting a battery isolation pick between the logic board and the battery connector.

    FixBot'a Sor

    Yorum Ekle

  14. Retina MacBook 2015 Upper Case Assembly Replacement: adım 14, 1 resimden 1.
    • Remove the two screws securing the USB-C port cable bracket:

    • 1.1 mm Tri-point Y00 screw

    • Some variations of this model may use a Phillips #00 screw.

    • 3.5 mm T5 Torx screw

    FixBot'a Sor

    Yorum Ekle

  15. Retina MacBook 2015 Upper Case Assembly Replacement: adım 15, 2 resimden 1. Retina MacBook 2015 Upper Case Assembly Replacement: adım 15, 2 resimden 2.
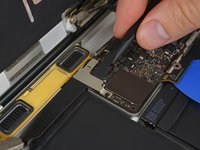
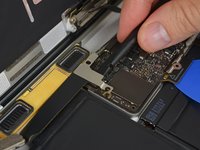
    • Use the flat end of a spudger to disconnect the USB-C port cable bracket by prying it straight up from the logic board.

    • To reconnect this cable, first line up the metal bracket over the screw holes, then press down on the middle of the bracket. Make sure it's aligned correctly, or you may damage the connector.

    FixBot'a Sor

    Yorum Ekle

  16. Retina MacBook 2015 Upper Case Assembly Replacement: adım 16, 2 resimden 1. Retina MacBook 2015 Upper Case Assembly Replacement: adım 16, 2 resimden 2.
    • Use a spudger to flip open the retaining flap on the audio jack board cable ZIF connector.

    FixBot'a Sor

    Yorum Ekle

  17. Retina MacBook 2015 Upper Case Assembly Replacement: adım 17, 1 resimden 1.
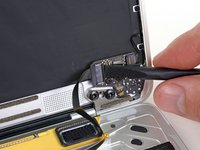
    • Disconnect the audio jack board ribbon cable by pulling it straight back out of the ZIF connector.

    • During reassembly, orient the ribbon cable so that the side with the white stripe faces you, as shown.

    FixBot'a Sor

    Yorum Ekle

  18. Retina MacBook 2015 Upper Case Assembly Replacement, Retina MacBook 2015 Lower Case Assembly Removal: adım 18, 2 resimden 1. Retina MacBook 2015 Upper Case Assembly Replacement, Retina MacBook 2015 Lower Case Assembly Removal: adım 18, 2 resimden 2.
    Bu adımda kullanılan alet:
    Tweezers
    $4.99
    • Use tweezers to peel back the tape covering the display cable connector.

    FixBot'a Sor

    Yorum Ekle

  19. Retina MacBook 2015 Upper Case Assembly Replacement: adım 19, 2 resimden 1. Retina MacBook 2015 Upper Case Assembly Replacement: adım 19, 2 resimden 2.
    • It's possible the metal retaining flap on the display cable connector may flip open, remaining stuck to the tape.

    • If so, use the flat end of a spudger to hold down the retaining flap while peeling the tape away with the tweezers.

    FixBot'a Sor

    Yorum Ekle

  20. Retina MacBook 2015 Upper Case Assembly Replacement: adım 20, 1 resimden 1.
    • Use the flat end of a spudger to flip open the retaining flap on the display cable connector.

    • Try to keep it clear of the tape, or it may re-adhere and make cable removal difficult.

    FixBot'a Sor

    Yorum Ekle

  21. Retina MacBook 2015 Upper Case Assembly Replacement: adım 21, 3 resimden 1. Retina MacBook 2015 Upper Case Assembly Replacement: adım 21, 3 resimden 2. Retina MacBook 2015 Upper Case Assembly Replacement: adım 21, 3 resimden 3.
    Bu adımda kullanılan alet:
    iOpener
    $14.95
    • Carefully slide the flat end of a spudger underneath the display cable to separate the adhesive holding it to the lower case.

    • Take care not to damage the cable. If it doesn't separate easily, heat the cable and/or the case directly beneath it with a hair dryer or iOpener to soften the adhesive, and try again.

    FixBot'a Sor

    Yorum Ekle

  22. Retina MacBook 2015 Upper Case Assembly Replacement: adım 22, 1 resimden 1.
    • Disconnect the display cable by gently pulling it straight out of its connector.

    • Immediately close the retaining flap.

    • The flap must remain closed when the cable is reinserted during reassembly. Carefully line up the cable with the gold contacts facing down, and gently slide it into the connector. Take care not to crimp or damage the cable. When fully inserted, the indentations on the sides should not be visible.

    FixBot'a Sor

    Yorum Ekle

  23. Retina MacBook 2015 Upper Case Assembly Replacement: adım 23, 1 resimden 1.
    • Separate the upper case assembly from the lower case assembly.

    FixBot'a Sor

    Yorum Ekle

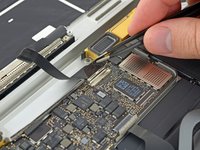
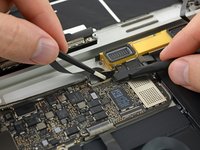
  24. Retina MacBook 2015 Upper Case Assembly Replacement, Audio Jack Board: adım 24, 2 resimden 1. Retina MacBook 2015 Upper Case Assembly Replacement, Audio Jack Board: adım 24, 2 resimden 2.
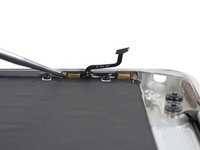
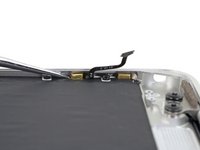
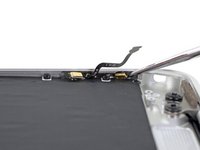
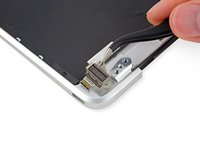
    • Use a spudger to flip open the ZIF connector retaining flap for the dual microphone assembly ribbon cable.

    FixBot'a Sor

    Yorum Ekle

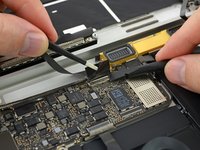
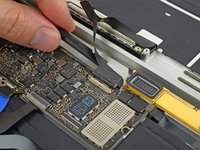
  25. Retina MacBook 2015 Upper Case Assembly Replacement: adım 25, 2 resimden 1. Retina MacBook 2015 Upper Case Assembly Replacement: adım 25, 2 resimden 2.
    Bu adımda kullanılan alet:
    Tweezers
    $4.99
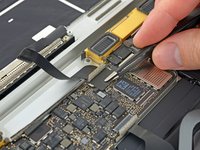
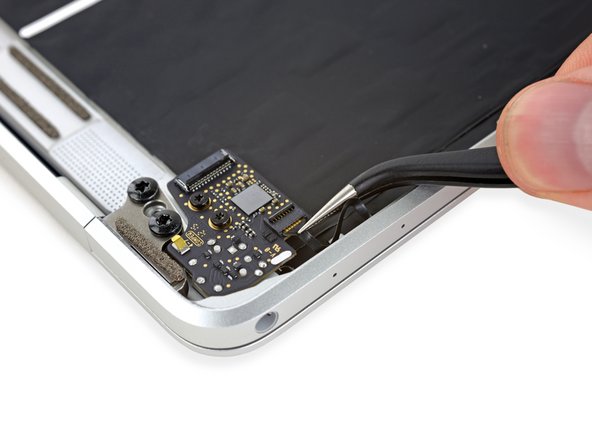
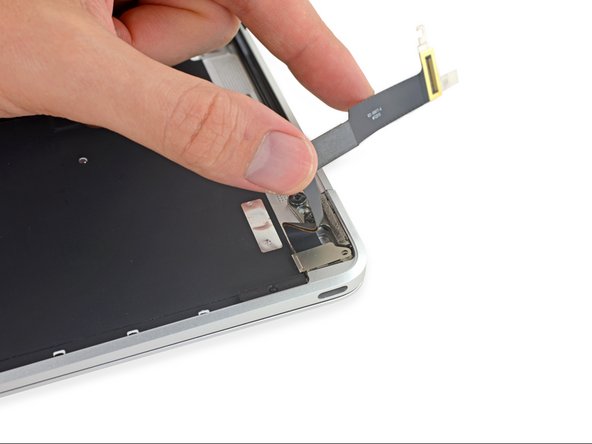
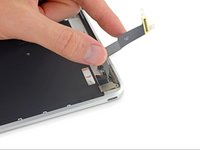
    • Use tweezers to pull the microphone assembly ribbon cable free of its connector.

    FixBot'a Sor

    Yorum Ekle

  26. Retina MacBook 2015 Upper Case Assembly Replacement: adım 26, 1 resimden 1.
    • Remove the two 3.2 mm T5 Torx screws securing the audio jack board to the case.

    FixBot'a Sor

    Yorum Ekle

  27. Retina MacBook 2015 Upper Case Assembly Replacement: adım 27, 1 resimden 1.
    • Remove the audio jack board.

    FixBot'a Sor

    Yorum Ekle

  28. Retina MacBook 2015 Upper Case Assembly Replacement, Dual Microphone Assembly: adım 28, 1 resimden 1.
    • Prepare an iOpener and apply heat to the upper case directly behind the microphone assembly.

    FixBot'a Sor

    Yorum Ekle

  29. Retina MacBook 2015 Upper Case Assembly Replacement: adım 29, 3 resimden 1. Retina MacBook 2015 Upper Case Assembly Replacement: adım 29, 3 resimden 2. Retina MacBook 2015 Upper Case Assembly Replacement: adım 29, 3 resimden 3.
    • Use a fine-tip probe or pick to gently peel the dual microphone assembly away from the case.

    FixBot'a Sor

    Yorum Ekle

  30. Retina MacBook 2015 Upper Case Assembly Replacement: adım 30, 1 resimden 1.
    • Remove the dual microphone assembly.

    FixBot'a Sor

    Yorum Ekle

  31. Retina MacBook 2015 Upper Case Assembly Replacement, Display Assembly: adım 31, 1 resimden 1.
    • Remove the two 3.3 mm T5 Torx screws securing the display cable assembly.

    FixBot'a Sor

    Yorum Ekle

  32. Retina MacBook 2015 Upper Case Assembly Replacement: adım 32, 1 resimden 1.
    • Remove the single 4.3 mm Phillips #00 screw securing the USB-C port ribbon cable.

    FixBot'a Sor

    Yorum Ekle

  33. Retina MacBook 2015 Upper Case Assembly Replacement: adım 33, 3 resimden 1. Retina MacBook 2015 Upper Case Assembly Replacement: adım 33, 3 resimden 2. Retina MacBook 2015 Upper Case Assembly Replacement: adım 33, 3 resimden 3.
    • Unfold the USB-C port ribbon cable until it lays flat, allowing access to the bracket beneath.

    FixBot'a Sor

    Yorum Ekle

  34. Retina MacBook 2015 Upper Case Assembly Replacement: adım 34, 1 resimden 1.
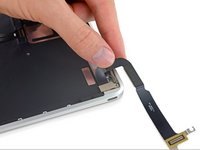
    • Lift and remove the metal bracket securing the USB-C port ribbon cable connector.

    • During reassembly, be sure the metal tab on the USB-C connector board slides through the slit on the metal bracket.

    FixBot'a Sor

    Yorum Ekle

  35. Retina MacBook 2015 Upper Case Assembly Replacement: adım 35, 3 resimden 1. Retina MacBook 2015 Upper Case Assembly Replacement: adım 35, 3 resimden 2. Retina MacBook 2015 Upper Case Assembly Replacement: adım 35, 3 resimden 3.
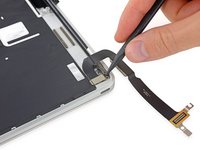
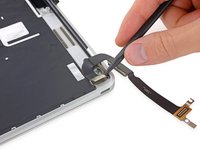
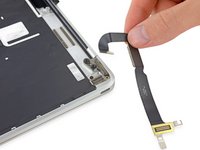
    • Use a spudger to disconnect the USB-C port ribbon cable by prying the connector straight up.

    • Pry from the side nearest the back edge of the MacBook.

    • Remove the ribbon cable.

    FixBot'a Sor

    Yorum Ekle

  36. Retina MacBook 2015 Upper Case Assembly Replacement: adım 36, 1 resimden 1.
    • Fully open the display.

    • Set the MacBook down on its right edge with the display facing away from you, as shown.

    FixBot'a Sor

    Yorum Ekle

  37. Retina MacBook 2015 Upper Case Assembly Replacement: adım 37, 2 resimden 1. Retina MacBook 2015 Upper Case Assembly Replacement: adım 37, 2 resimden 2.
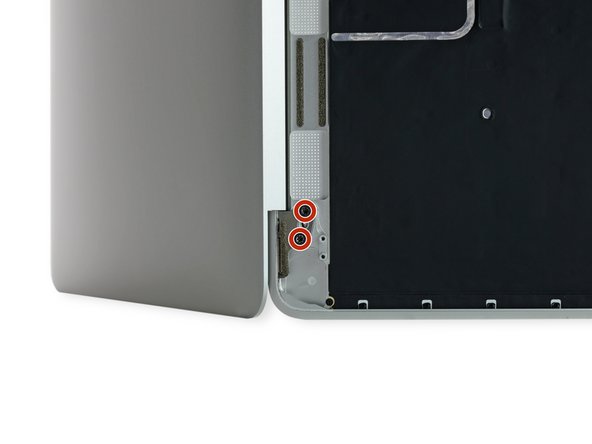
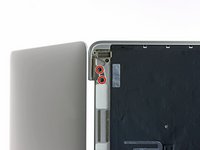
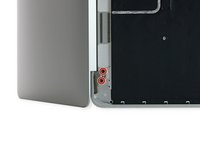
    • Remove the four 4.8 mm T8 Torx screws securing the display hinges.

    FixBot'a Sor

    Yorum Ekle

  38. Retina MacBook 2015 Upper Case Assembly Replacement: adım 38, 3 resimden 1. Retina MacBook 2015 Upper Case Assembly Replacement: adım 38, 3 resimden 2. Retina MacBook 2015 Upper Case Assembly Replacement: adım 38, 3 resimden 3.
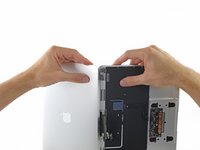
    • Holding the display assembly with one hand and the upper case with the other, push them together slightly to move the hinges out of their recesses in the the upper case.

    • There are only a few millimeters of play between the hinges and the case, so you won't need to push far.

    • Push the upper case forward while pulling back gently on the display.

    • Once the two display hinges have cleared the upper case, remove the display and set it aside.

    FixBot'a Sor

    Yorum Ekle

  39. Retina MacBook 2015 Upper Case Assembly Replacement, USB-C Port: adım 39, 1 resimden 1.
    • Remove the single 2.9 mm T3 Torx screw securing the USB-C port to the upper case.

    FixBot'a Sor

    Yorum Ekle

  40. Retina MacBook 2015 Upper Case Assembly Replacement: adım 40, 3 resimden 1. Retina MacBook 2015 Upper Case Assembly Replacement: adım 40, 3 resimden 2. Retina MacBook 2015 Upper Case Assembly Replacement: adım 40, 3 resimden 3.
    • Slide the USB-C port out of its recess in the upper case, and remove the USB-C port.

    FixBot'a Sor

    Yorum Ekle

  41. Retina MacBook 2015 Upper Case Assembly Replacement, Trackpad Assembly: adım 41, 2 resimden 1. Retina MacBook 2015 Upper Case Assembly Replacement, Trackpad Assembly: adım 41, 2 resimden 2.
    Bu adımda kullanılan alet:
    Tweezers
    $4.99
    • Use a pair of tweezers to remove the tape covering the keyboard ribbon cable connector on the trackpad.

    FixBot'a Sor

    Yorum Ekle

  42. Retina MacBook 2015 Upper Case Assembly Replacement: adım 42, 2 resimden 1. Retina MacBook 2015 Upper Case Assembly Replacement: adım 42, 2 resimden 2.
    • Using a spudger, flip open the retaining flap on the keyboard ribbon cable ZIF connector.

    FixBot'a Sor

    Yorum Ekle

  43. Retina MacBook 2015 Upper Case Assembly Replacement: adım 43, 2 resimden 1. Retina MacBook 2015 Upper Case Assembly Replacement: adım 43, 2 resimden 2.
    • Gently pull the keyboard ribbon cable out of its slot in the frame.

    FixBot'a Sor

    Yorum Ekle

  44. Retina MacBook 2015 Upper Case Assembly Replacement: adım 44, 1 resimden 1.
    • Remove the five 2.5 mm T3 Torx screws securing the trackpad to the case.

    • Depending on which bit set you use, a T4 driver may fit better. Try both sizes, and use the largest driver that fits fully into the screw head.

    FixBot'a Sor

    Yorum Ekle

  45. Retina MacBook 2015 Upper Case Assembly Replacement: adım 45, 1 resimden 1.
    • Remove the trackpad assembly.

    • Metal brackets on each side of the trackpad may fall away during removal. Be sure to position them as shown in the photo during reassembly.

    FixBot'a Sor

    Yorum Ekle

  46. Retina MacBook 2015 Upper Case Assembly Replacement: adım 46, 2 resimden 1. Retina MacBook 2015 Upper Case Assembly Replacement: adım 46, 2 resimden 2.
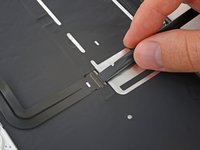
    • Use a spudger to flip up the retaining flap on the keyboard ribbon cable ZIF connector.

    FixBot'a Sor

    Yorum Ekle

  47. Retina MacBook 2015 Upper Case Assembly Replacement: adım 47, 3 resimden 1. Retina MacBook 2015 Upper Case Assembly Replacement: adım 47, 3 resimden 2. Retina MacBook 2015 Upper Case Assembly Replacement: adım 47, 3 resimden 3.
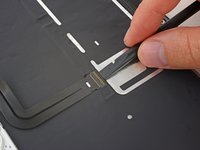
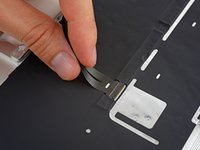
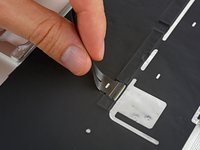
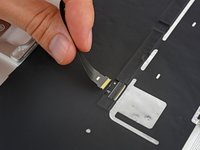
    • Gently peel the keyboard ribbon cable up from the case, and remove the cable.

    FixBot'a Sor

    Yorum Ekle

  48. Retina MacBook 2015 Upper Case Assembly Replacement: adım 48, 1 resimden 1.
    • The upper case remains.

    FixBot'a Sor

    Yorum Ekle

Sonuç

To reassemble your device, follow these instructions in reverse order. To avoid logic board damage, when your MacBook repair is complete but before powering it on, connect it to low-voltage power using a 5-Watt iPhone charger and a USB-C to USB-A cable.

İptal et: Bu kılavuzu tamamlamadım.

21 farklı kişi bu kılavuzu tamamladı.

Geoff Wacker

Üyelik tarihi: 09/30/13

92.872 İtibar

89 adet Kılavuz yazıldı

4Kılavuz Yorumları

please where do i have to put the mushrooms screws? 923-01012

Antonio gaeta - Yanıt Paylaş

If you look closely at this image in Step 36 you can see them pretty clearly.

Jeff Suovanen - Yanıt Paylaş
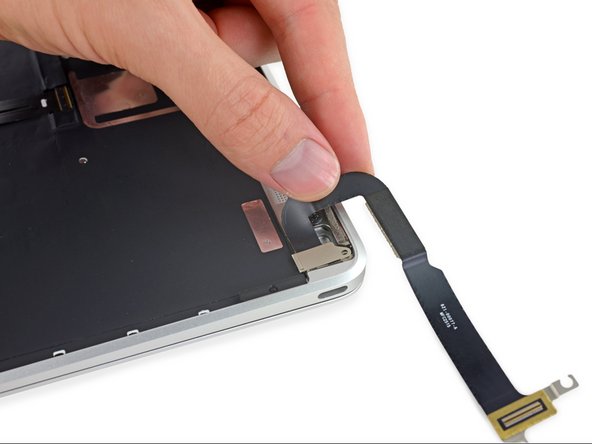
I changed the keyboard itself; you follow the instructions to step 35 (skipping 29 to 30, microphone removal) and then remove the keyboard ribbon cable connector to the trackpad (step 45). Maybe the most complicated step is ungluing the black backing stuck to the back of the keyboard and then there are almost a hundred tiny screws holding the keyboard to the frame, mostly only an eye strain. Got the keyboard through ebay (spanish keyboard layout).

Lorenzo Segovia - Yanıt Paylaş
I replaced my keyboard and it won’t turn on.

Patrick Cafferky - Yanıt Paylaş

Yorum Ekle

İstatistikleri Görüntüle:

Son 24 Saat: 4

Son 7 gün: 17

Son 30 gün: 86

Her zaman: 32,362