Ana içeriğe geç

Ridgid R860054 Trigger Replacement

Neye ihtiyacın var

  1. Ridgid R860054 Trigger Replacement, Ridgid R860054 Disassembly: adım 1, 2 resimden 1. Ridgid R860054 Trigger Replacement, Ridgid R860054 Disassembly: adım 1, 2 resimden 2.
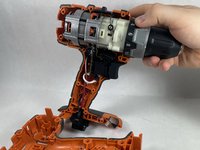
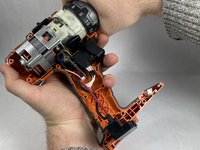
    • Using a T10 Torx security bit, remove the ten screws from the housing assembly.

    • All of the casing screws are the same length and require the same bit.

  2. Ridgid R860054 Trigger Replacement: adım 2, 2 resimden 1. Ridgid R860054 Trigger Replacement: adım 2, 2 resimden 2.
    • Separate one half of the drill casing from the other by gently pulling both halves apart.

    • Once one half of the casing is removed, be careful! If the components are directed towards the ground, they could fall out.

  3. Ridgid R860054 Trigger Replacement: adım 3, 3 resimden 1. Ridgid R860054 Trigger Replacement: adım 3, 3 resimden 2. Ridgid R860054 Trigger Replacement: adım 3, 3 resimden 3.
    • Remove the plastic speed switch and forward/reverse switch by softly lifting them from the casing.

    • Remove the internal components of the drill by lightly pulling on the drill chuck.

    • All of the other electronic components are attached to the chuck, and will come out with it.

  4. Ridgid R860054 Trigger Replacement: adım 4, 1 resimden 1.
    • The main section of the drill should have the trigger, light indicator, and battery prongs all connected via wire. There should be two plastic switches separated from the rest of the body.

  5. Ridgid R860054 Trigger Replacement, Trigger: adım 5, 3 resimden 1. Ridgid R860054 Trigger Replacement, Trigger: adım 5, 3 resimden 2. Ridgid R860054 Trigger Replacement, Trigger: adım 5, 3 resimden 3.
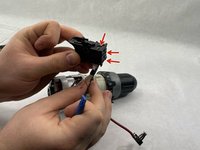
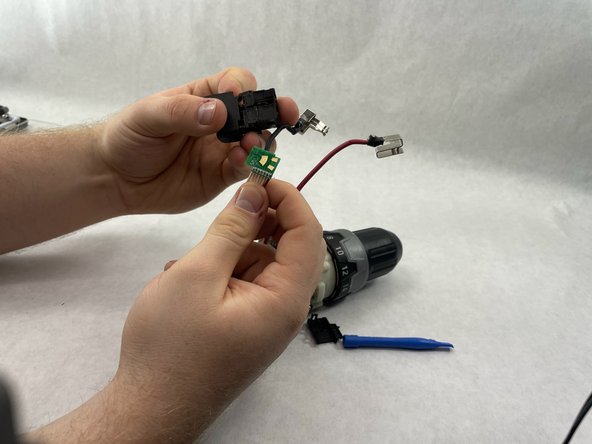
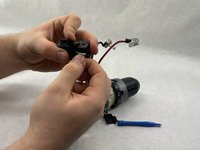
    • Use a thin tool to disconnect the three prongs.

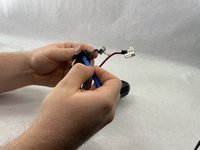
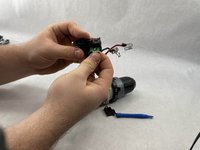
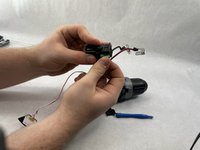
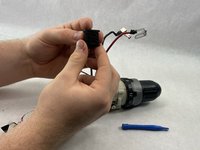
    • Remove the black plastic piece from the trigger body.

    • On the new trigger, follow the same steps as above and remove the cap.

  6. Ridgid R860054 Trigger Replacement: adım 6, 2 resimden 1. Ridgid R860054 Trigger Replacement: adım 6, 2 resimden 2.
    • Remove the trigger circuit from the plastic trigger body.

  7. Ridgid R860054 Trigger Replacement: adım 7, 3 resimden 1. Ridgid R860054 Trigger Replacement: adım 7, 3 resimden 2. Ridgid R860054 Trigger Replacement: adım 7, 3 resimden 3.
    • Place the circuit into the new trigger and closure.

    • Place the plastic cap back on the trigger to secure the wire.

Sonuç

To reassemble your device, follow these instructions in reverse order.

Ryan Friedman

Üyelik tarihi: 03/13/23

109 İtibar

1 Kılavuz yazıldı

Ekip

UMass Dartmouth, Team 1-1, Shaddix Spring 2023 UMass Dartmouth, Team 1-1, Shaddix Spring 2023 üyesi

UMASSD-SHADDIX-S23S1G1

4 Üyeler

4 adet Kılavuz yazıldı

0 Yorum

Yorum Ekle

İstatistikleri Görüntüle:

Son 24 Saat: 0

Son 7 gün: 0

Son 30 gün: 8

Her zaman: 169