Ana içeriğe geç

Rival 16131 Toaster Bread Shelf Replacement

Neye ihtiyacın var

  1. Rival 16131 Toaster Bread Shelf Replacement, Shell: adım 1, 2 resimden 1. Rival 16131 Toaster Bread Shelf Replacement, Shell: adım 1, 2 resimden 2.
    • Make sure the toaster is unplugged before dissembling.

    • Turn the toaster over and remove the rubber bumper feet.

  2. Rival 16131 Toaster Bread Shelf Replacement: adım 2, 2 resimden 1. Rival 16131 Toaster Bread Shelf Replacement: adım 2, 2 resimden 2.
    • Use a Phillips #2 screwdriver to remove four 12 mm screws at the base of the toaster shell.

  3. Rival 16131 Toaster Bread Shelf Replacement: adım 3, 3 resimden 1. Rival 16131 Toaster Bread Shelf Replacement: adım 3, 3 resimden 2. Rival 16131 Toaster Bread Shelf Replacement: adım 3, 3 resimden 3.
    • With the dial facing you, push the toaster base up and away until the base is just over the lip of the shell. This will disconnect the browning dial from the rest of the toaster.

    • When reassembling the toaster, make sure that the back of the dial lines up with the slot, both in position and orientation (the dial and slot are not perfect circles - they have a notch).

    • The only object holding the shell onto the toaster now is the grey part of the lever.

  4. Rival 16131 Toaster Bread Shelf Replacement: adım 4, 1 resimden 1.
    • Reach into the shell and grab the back white part of the lever.

    • Hold the grey lever with both your index finger and middle finger. Next, pull it.

    • Pulling too hard will break the mechanism that holds the grey handle onto the white lever.

    • Remove the shell.

  5. Rival 16131 Toaster Bread Shelf Replacement, Bread Shelf Repair: adım 5, 1 resimden 1.
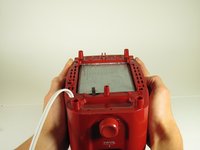
    • After disassembling the toaster, turn the back side of the toaster towards you.

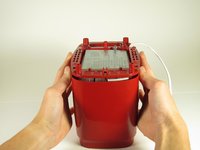
    • On the back of the toaster the metal tabs attached to the bread shelf should be visible.

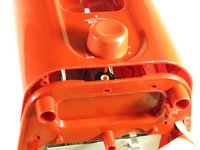
    • These tabs will sometimes get caught in the shaft which disables your toaster from returning the bread.

  6. Rival 16131 Toaster Bread Shelf Replacement: adım 6, 1 resimden 1.
    • Twist the metal tabs to vertical position to allow them to glide along the slot.

    • Push down on the white lever on the opposite side repeatedly to ensure that the metal tabs will no longer stick.

Sonuç

To reassemble your device, follow these instructions in reverse order.

2 farklı kişi bu kılavuzu tamamladı.

Kristen

Üyelik tarihi: 09/26/12

108 İtibar

1 Kılavuz yazıldı

Ekip

Cal Poly, Team 2-8, Propen Fall 2012 Cal Poly, Team 2-8, Propen Fall 2012 üyesi

CPSU-PROPEN-F12S2G8

5 Üyeler

6 adet Kılavuz yazıldı

0 Yorum

Yorum Ekle

İstatistikleri Görüntüle:

Son 24 Saat: 0

Son 7 gün: 0

Son 30 gün: 4

Her zaman: 932