Giriş
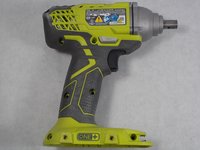
Use this guide to replace the trigger assembly in your Ryobi P235 Impact driver if power isn’t getting to the motor while using a fully charged battery.
The trigger assembly is what regulates how much power gets to the motor and what direction the motor spins.
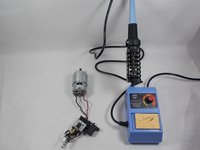
When you reach step 7 and 8, the wires are soldered to the motor so a soldering iron will need to be used to disconnect them from the old trigger assembly and then reattach them to the new one.
Neye ihtiyacın var
-
-
Pull the battery away from the drill housing while holding in both tabs.
-
-
-
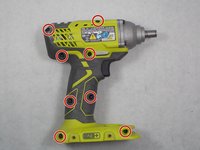
Use a Phillips #2 screwdriver to remove the eight 16 mm screws that secure the housing.
-
-
-
-
Use a T20 Torx screwdriver to remove the four 25.4 mm screws that secure the front of the housing.
-
-
-
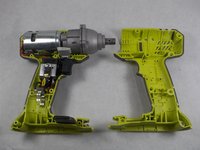
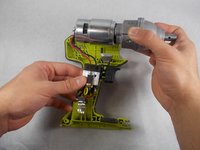
Lift the trigger mechanism and other internal components out of the housing assembly.
-
-
-
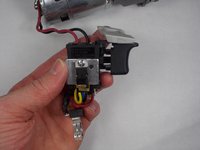
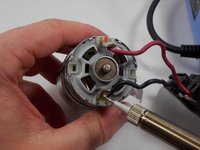
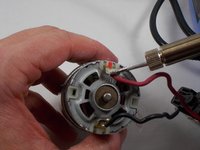
Use a soldering iron to remove the black and red wires connecting the trigger assembly to the motor.
-


To reassemble your device, follow these instructions in reverse order starting at step 6.
İptal et: Bu kılavuzu tamamlamadım.
3 farklı kişi bu kılavuzu tamamladı.
Ekip

UMass Dartmouth, Team S4-G2, Saloman Fall 2019 UMass Dartmouth, Team S4-G2, Saloman Fall 2019 üyesi
UMASSD-SALOMAN-F19S4G2
3 Üyeler
12 adet Kılavuz yazıldı