Bu sürüm, hatalı düzenlemeler içerebilir. En son doğrulanmış bellek kopyası dönün.
Neye ihtiyacın var
-
Bu adım çevrilmemiş. Çevrilmesine yardım edin
-
Lay the blower on its side so that most of the screw heads are facing up. Identify all 9 screw locations.
-
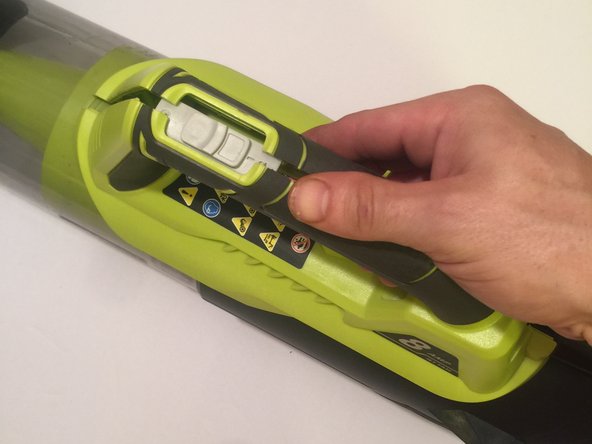
One screw is located under the sticker with the number 8 on it.
-
Another screw is located on the opposite side.
-
-
Bu adım çevrilmemiş. Çevrilmesine yardım edin
-
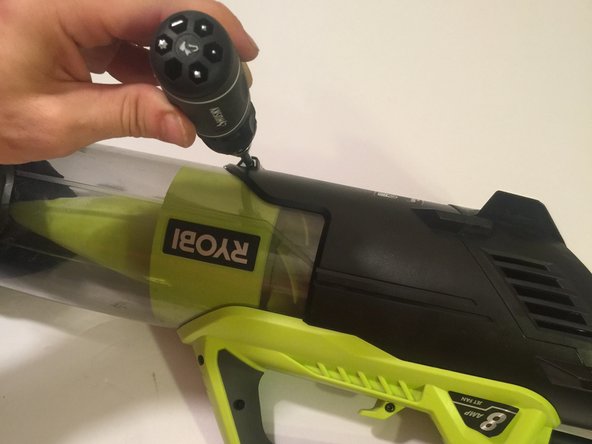
Using a T15 torx drive(star-head), carefully remove each of the 9 screws and set aside in a secure location. All 9 screws are 10 mm long.
-
-
Bu adım çevrilmemiş. Çevrilmesine yardım edin
-
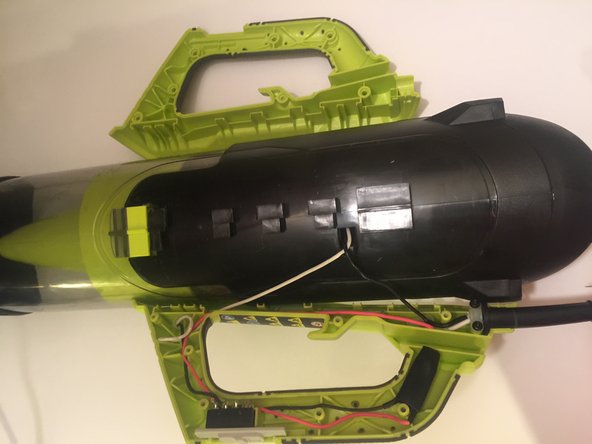
After all 9 screws have been removed, seperate the handle housing the on/off switch.
-
-
-
Bu adım çevrilmemiş. Çevrilmesine yardım edin
-
Once the handle has been separated, the blower shaft with detach from the motor housing. Slide the blower shaft out of the motor housing and set aside.
-
-
Bu adım çevrilmemiş. Çevrilmesine yardım edin
-
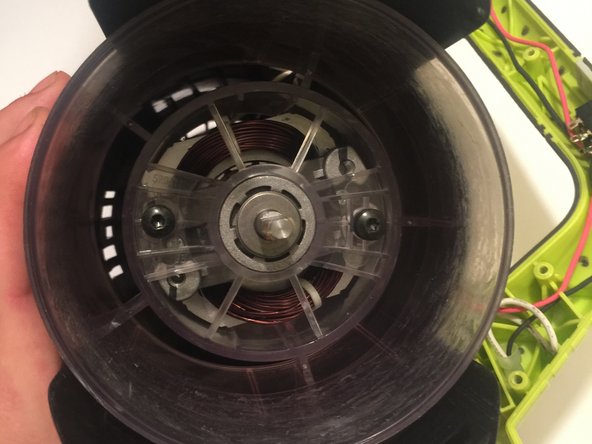
Once the blower shaft is detached, the fan will be visible. Use a ratchet with a 1/2" socket to remove the 1/2" nut securing the fan to the motor. This nut is reverse thread so turning it clockwise will loosen it. The fan will also need to be secured so that it does not spin as the nut is being loosened.
-
-
Bu adım çevrilmemiş. Çevrilmesine yardım edin
-
Remove new fan from package and install as shown. Screw the nut back on to secure the fan. Remember the nut is reverse thread, so turning it counter clockwise will tighten it. The fan will also need to be secured while the nut is being tightened.
-
-
Bu adım çevrilmemiş. Çevrilmesine yardım edin
-
Slide blower shaft back into motor housing, close handle back around blower shaft and motor housing, and screw all 9 screws back into their location.
-


İptal et: Bu kılavuzu tamamlamadım.
2 farklı kişi bu kılavuzu tamamladı.
Ekip

University of Memphis, Team S4-G1, Baddour Spring 2018 University of Memphis, Team S4-G1, Baddour Spring 2018 üyesi
UM-BADDOUR-S18S4G1
2 Üyeler
1 Kılavuz yazıldı
7 Yorum
My blower is not like yours. Mine like a fun has corn shaped. How to replace this fun. I need your help.
Thanks for the tip, mine is a cordless 18 v and it's slightly more difficult then shown but not impossible!!
It's all plastic and kinda worried about breaking something. I've had mine like for almost 2 yrs. I was using it and barely bumped the wall and the blade just exploded….Really crazy weird.
Thanks for the help.
Cannot find the correct part on the internet anywhere. Mine is orange and flat on the back side; not coned & green as shown in your tutorial.
Jan Dru Basehart
Jan I believe mine was orange originally as well. I would try to contact their parts department to ensure it will work before ordering though.