Giriş
If the pump no longer works properly, remove it and overhaul or replace it. These instructions will show you how to do this. You will have to open the machine. It is recommended to remove the thermoblock. The pictures are from a Saeco Royal Sup 014, but the repair is similar for machines of the series Royal - Magic - Stratos.
Note: in this manual, the thermoblock has been completely removed. The effort is not very big and the pump is easier to remove. You can also skip the steps that involve removing the thermoblock.
Neye ihtiyacın var
-
-
The coffeebean supply is fixed with two screws. Unscrew them and lift it off.
-
There is a black rubber lid under the bean hopper that you can easily lift off, leaving a large opening.
-
The adjuster of the grinder has to be solved. Mark the position or just take a picture. This type is fixed with a screw, others are only sticked together.
-
-
-
-
The screws are situated on the underneath of the cover. This type is held by four screws.
-
-
-
Now the cover can be raised: first grip on left and right rear side and lift about 10 cm (4 in). Sometimes the cover jams a little bit.
-
Solve the hoses which lead to the water tank. Perhaps you have to pull out some contacts, (e.g. the yellow-green protection lead), don´t forget to put them on again later.
-
The cover can be drawn aslant towards the front, sliding it over the hot water pipe.
-
Most repairs can be done with the cover being laid up partially , it must not be completely removed.
-
-
-
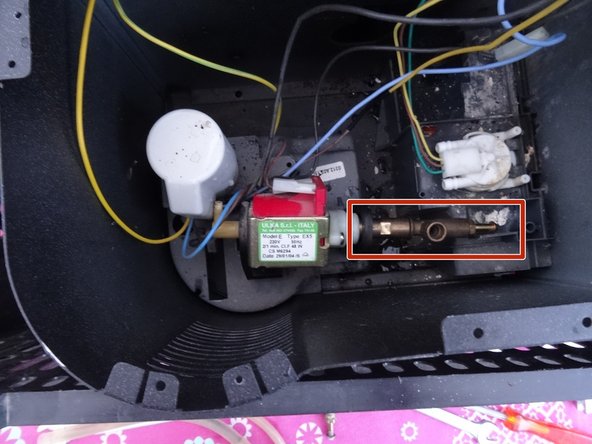
Here the pump viewed from above, a Ulka EX5 with 230V. The pump is stored in rubber pieces.
-
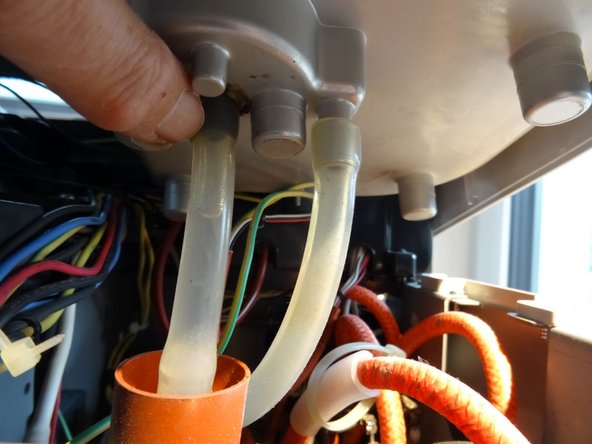
Pull the silicone hose off the rear elbow.
-
If not already done, remove the clamp on the pressure hose on the pressure relief valve. Then remove the pressure hose.
-
-
-
In the first picture, the pump has already been removed. The red marking shows the catch that holds the rubber molded part. You can easily pull it out when the catch is pressed down.
-
Pull the angled molded rubber parts out of their spots on the floor.
-
Lift the pump with the rubber moldings out of the machine.
-
-
-
Unscrew the pressure relief valve with two wrenches SW 10 and 13.
-
Only the pump itself as well as the relief valve will remain.
-
If you want to replace the pump, you'll have to transfer the pressure relief valve to the new pump. You should also service your valve while you're at it.
-


Work through the steps in reverse order to reassemble your device.
Work through the steps in reverse order to reassemble your device.
Bu çevirmenlere özel teşekkürler:
100%

Bu çevirmenler dünyayı onarmamıza yardım ediyor! Katkıda bulunmak ister misiniz?
Çeviriye Başlayın ›
Ekip

Repair is War on Entropy Repair is War on Entropy üyesi
Community
24 Üyeler
1.096 adet Kılavuz yazıldı