Ana içeriğe geç
Onarım Topluluğuna Katılın - Hesap Oluşturun

Samsung Alias 2 Hinge Replacement

Neye ihtiyacın var

  1. Samsung Alias 2 Hinge Replacement, Battery: adım 1, 1 resimden 1.
    • Press down on the back cover of the phone and remove it.

    FixBot'a Sor

    Yorum Ekle

  2. Samsung Alias 2 Hinge Replacement: adım 2, 1 resimden 1.
    • Take out the battery from the device.

    FixBot'a Sor

    Yorum Ekle

  3. Samsung Alias 2 Hinge Replacement, Hinge: adım 3, 1 resimden 1.
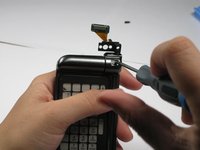
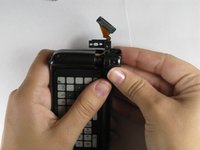
    • Use a Phillips #00 screwdriver to remove the two 4 mm screws on screen.

    FixBot'a Sor

    Yorum Ekle

  4. Samsung Alias 2 Hinge Replacement: adım 4, 2 resimden 1. Samsung Alias 2 Hinge Replacement: adım 4, 2 resimden 2.
    • Use the opening tool to remove the front outside casing.

    FixBot'a Sor

    Yorum Ekle

  5. Samsung Alias 2 Hinge Replacement: adım 5, 1 resimden 1.
    Bu adımda kullanılan alet:
    Tweezers
    $4.99
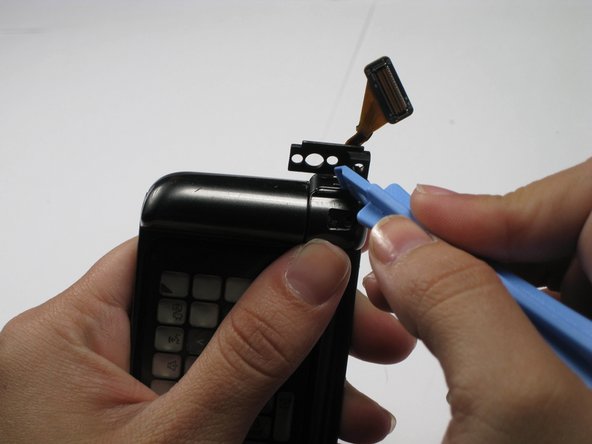
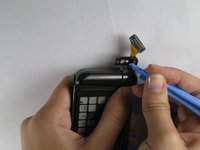
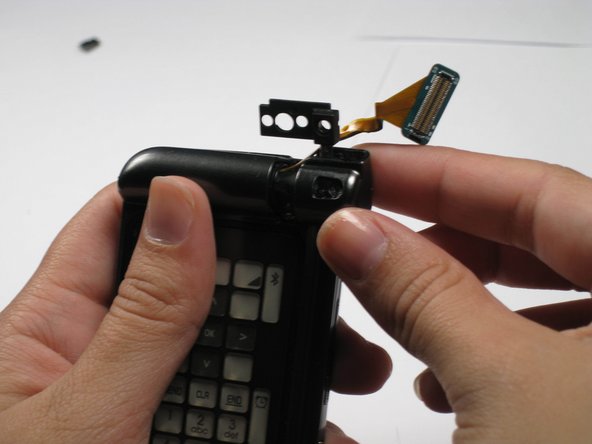
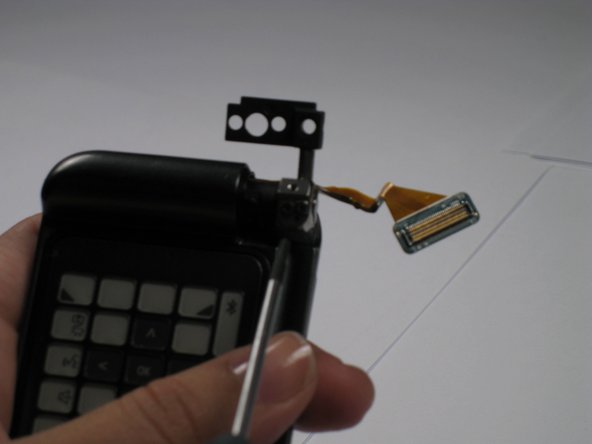
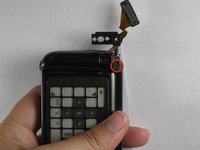
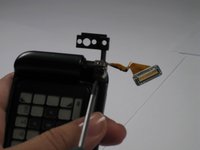
    • Remove ribbon connector next to camera using tweezers.

    FixBot'a Sor

    Yorum Ekle

  6. Samsung Alias 2 Hinge Replacement: adım 6, 1 resimden 1.
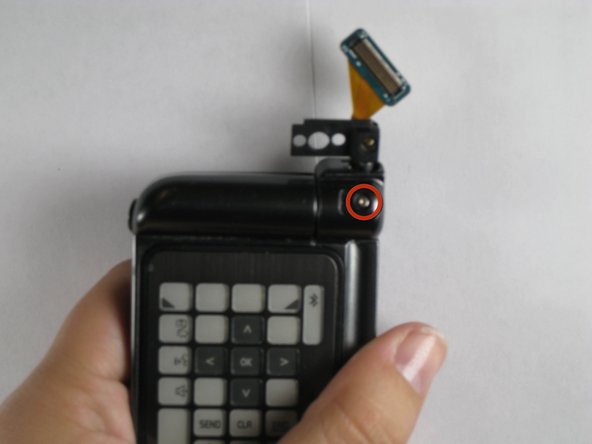
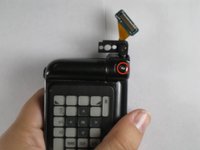
    • Unscrew and remove the two 3.95 mm screws underneath that ribbon connector.

    • Be careful not to lose their accompanying plastic washers.

    FixBot'a Sor

    Yorum Ekle

  7. Samsung Alias 2 Hinge Replacement: adım 7, 2 resimden 1. Samsung Alias 2 Hinge Replacement: adım 7, 2 resimden 2.
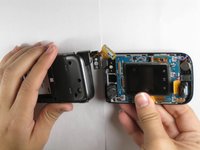
    • Pull the two halves of the phone apart.

    • The phone will not slide straight apart. You have to angle the back half up a little.

    • Do not force it. Jiggle it a little if it doesn't come apart.

    FixBot'a Sor

    Yorum Ekle

  8. Samsung Alias 2 Hinge Replacement: adım 8, 1 resimden 1.
    • Remove the plastic panel cover from the hinge.

    FixBot'a Sor

    Yorum Ekle

  9. Samsung Alias 2 Hinge Replacement: adım 9, 2 resimden 1. Samsung Alias 2 Hinge Replacement: adım 9, 2 resimden 2.
    • Remove the 3.41 mm screw out from underneath plastic cover.

    FixBot'a Sor

    Yorum Ekle

  10. Samsung Alias 2 Hinge Replacement: adım 10, 2 resimden 1. Samsung Alias 2 Hinge Replacement: adım 10, 2 resimden 2.
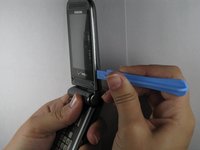
    • Pop out the top half of the hinge with the plastic opening tool. This will release the hinge cover for removal.

    FixBot'a Sor

    Yorum Ekle

  11. Samsung Alias 2 Hinge Replacement: adım 11, 2 resimden 1. Samsung Alias 2 Hinge Replacement: adım 11, 2 resimden 2.
    • Pull off the hinge cover.

    FixBot'a Sor

    Yorum Ekle

  12. Samsung Alias 2 Hinge Replacement: adım 12, 2 resimden 1. Samsung Alias 2 Hinge Replacement: adım 12, 2 resimden 2.
    • Remove the two 2.71 mm screws on the hinge using screwdriver.

    • Under these screws will be a washer, spring, and small metal disc. Make sure you don't lose these.

    FixBot'a Sor

    Yorum Ekle

  13. Samsung Alias 2 Hinge Replacement: adım 13, 1 resimden 1.
    • Remove the Verizon logo from the back of phone using the plastic opening tool.

    • The logo is attached with glue. It will be sticky, but it just pulls off.

    FixBot'a Sor

    Yorum Ekle

  14. Samsung Alias 2 Hinge Replacement: adım 14, 1 resimden 1.
    • Remove the four 4.44 mm screws from the back.

    • Remove the three 4.35mm screws from under the Verizon logo.

    • Make sure you don't mix the screws together.

    FixBot'a Sor

    Yorum Ekle

  15. Samsung Alias 2 Hinge Replacement: adım 15, 1 resimden 1.
    • Pull the back off by using the plastic opening tool.

    • Do not lose the buttons on the side of the phone, as they will come off of the phone when you remove the back outside casing.

    FixBot'a Sor

    Yorum Ekle

  16. Samsung Alias 2 Hinge Replacement: adım 16, 1 resimden 1.
    • Pull up on the yellow tab.

    FixBot'a Sor

    Yorum Ekle

  17. Samsung Alias 2 Hinge Replacement: adım 17, 1 resimden 1.
    • Disconnect the connecting cord using tweezers.

    FixBot'a Sor

    Yorum Ekle

  18. Samsung Alias 2 Hinge Replacement: adım 18, 1 resimden 1.
    • Disconnect the rectangular ribbon.

    FixBot'a Sor

    Yorum Ekle

  19. Samsung Alias 2 Hinge Replacement: adım 19, 1 resimden 1.
    • Remove the logic board.

    FixBot'a Sor

    Yorum Ekle

  20. Samsung Alias 2 Hinge Replacement: adım 20, 1 resimden 1.
    • Remove the three 3.95 mm screws.

    • The two rightmost screws must be pulled out with tweezers after unscrewed.

    FixBot'a Sor

    Yorum Ekle

  21. Samsung Alias 2 Hinge Replacement: adım 21, 1 resimden 1.
    • Pull the hinge out.

    FixBot'a Sor

    Yorum Ekle

Sonuç

To reassemble your device, follow these instructions in reverse order.

İptal et: Bu kılavuzu tamamlamadım.

Bir başkası bu kılavuzu tamamladı.

Chris

Üyelik tarihi: 04/16/11

133 İtibar

5 adet Kılavuz yazıldı

Ekip

Cal Poly, Team 12-35, Maness Spring 2011 Cal Poly, Team 12-35, Maness Spring 2011 üyesi

CPSU-MANESS-S11S12G35

4 Üyeler

10 adet Kılavuz yazıldı

0Kılavuz Yorumları

Yorum Ekle

İstatistikleri Görüntüle:

Son 24 Saat: 0

Son 7 gün: 12

Son 30 gün: 33

Her zaman: 4,678